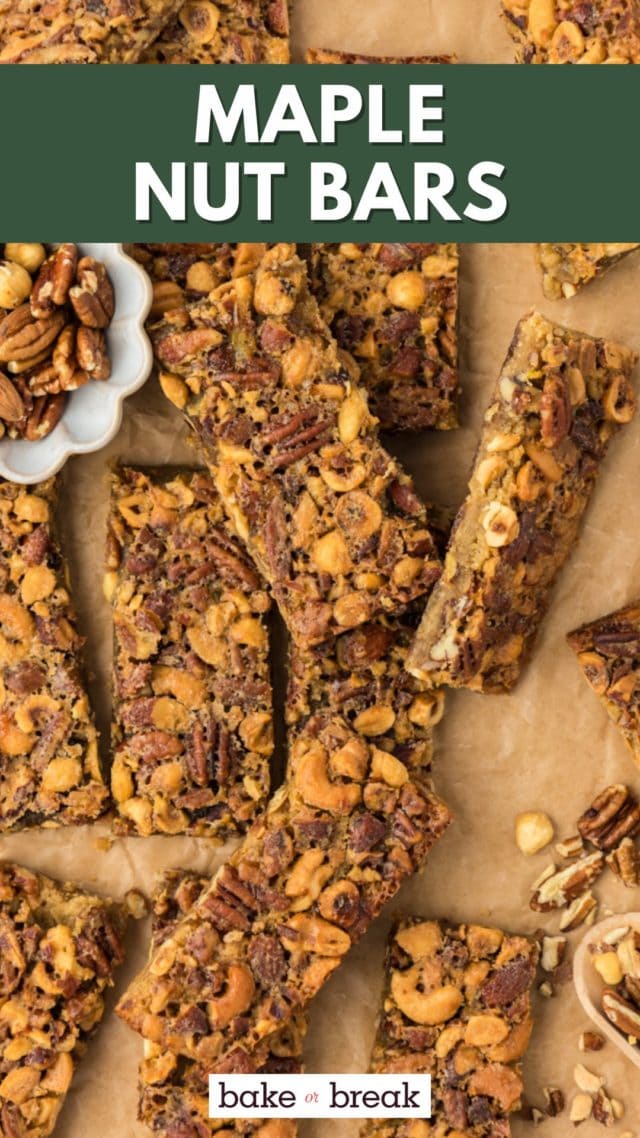
These maple nut bars are made for nut lovers! If you’re the type who always adds walnuts to your chocolate chip cookies and banana bread, you’ll appreciate that nuts are the star of the show here. Combined with cozy maple syrup, these easy bars are absolutely swoon-worthy.

Easy Homemade Nut Bars
Maple nut bars are a delicious twist on traditional pecan pie bars. Maple syrup adds a wonderful flavor while still maintaining that trademark gooeyness of the bars. You’ll get a great sweet/crunchy combo that is really irresistible.
Much like butterscotch, I never thought I liked maple syrup. Then at some point I realized that I was basing my opinion on pancake syrup. Trust me, that’s not maple syrup. Once I tried real maple syrup, I realized that it has a nice sweetness and rich flavor that’s tough to beat.
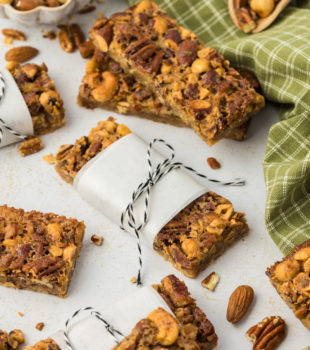
I used a combination of nuts from my pantry—pecans, cashews, almonds. You can, of course, just use one kind of nut or a few of your favorites. I like the look of whole nuts with these. But chopping them works just as well and will make them a little easier to cut.

Why You’ll Love This Maple Nut Bar Recipe
Here’s what makes these maple nut bars a standout:
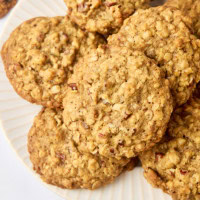
- The best bar for nut lovers. Nuts are often an afterthought in recipes, but not here. These bars are loaded with crunchy nuts for a fabulous texture and taste. (If you love nuts, be sure to try my Oat Muffins with Nuts and Seeds, too.)
- Maple syrup adds a robust flavor. As mentioned before, maple syrup brings a unique flavor that’s hard to replicate with any other sweetener. It really elevates these bars and perfectly complements the earthy flavor of the nuts.
- Easy to make. These bars require just a few ingredients and are easy to whip up for any occasion. No complicated steps or layers!

What You’ll Need
Scroll down to the recipe card to find the ingredient quantities and recipe instructions.
For the Crust:
- All-purpose flour – Here’s how to measure flour for baking.
- Light brown sugar
- Salt
- Unsalted butter – Learn more: Unsalted or Salted Butter: Which is Better for Baking?
For the Filling:
- Eggs – Eggs help bind everything together in this recipe.
- Maple syrup
- Unsalted butter – Melt it in a microwave-safe bowl or in a saucepan on the stovetop.
- Light brown sugar – Learn more: Light Brown Sugar vs Dark Brown Sugar: What’s the Difference?
- Granulated sugar
- Salt
- Coarsely chopped assorted nuts – Pecans, cashews, almond, hazelnuts, etc.
What Grade of Maple Syrup Is Best for Baking?
For baking, I tend to like Grade A Medium Amber (also known as Grade A Amber Color with Rich Taste) but that’s just my preference. Grade A Dark/Extra Dark is also a good choice for baking; it has a stronger flavor than Medium Amber. And, of course, check the ingredients and make sure it’s real maple syrup—don’t make the mistake I did all of those years and use pancake syrup!
How to Make Maple Nut Bars
These bars are quite easy, but keep in mind when planning your baking that you’ll want them to cool completely before cutting and serving!


- Prepare. Preheat your oven to 350°F. Grease a 9”x 13” x 2″ baking pan, then line it with parchment paper so the ends overhang by a couple of inches on the two short ends.
- Mix the crust ingredients. Whisk the flour, brown sugar, and salt in a bowl. Mix in the butter with a pastry blender or fork until combined; the mixture will be crumbly, but hold together when you pinch it between two fingers.


- Form the crust. Press the crust dough into the bottom of the prepared pan, then bake for 15 minutes or until the edges are lightly browned.
- Make the filling. Lightly beat the eggs in a large bowl. Stir in the maple syrup, melted butter, brown sugar, sugar, and salt, then fold in the nuts.


- Bake. Pour the filling over the crust, then bake for 30 to 35 minutes, or until the filling is set.
- Cool and cut. Let the bars cool completely in the pan on a wire rack. Once cool, use the overhanging parchment paper to lift the bars out of the pan and transfer them to a cutting board. Use a sharp knife to cut into your desired size.
Tips for Success
Read over my baking tips for beginners, then follow these additional pointers:
- Use a variety of nuts. I think part of the appeal of this recipe is that instead of using a single nut like pecans or cashews, there’s a variety. It gives these maple nut bars a fantastic texture and flavor.
- Press the crust in evenly. Instead of dumping the crumbs in the middle of the pan, you can evenly distribute them throughout the pan then start pressing them in. This will keep the center from being thicker than the edges.
- Cut even, clean pieces. If you want your bars to look like they came from a professional bakery, take out a ruler and use your knife to score where you plan on making your cuts for perfect, even pieces. Then, make quick, confident cuts with a chef’s knife, wiping it clean between cuts. Sawing back and forth or cutting slowly makes for messy bars.

Variations
As written, these maple nut bars have a bit of sweet/salty contrast, but if you want to play that up even more, I recommend sprinkling some flaky sea salt over the tops of the bars right after they come out of the oven—Maldon salt or fleur de sel would be fantastic.
To add chocolate to the equation, you could fold chocolate chips or chunks into the filling mixture, or drizzle melted dark chocolate over the cooled bars.
How to Store
Place the maple nut bars in an airtight container or wrap them tightly with plastic wrap. They can be kept at room temperature for up to 3 days.

Can I Freeze This Recipe?
To freeze your maple nut bars, wrap each bar individually with plastic wrap and then place them in an airtight container or freezer-safe bag. They can be kept frozen for up to 3 months. Thaw at room temperature before serving.
More Recipes with Maple

Maple Nut Bars
Ingredients
For the crust:
- 1 ½ cups (180 g) all-purpose flour
- ¾ cup (150 g) firmly packed light brown sugar
- ½ teaspoon salt
- ½ cup (113 g) unsalted butter, cold and cut into 1/2-inch cubes
For the filling:
- 3 large eggs
- ½ cup (60 ml) maple syrup
- ¼ cup (57 g) unsalted butter, melted
- ½ cup (100 g) firmly packed light brown sugar
- ¼ cup (50 g) granulated sugar
- ½ teaspoon salt
- 1 ½ cups coarsely chopped assorted nuts, pecans, cashews, almond, hazelnuts, etc.
Recommended Products
Instructions
To make the crust:
- Preheat oven to 350°F (175°C). Grease a 9”x 13” x 2" baking pan, and line with parchment paper so that the ends overhang by a couple of inches on the two short ends.
- Whisk together the flour, brown sugar, and salt. Add the butter and mix using a pastry blender or a fork until combined. The mixture will be crumbly but will hold together when pinched.
- Press the crust mixture evenly into the bottom of the prepared pan.
- Bake for 15 minutes or until the edges are lightly browned. Set aside.
To make the filling:
- Place the eggs in a large bowl and beat lightly. Add the maple syrup, melted butter, brown sugar, sugar, and salt, stirring until combined. Stir in the nuts.
- Pour the filling over the partially baked crust. Bake 30 to 35 minutes, or until the filling is set.
- Cool the bars completely in the pan on a wire rack. Once cool, use the overhanging parchment paper to lift the bars out of the pan and onto a cutting board and cut into bars.
Notes
- Store in an airtight container at room temperature up to 3 days.


9 Comments on “Maple Nut Bars”
yuuummmm!! I attempted to make something similar last year for Christmas … mine definitely didn’t turn out as pretty as yours 🙂
Oh wow! These sound so good! Can I eat them with vanilla ice cream?! Yum!
you’ve hit a number of my favorite food flavors here. I consider this recipe a winner and I haven’t even tried it yet!
These bars look glorious!! 🙂 And I agree with you about real maple syrup-SO good!!
Maple is defintiely one of my favorite flavors of full. THe fact that these are extra nutty makes me love them all the more!
I wonder if Kayro Syrup would work. It comes light or dark. I use the light quite often, especially in Pecan pie. These bars look delicious!!
Yes, you should be able to substitute corn syrup.
a friend of a friend brought them to our Gilmore Girls afternoon last fall and I loved them. He sent me to your blog and I’m gonna bake them for my Mum’s birthday this week, because this will be right up her ally. Thanks for the gorgeous recipe! Lara
I’m glad you like them, Lara! By the way, I’m betting your Gilmore Girls afternoon was tons of fun!