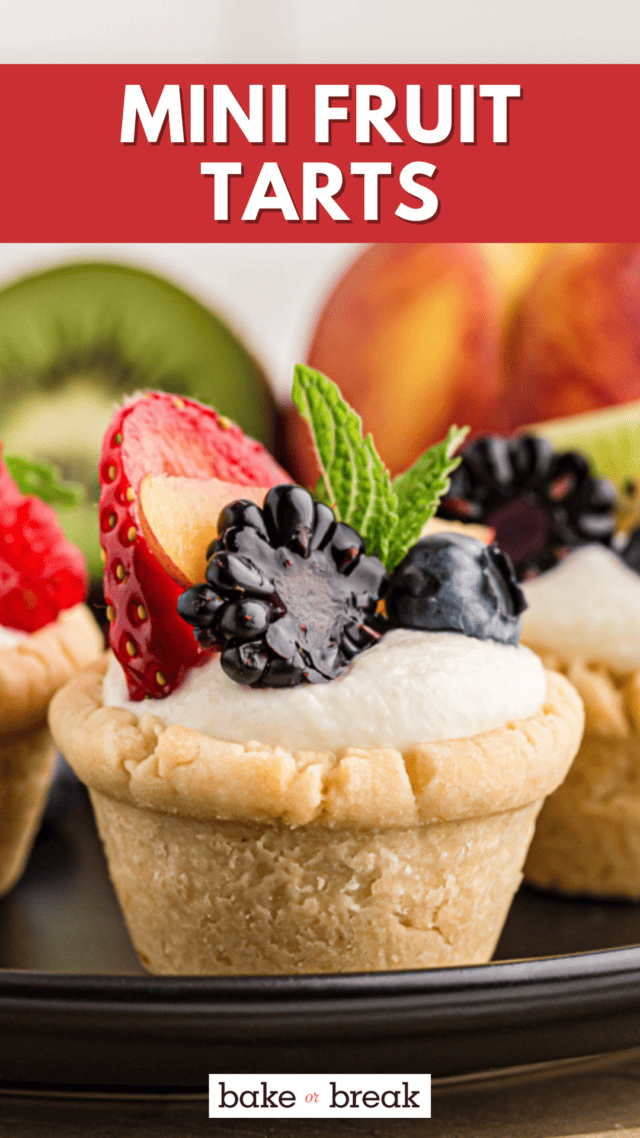
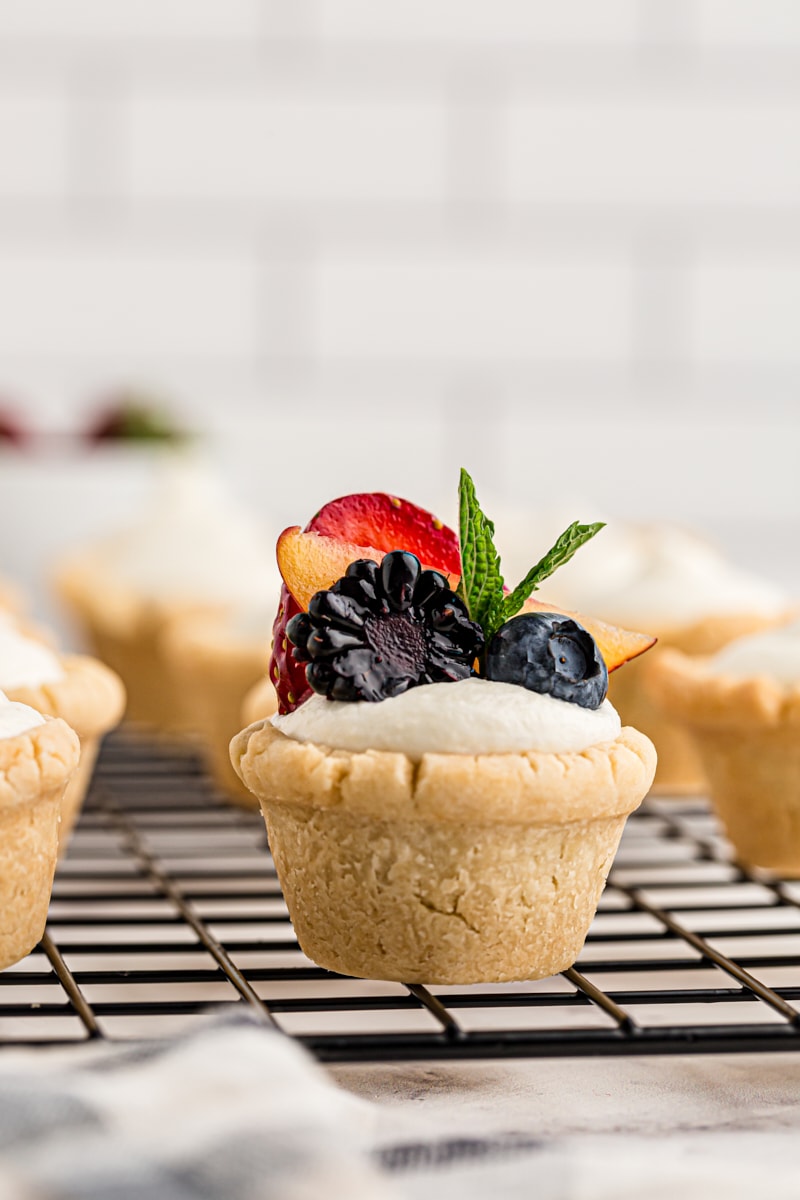
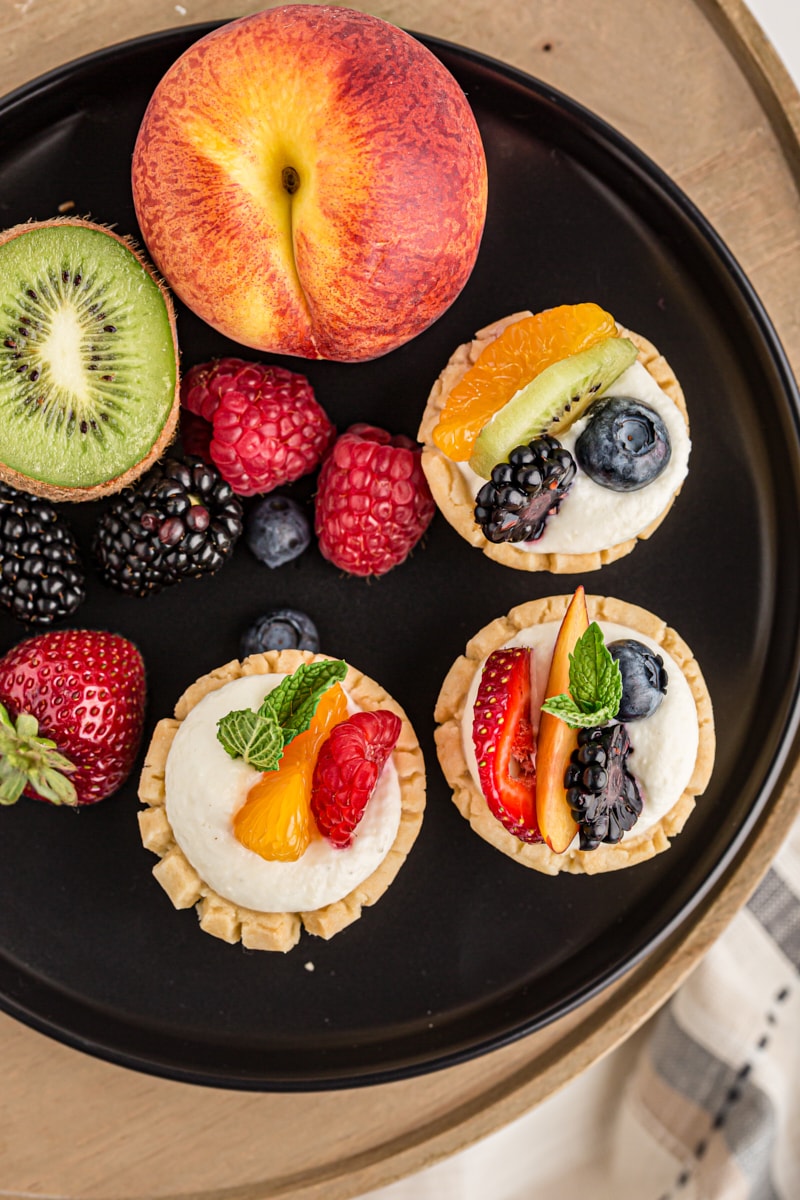
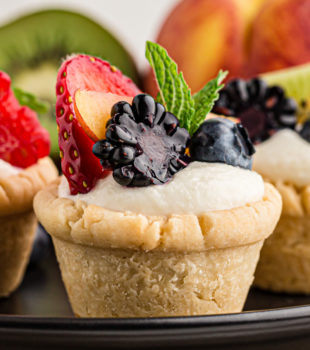
Mini Fruit Tarts combine a buttery crust, creamy filling, and an assortment of fresh fruits for a delectable dessert that’s both easy and beautiful!

Fruit Tartlets with Mascarpone Filling
If you ask me, the best summer desserts are easy to make and feature seasonal flavors. Throw in cool and creamy, and you’ve got a real winner. That means that these mini fruit tarts absolutely belong in that winner category.
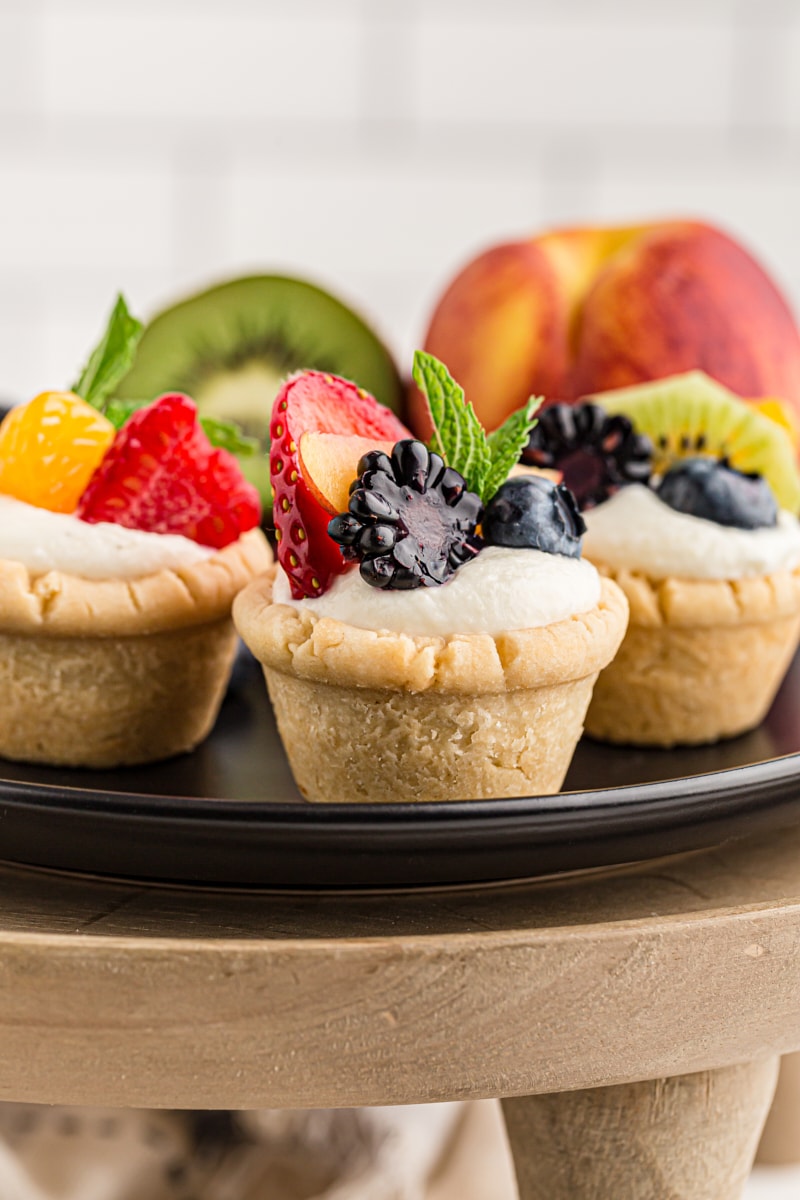
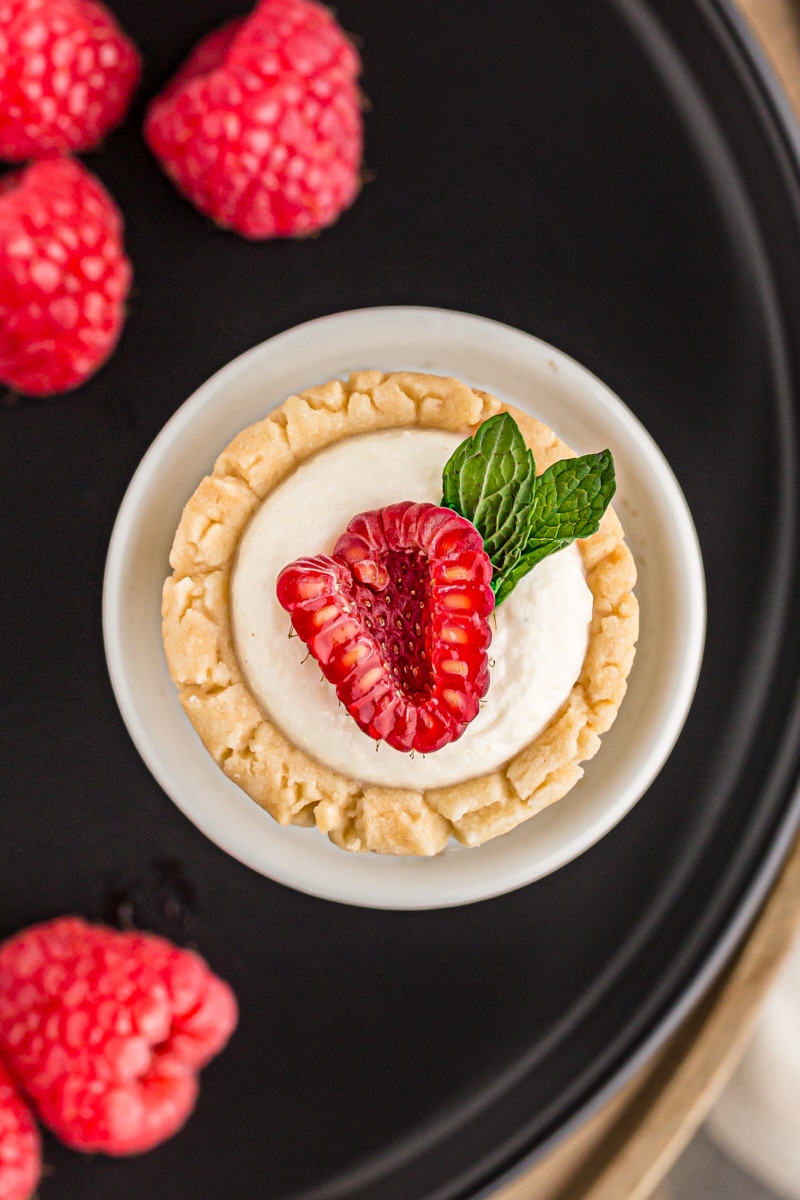
These beautiful tarts begin with a combination of simple ingredients that create the perfect crust for filling. Next comes a wonderfully easy, 3-ingredient, creamy filling that’s smooth, sweet, and creamy. And finally, here comes the flavor fun with plenty of fresh fruit.
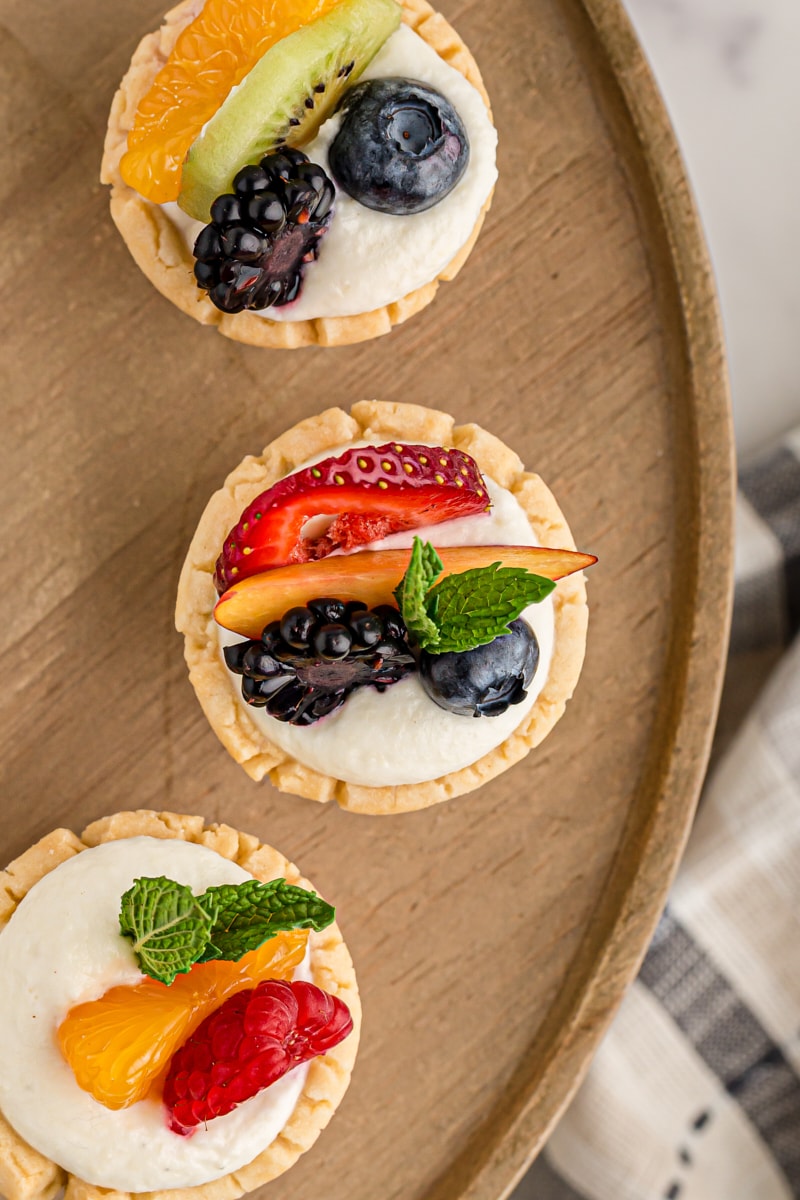
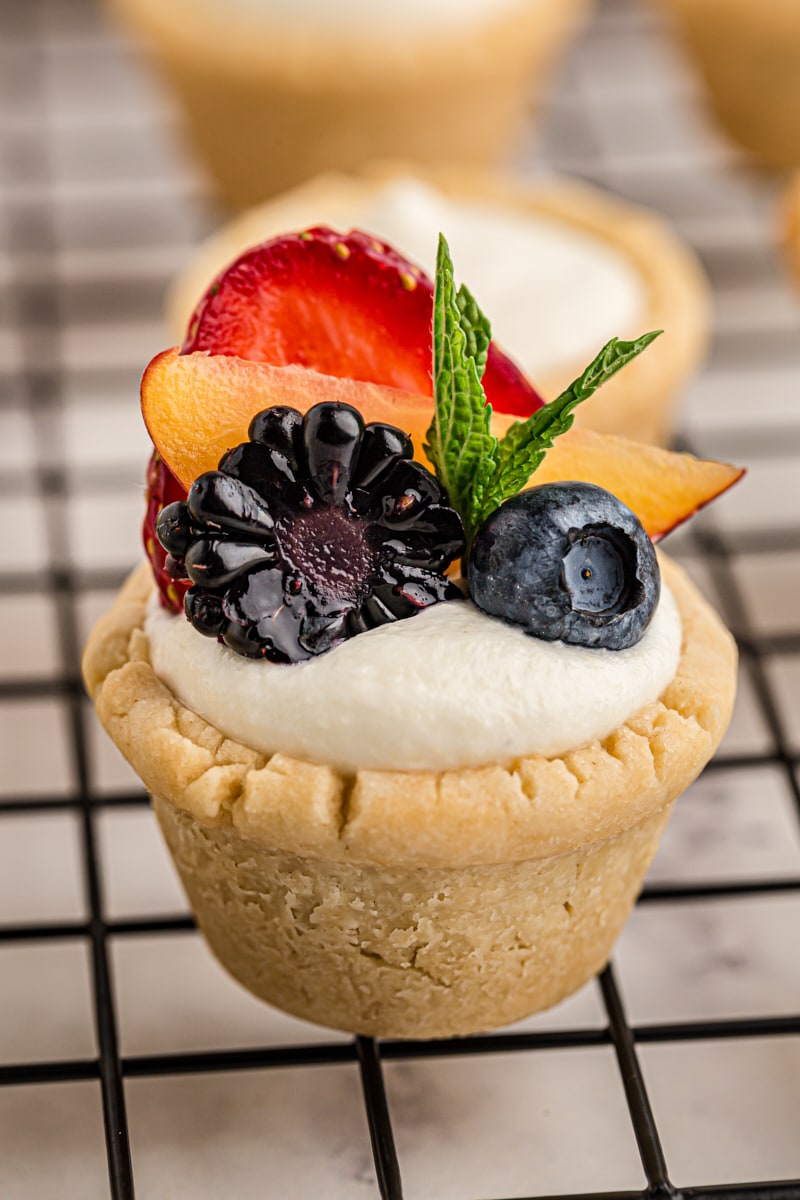
Pick a favorite fruit or go with a variety. I love using a whole slew of berries, stone fruits, and whatever else I can find. Just layer bite-size pieces on top of the filling! Make every tart look the same, or make each one unique. There’s no wrong answer here!
Why You’ll Love This Mini Fruit Tarts Recipe
There’s a lot to love about these mini desserts. Here’s a little of what makes them special:
- Easy to make. Both the tart shells and the filling are easy and quick to make.
- Impressive. A plate or tray filled with these finished tarts is a beauty to behold! They make an eye-catching display for most any summer party.
- Easy to serve. There’s no slicing and serving here. Everyone can just grab their tart and enjoy!
- Versatile. The fruit you use can change as the season progresses, taking advantage of whatever is freshest.
What You’ll Need
See the recipe card at the bottom of this post for ingredient quantities and full instructions. Here are some notes about the ingredients you’ll need to make these mini fruit tarts.
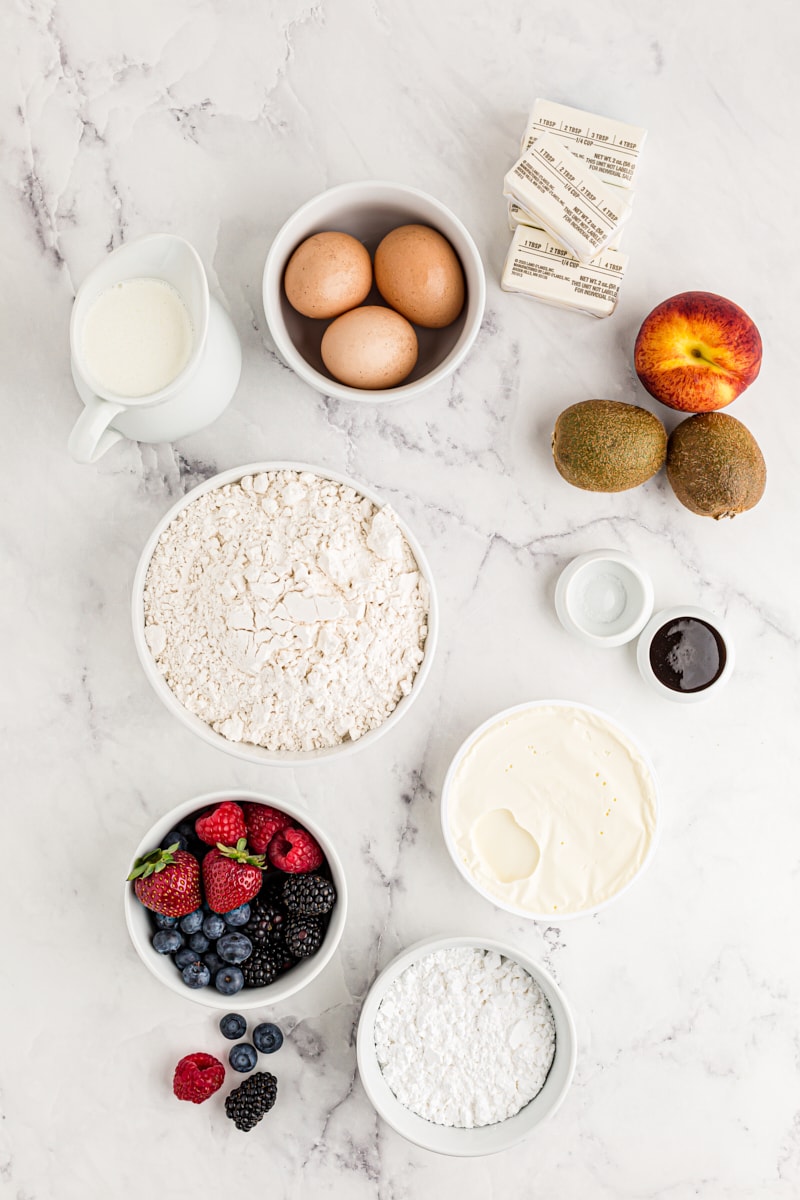
- All-purpose flour – Measure by weight or use the spoon and sweep method. Learn more: How to Measure Flour
- Confectioners’ sugar – Break up any lumps or sift the sugar before mixing.
- Salt – You just need a pinch to complement the sweetness in these tarts.
- Unsalted butter – Make sure your butter is cold. You will likely want to cut it into cubes before mixing, especially if you’re using a hand mixer.
- Egg yolks – Need a use for the egg whites? Make a batch of coconut macaroons, a pan of brownie brittle, or keep the fruity theme going with a berry vanilla cake.
- Mascarpone cheese – Let this soften to room temperature before mixing.
- Vanilla bean paste – You can instead use an equal amount of vanilla extract.
- Heavy cream – This may also be labeled as heavy whipping cream.
- Fresh fruits – Use a variety of your favorite summer fruits – strawberries, blueberries, blackberries, kiwi, peaches, raspberries, mandarin oranges, etc.
- Fresh mint leaves – This is an optional garnish for your tarts.
What’s the Difference Between Mascarpone and Cream Cheese?
Mascarpone has a higher fat content than cream cheese, meaning using it here will make a richer, creamier filling. Cream cheese has more of a tangy flavor, while mascarpone tastes buttery and almost nutty. You can use cream cheese in this filling, but keep in mind that there will be differences in flavor and texture. To get something closer to mascarpone, use an equal amount of cream cheese blended with a splash of milk or cream.
How to Make Mini Fruit Tarts
You’ll be making two components here – the tart shells and the filling. Both are incredibly easy to make, so these little tarts are less fussy than you might think. Here’s what you’ll need to do:
Make the Tart Shells
Prepare for baking. Heat the oven to 375°F. Spray 24 mini muffin cups with cooking spray. I recommend a spray with flour, like Baker’s Joy or Pam Baking.
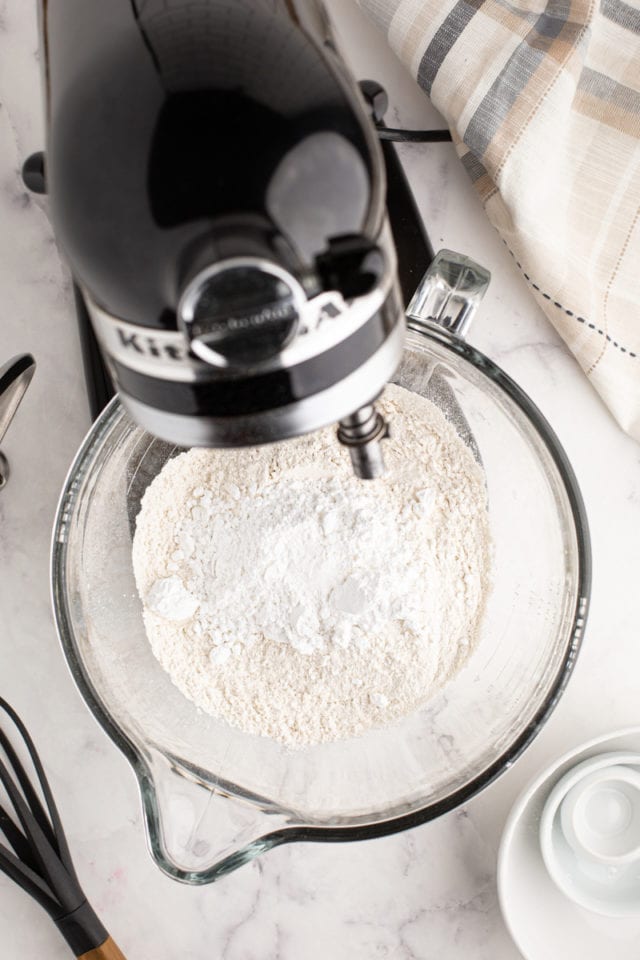
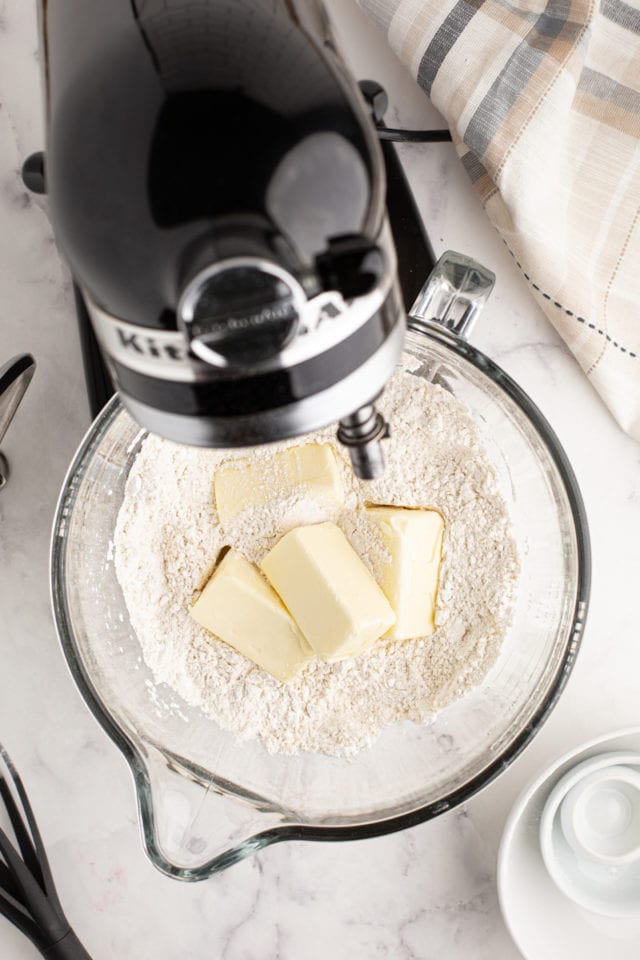

Begin mixing. Combine the flour, confectioners’ sugar, and salt in the bowl of a stand mixer. Add the butter, and mix on low speed until a sandy mixture forms.
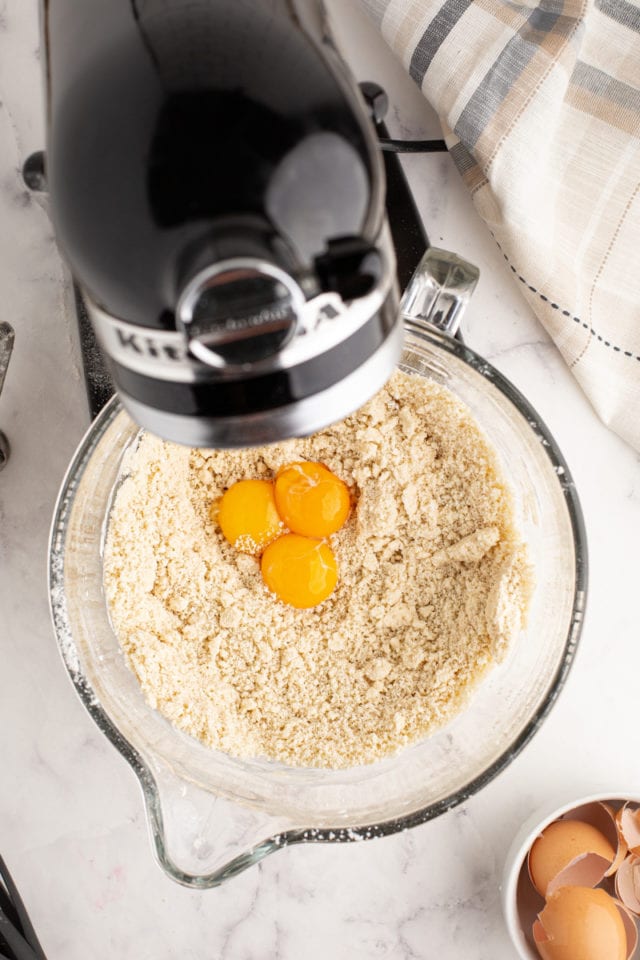
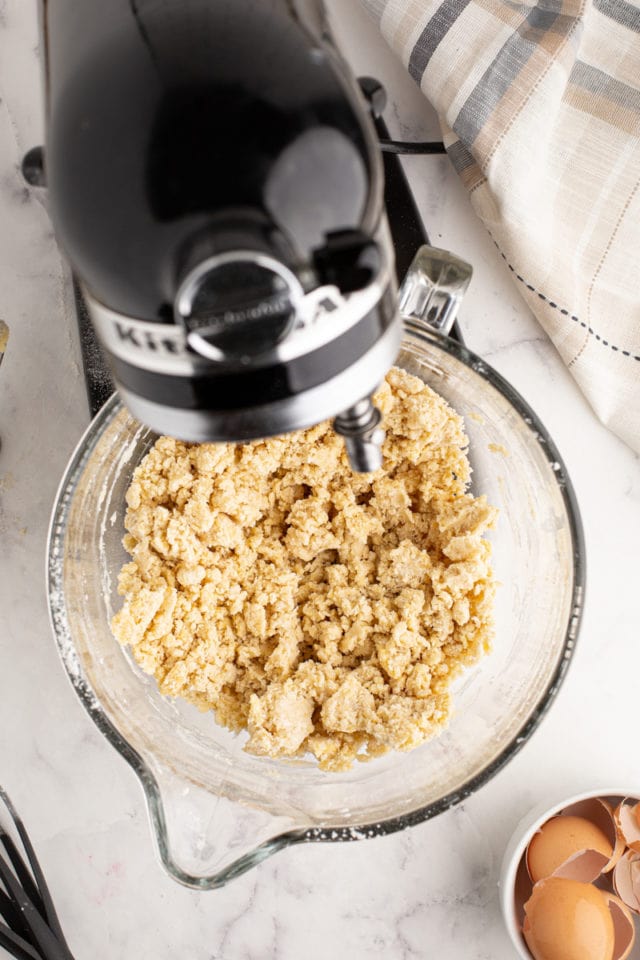
Finish mixing. Add the egg yolks, and mix just until the mixture is combined and even in color.
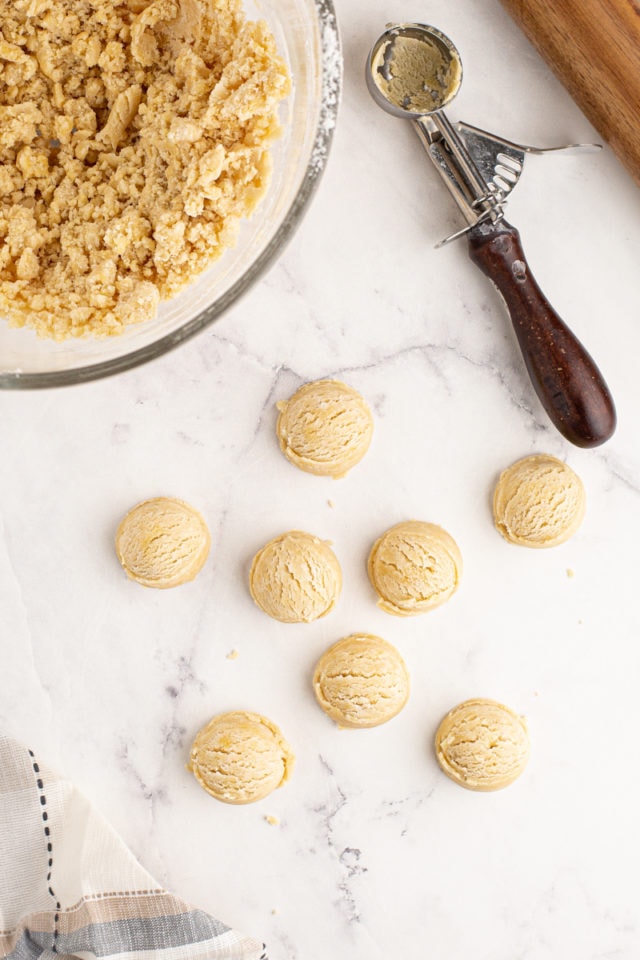
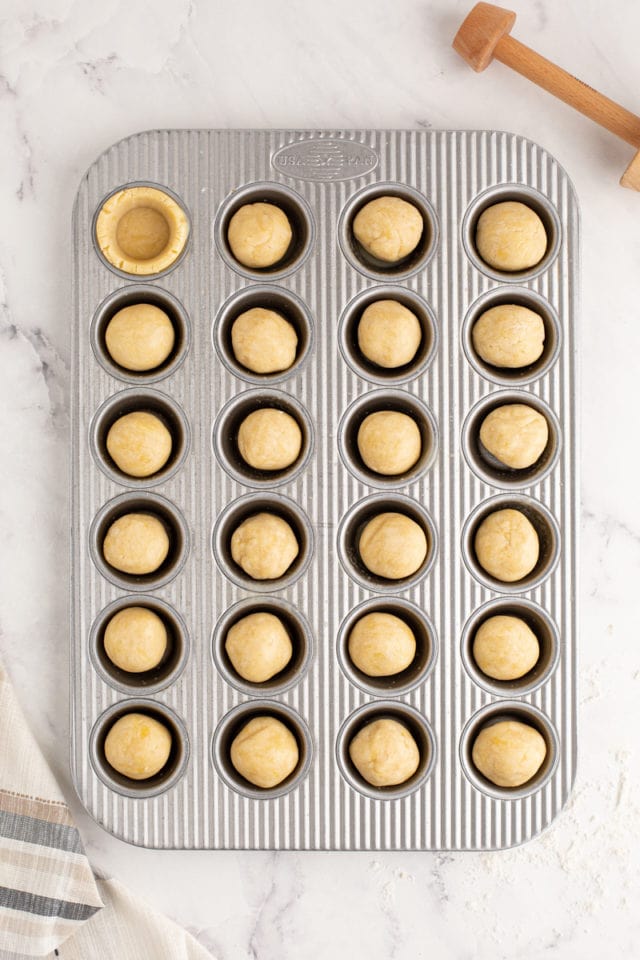
Portion the dough. Using about a tablespoonful of dough at a time, divide the dough into 24 equal portions. Roll each portion into a ball between the palms of your hands.
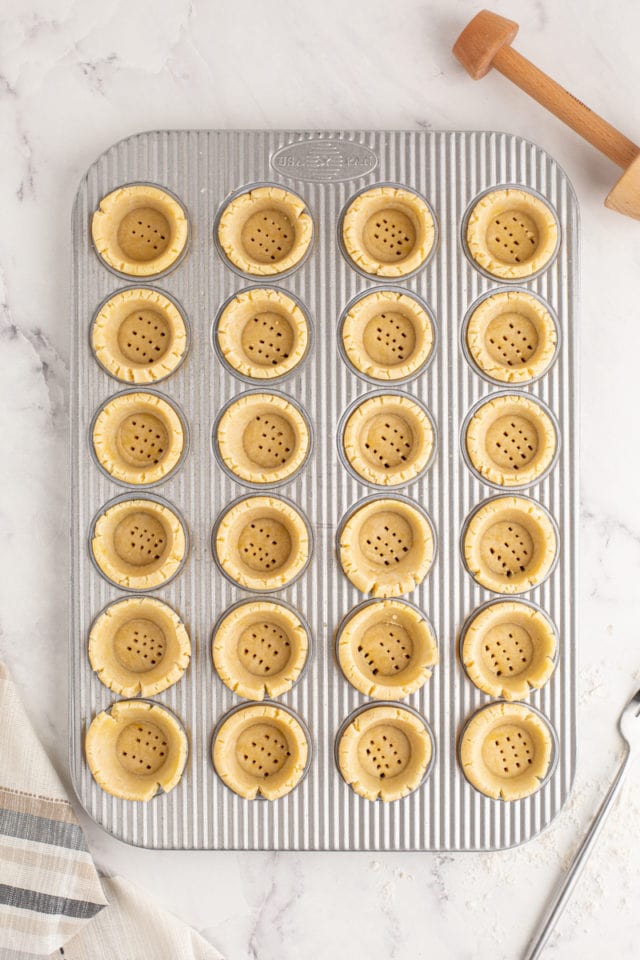
Form the tart shells. Place the balls of dough in the prepared muffin cups, and press each into the bottom and up the sides of the cups. A tart tamper works well for this, but you can use your thumbs. Score the bottoms of the shells with a fork to keep the crusts from puffing.
Bake. Place one pan at a time for 15 to 18 minutes, or until the tarts are golden brown.
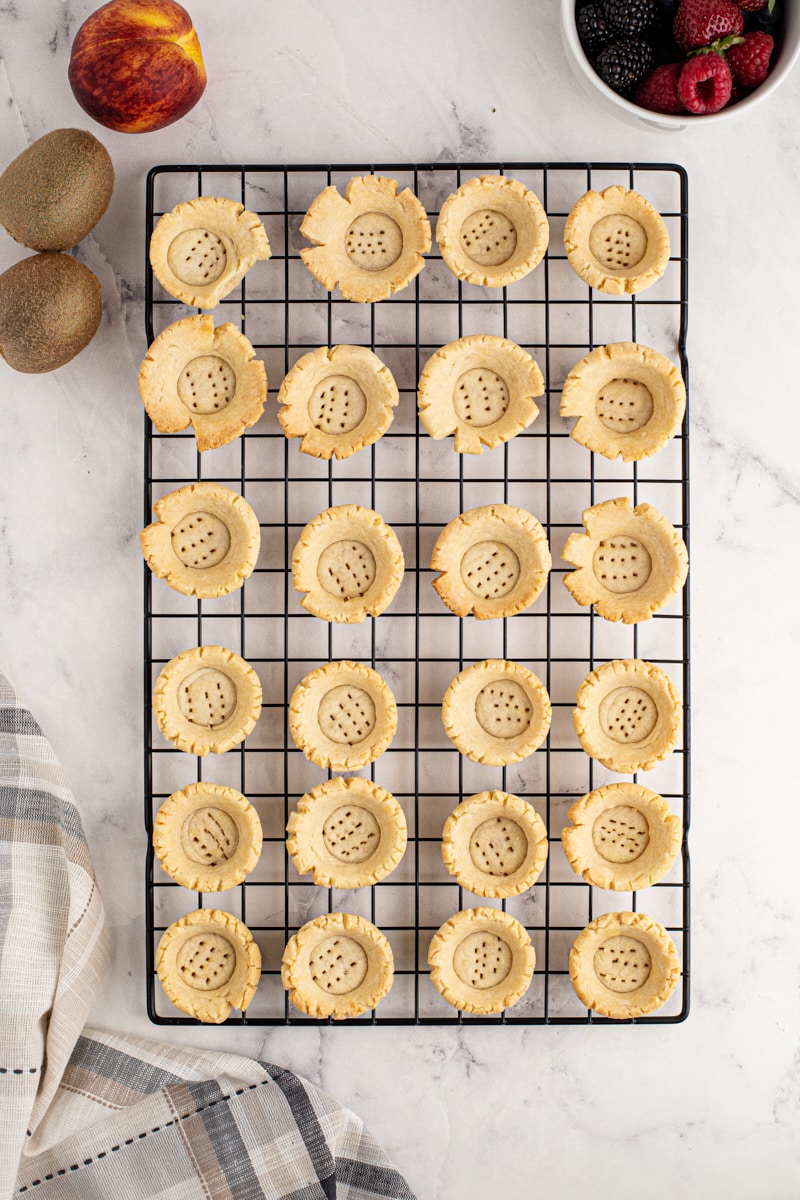
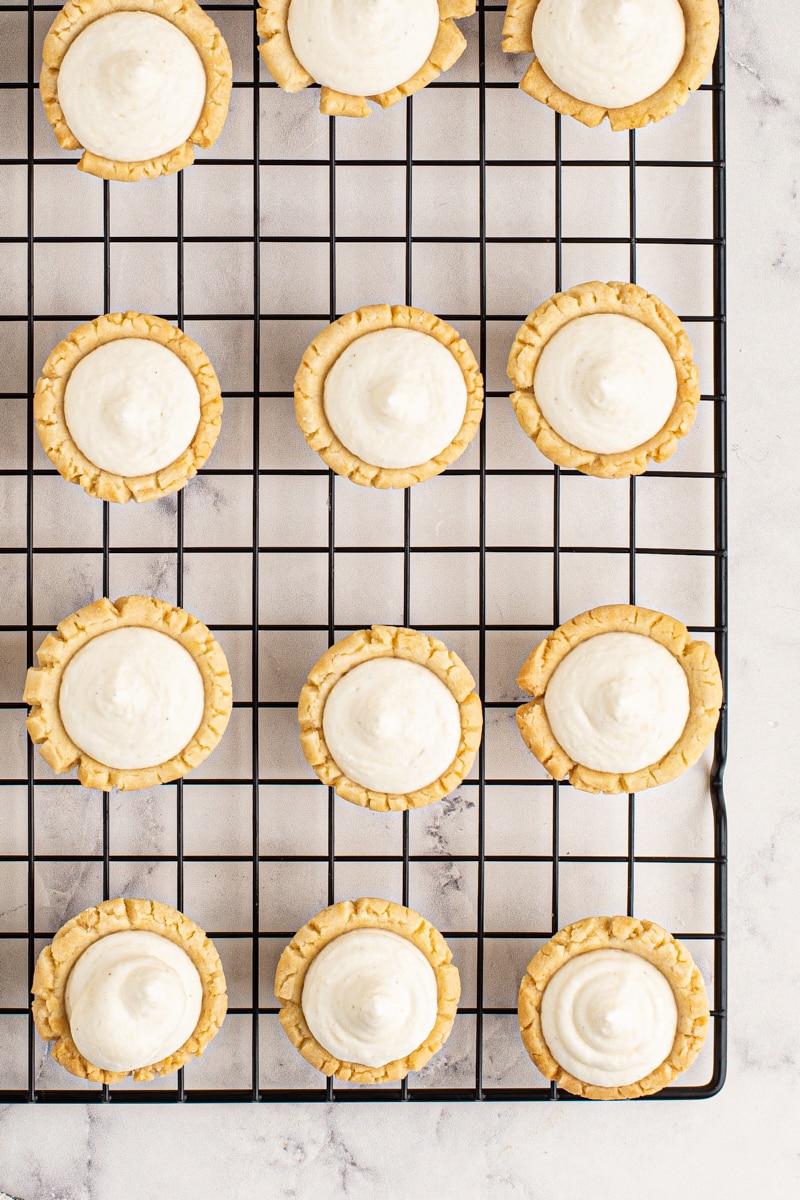
Cool. Place the pans on a wire rack, and allow the tart shells to cool in the pans for 5 minutes. Then transfer them from the pan to a wire rack to cool completely.
Make the Filling
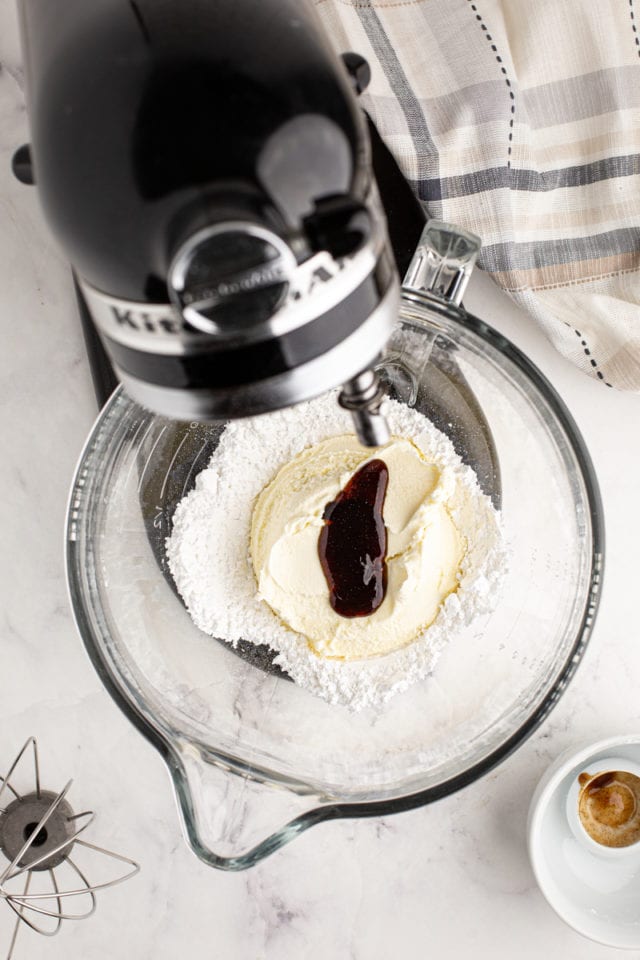
Begin mixing. Using an electric mixer on medium speed, beat the mascarpone, confectioners’ sugar, and vanilla bean paste until thoroughly combined.
Whip the cream. In a separate bowl, use an electric mixer with a whisk attachment to whip the cream until stiff peaks form.
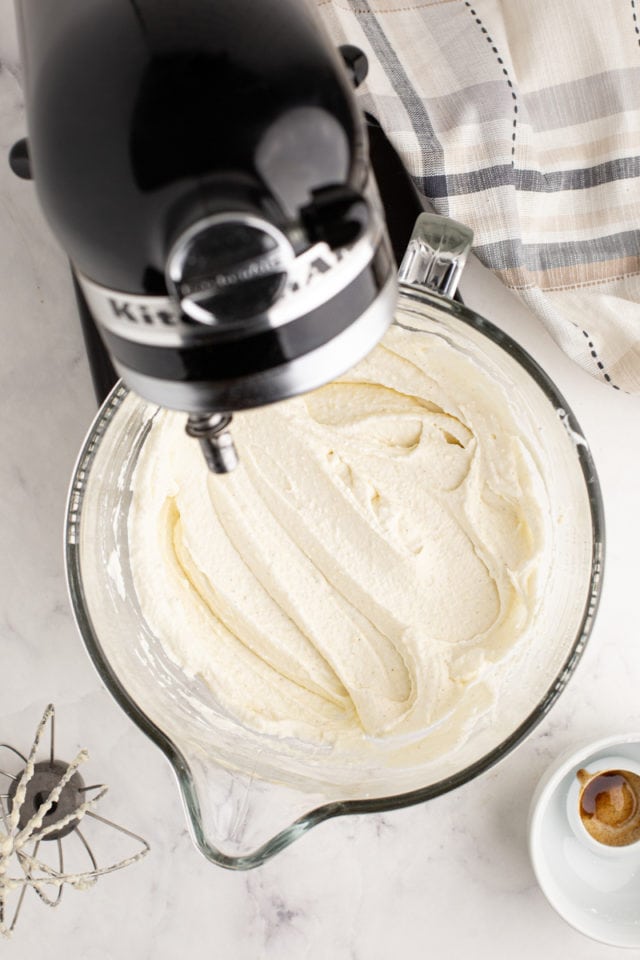
Finish mixing. Gently fold the whipped cream into the mascarpone mixture.
Chill. Cover the filling tightly and refrigerate until the tart shells have cooled completely.
Assemble the Tarts
Fill. Pipe or spoon the filling into the cooled tart shells, filling them all the way to the top.
Add fruit. Slice the fruit as you like, and use it to top each tart. (Bite-size pieces work best.) Garnish with fresh mint, if you like.
Can I Make Fruit Tarts Ahead of Time?
If you want to make these mini tarts in advance, I recommend storing the components separately and assembling before serving because the filling and fruit can make the tarts become soggy over time. The tart shells will store at room temperature in an airtight container. The filling should be kept covered and refrigerated.
Tips for Success
I think you’ll find these tarts a cinch to make! Here are a few tips to help ensure yours turn out perfectly:
- Use a stand mixer. For mixing the tart dough, a stand mixer will handle the mixing more efficiently. A hand mixer will work, too; just be sure to cut the butter into cubes and plan on several minutes of mixing.
- Make the fruit bite-size. Whatever kinds of fruit you use to top these individual tarts, I recommend cutting them into small pieces for easier eating.
- Use fresh fruit. Frozen fruits may work well enough in many recipes, but fresh berries and other fruits are a must for using as a topping.
Ideas for Variations
For a shortcut, you can use store-bought tart shells. If you’d like something different from this more traditional filling, try using lemon curd. And of course, there are seemingly endless variations with the fruits you use to top the tarts!
How to Store
While these mini fruit tarts are best enjoyed fresh, you can store leftovers in an airtight container in the refrigerator for up to 2 days. The shell will likely soften over time from the moisture in the filling and the fruit. You can instead store the shells, filling, and fruit separately, and then assemble them before serving.
Can These Fruit Tarts be Frozen?
I don’t recommend freezing the assembled tarts because the texture of the filling does not hold up well after it thaws. However, you can freeze the baked shells once they are cool. Place them in a freezer-safe container, and store in the freezer up to one month. Thaw in the refrigerator overnight before filling.
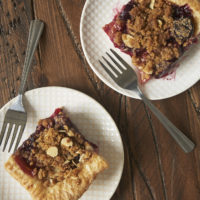
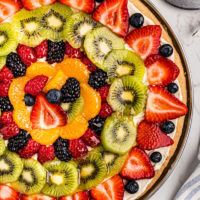
More Summer Fruit Desserts

Mini Fruit Tarts
Ingredients
For the tart shells:
- 2 ½ cups (300 g) all-purpose flour
- ¼ cup (27 g) confectioners' sugar
- pinch salt
- 1 cup (226 g) unsalted butter, cold and cut into cubes*
- 3 large egg yolks
For the filling:
- 1 cup (226 g) mascarpone
- 2 teaspoons vanilla bean paste
- ½ cup (55 g) confectioners' sugar
- 1 cup (240 ml) heavy whipping cream
- assorted fresh fruits, strawberries, blackberries, mandarin oranges, kiwi, peaches, etc.
- fresh mint leaves, for an optional garnish
Recommended Products
Instructions
To make the tart shells:
- Preheat the oven to 375°F (190°C). Grease 24 mini muffin cups. (I recommend using a cooking spray with flour.)
- In the bowl of a stand mixer, whisk together the flour, confectioners’ sugar, and salt. Add the cold butter and mix with the paddle attachment until the mixture resembles a sandy texture. This will take a few minutes on low.
- Add the egg yolks and mix just until combined and the coloring is even. Take care not to over-mix.
- Divide the dough into 24 equal portions using about a tablespoon of dough per portion. Roll each portion into a ball between the palms of your hands.
- Press each dough ball into the bottom and up the sides of the prepared pan. Use your fingers or a tart tamper to make sure the cavities of the pan are evenly covered. Use a fork to score the bottom of the tart shells.
- Bake the tarts for 12 to 15 minutes, or until the edges are golden brown.
- Cool in the pan for 5 minutes, and then remove them from the pan to a cooling rack to cool completely.
To make the filling:
- Using an electric mixer on medium speed, combine the mascarpone, confectioners’ sugar, and vanilla bean paste.
- In a separate bowl, whip the cream until stiff peaks form. Gently fold the whipped cream into the mascarpone mixture.
- Cover tightly and refrigerate until the tart shells have cooled to room temperature.
- Once the tarts are cool, pipe or spoon in the filling, filling each tart so that the filling is level with the edges.
- Slice the fruit and place on top of the tarts. Add fresh mint if desired.
Notes
- *If you’re using a heavy-duty stand mixer, you can leave the butter in larger pieces.
- Storage: These tarts are best the day they’re assembled but can be stored in an airtight container in the refrigerator up to 2 days.


