Correctly using the creaming method is key to perfect cakes and cookies. So, let’s talk about it and make sure we’re doing it the right way!
The creaming method is likely the mixing technique bakers are most familiar using. You’ll most often see this in recipes for cookies and cakes, when you’re directed to beat or cream butter and sugar until “light and fluffy.”
It’s also one of the least explained methods. The steps will be outlined in a recipe, but the specifics of getting it just right just aren’t there. Let’s talk about what it is and how to do it so that your baking can be the very best it can be!
What is the Creaming Method?
The creaming method is simply a name given to a technique for mixing some batters and doughs. Generally speaking, it involves creaming the butter and sugar together, followed by the addition of eggs. Next come the dry ingredients and any liquid ingredients.
If you’ve done any baking at all, you likely recognize that pattern of mixing. While it is fairly straightforward, there is some nuance to getting it right.
What is Creaming?
Let’s start with the basics. The first step in the creaming method is mixing (or creaming) the butter and sugar. Most baking recipes that use this method will either call this creaming or may just call it beating or mixing.
Creaming is the process of mixing softened butter and sugar in a way that forms small bubbles or air pockets in the mixture. As the butter and sugar are beaten, the sugar cuts into the butter, which creates those bubbles. The purpose of all those bubbles is to allow leavening agents, such as baking powder and baking soda, to expand those bubbles and create rise in baked goods.
Doing this correctly goes a long way to make sure whatever you’re baking rises well and has a good texture. Not doing this well means tough, flat, or otherwise unappealing baked goods. More on that a little further down, but let’s start with the first thing you need to master for successful creaming.
Softened Butter
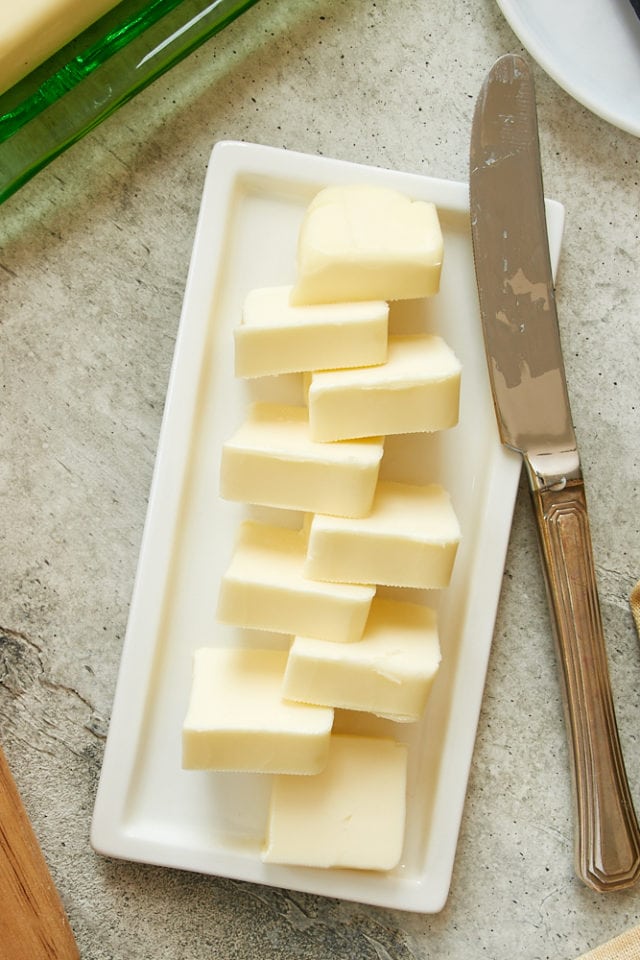
Properly softened butter is the first step to using the creaming method successully. Getting your butter to the right temperature and texture is vital to making the whole process work.
Softened butter should still feel cold but will hold a thumbprint when pressed. You can also test it by cutting it with a knife. The butter should offer little resistance when cut.
Butter that is too warm will begin to melt. If your butter is shiny and too soft to hold a thumbprint, it has begun to melt. Melted butter will not aerate in the same way as softened butter. That means no bubbles. You’ll get cookies that spread too much or cakes that feel dense.
Keep in mind that butter begins to melt at 68°F. It is also important to consider that the heat of your mixer will further warm the butter. Because of these reasons, do not allow your butter to warm all the way to room temperature.
The best way to soften butter is to allow it to sit at room temperature for about 30 minutes. For further reading and options for softening butter more quickly, see my tips for How to Soften Butter.
How to Cream Butter and Sugar
Now that your butter is properly softened, it’s time to start mixing. A stand mixer fitted with the paddle attachment or a good hand mixer will work well. The mixing process can take several minutes when using a stand mixer. A hand mixer will require a few more minutes. Theoretically, you can also do this by hand, but it will take quite a bit of effort and time.
Depending on the recipe, you may mix the butter on its own first before adding the sugar. Other recipes will instruct you to mix them together from the start. You can mix at medium speed, or start with medium-low until the butter and sugar are initially mixed and then increase to medium to finish.
After a couple of minutes, use a spatula to scrape down the sides and bottom of the bowl. Continue mixing, scraping the bowl every couple of minutes as needed. As you scrape down the sides of the bowl, you will be able to detect that the mixture is getting lighter in texture and color.
Remember that softened butter discussion above? It’s important to keep that butter cool while mixing, too. If your bowl feels warm, just stop mixing and put it in the refrigerator or freezer for a few minutes before continuing.
The type of mixture created from using the creaming method is called an emulsion. That just means that one ingredient (sugar) is finely dispersed in another ingredient (butter). If you’re having science class flashbacks, that’s okay. Remember that baking is a science!
When to Stop Mixing
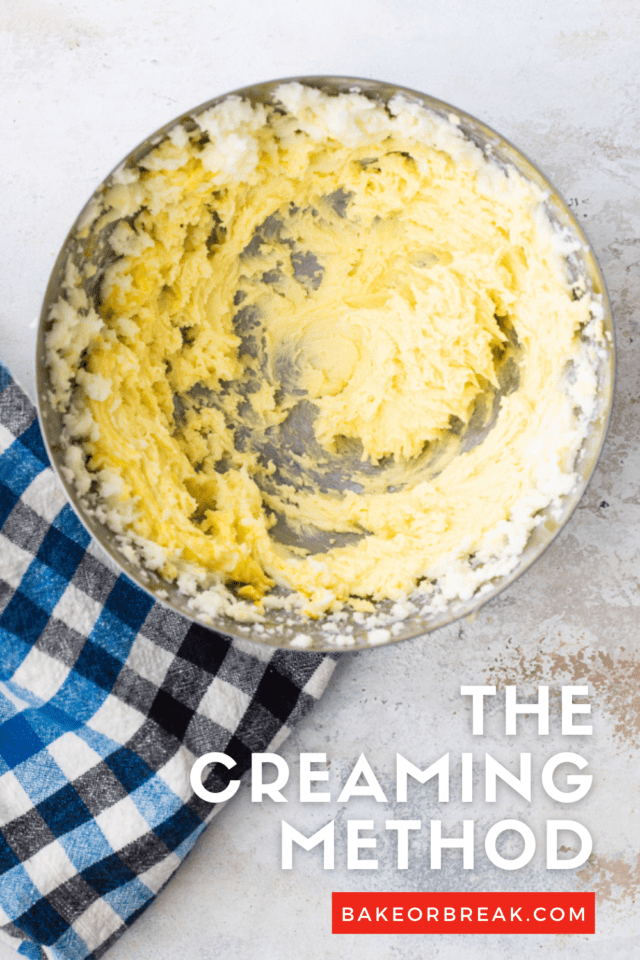
This is where “light and fluffy” becomes important. Creamed butter and sugar will be lighter in color. The bubbles created from beating will have caused the mixture to increase in volume, creating a fluffier texture. All of those air bubbles mean that your mixture should be about doubled in volume.
The mixture should still be cool. It should feel a little gritty. This level of grittiness will vary based on the kind and amount of sugar used in the recipe. You shouldn’t see the sugar anymore, but you should feel it if you rub some of the batter between your fingers.
Once you get to this consistency, stop mixing and continue with your recipe. Over-mixing will cause all those lovely pockets of air you just made to break down, and your baked goods will not rise properly.
How Long to Cream Butter and Sugar
There’s no one answer for how long it takes to cream butter and sugar properly. However, it’s probably a little longer than most home bakers think. Depending on your mixer, the creaming process can take as little as 3 minutes, or up to 7 or 8 minutes.
To gauge if the mixture is ready, look for the visual and textural cues mentioned in the section above.
Adding the Other Ingredients
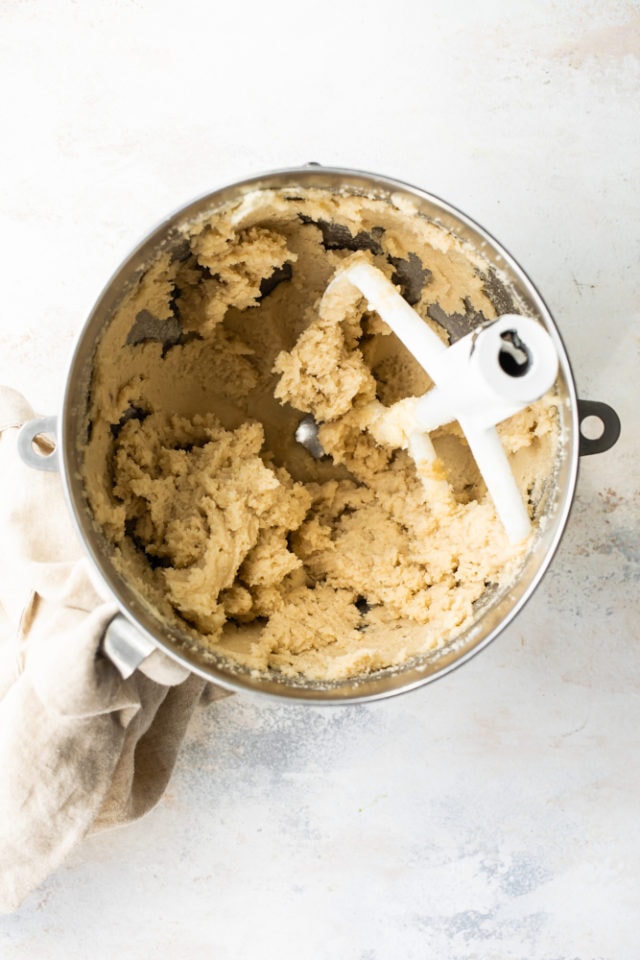
After you’ve successfully mixed the butter and sugar, it’s time to add the other ingredients. The next steps vary depending on what you’re making. Keep these next steps in mind as general rules.
Add the eggs one at a time, and mix well after each one. That keeps the emulsion you just made stable. Aim for getting those eggs fully incorporated without mixing excessively. Now add any extracts or flavorings you’re using.
For cookies, add the dry ingredients, mixing on low speed. If there aren’t any add-ins, mix the dough just until combined. If you’re adding chocolate chips, nuts, or some other add-in, then mix until you see a few streaks of flour in the dough. You’ll finish mixing the dough when you stir in the add-ins.
For cakes, reduce your mixer’s speed to low, and add the dry ingredients in portions, alternating with portions of the liquid ingredients (milk, sour cream, etc.). This is usually done as three portions of dry ingredients and two portions of liquid. Alternating the dry and wet ingredients helps keep the mixture stable. Mix just until combined.
For that last bit of mixing, remember that too much mixing means more gluten, which makes tough baked goods.
Also keep in mind that your ingredients shouldn’t be straight-from-the-fridge cold. Any eggs, milk, or any other cold ingredients should be at or near room temperature. If you make a habit of gathering and measuring all of your ingredients before starting to bake (which you should absolutely do!), this will usually happen without any further efforts on your part.
And, of course, be sure to scrape the sides of the mixing bowl and the beaters periodically during mixing so everything gets incorporated.
Recipes Using the Creaming Method
Most cookies and cakes follow the creaming method. You’ll also find it used in other recipes, but these are the most common. Here are some simple recipes that put that method to use:


2 Comments on “The Creaming Method in Baking”
Thanks for these info. Now I understand what is creaming method and how to do it correctly. i’m looking forward to improve my baking ability. Thank you very much.
I hope you’ll find it helpful, Maria!