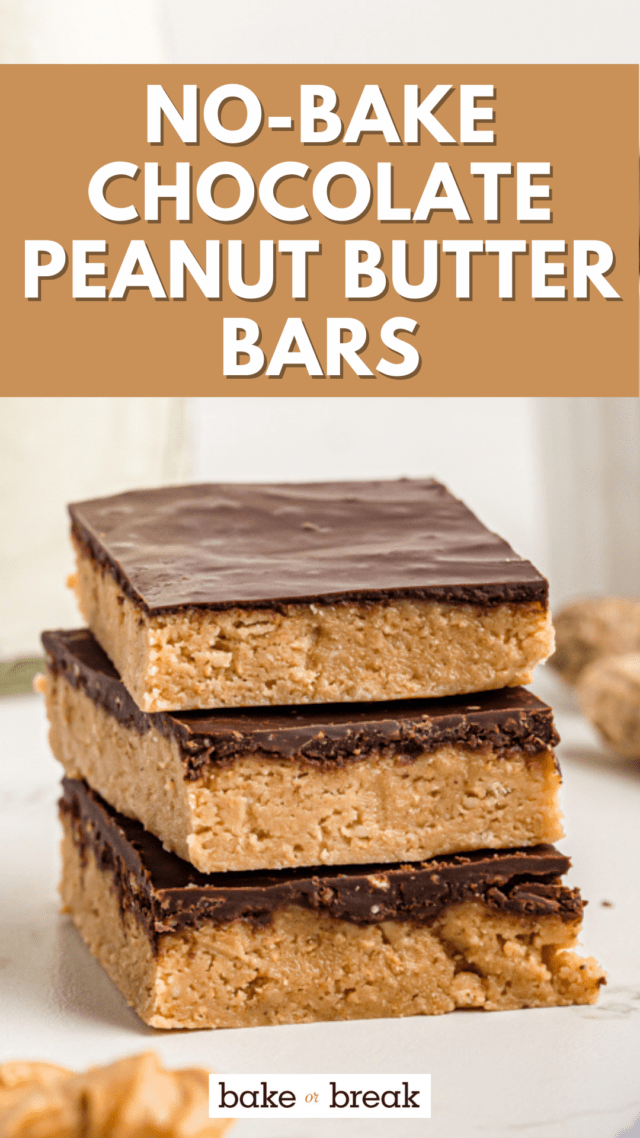
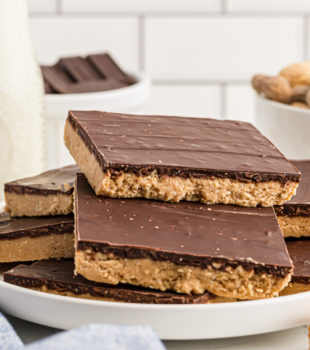
This easy, 6-ingredient recipe for no-bake peanut butter bars is just the thing when you’re craving a quick treat made with the irresistible combination of chocolate and peanut butter!

This recipe for no-bake peanut butter bars or some version of it has been around for a very long time. There are usually at least a couple of good reasons that a recipe has that kind of staying power. In the case of these bars, it’s not only that they’re delicious, but they are also ridiculously simple to make!
Why You’ll Love This Peanut Butter Bars Recipe
- Peanut butter candy in bar form. Now, you’ve probably had these bars before, but if you haven’t, you can expect a texture similar to peanut butter cups, but a taste reminiscent of Butterfinger bars.
- Easy to make. No-bake peanut butter bars are surprisingly delicious for the tiny amount of effort (and the whole 6 ingredients) involved in making them. The hardest part of making these may be waiting on them to chill!
- Quick and delicious. This is the kind of recipe that you’ll find yourself making over and over because they’re great for sharing! They’re also quick enough to whip up whenever you’re craving some chocolate and peanut butter goodness.

Ingredients You’ll Need
Here are some notes about the ingredients you’ll need to make these easy no-bake peanut butter bars. Scroll down to the printable recipe card to find the full ingredient quantities and recipe instructions.
- Confectioners’ sugar – Also known as powdered sugar. I don’t recommend substituting regular sugar as it makes the texture of the filling grainy.
- Graham cracker crumbs – You can buy these ready-to-use, or crush up graham crackers in the blender. See below.
- Peanut butter – You can use creamy or crunchy, but either way, use the shelf-stable kind, not the natural varieties with oil that need to be stirred.
- Unsalted butter – I prefer to use unsalted butter. You can learn more in my post covering unsalted versus salted butter in baking.
- Salt – This is optional, but highly recommended. Even just a pinch of salt will add a bit more interest to this flavor party.
- Semisweet chocolate – Use chocolate bars or discs if you can, because they will melt better than chocolate chips.
How Do You Make Graham Cracker Crumbs?
You can find boxes of graham cracker crumbs in the baking aisle at the grocery store, but you can also make your own by pulsing graham crackers in a food processor until they’re finely ground. If you buy the kind that have 4 graham crackers per sheet, you’ll need approximately 12 sheets for 1 1/2 cups of crumbs. If you don’t have a food processor, seal the crackers inside a zip-top bag and crush them using a rolling pin instead.

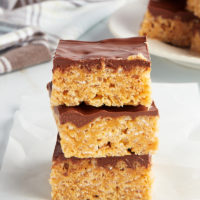
How to Make No-Bake Chocolate Peanut Butter Bars
You’re just a few minutes away from the best peanut butter bars ever! Here’s what you’ll need to do. Follow the steps below, and check out the recipe card for the printable instructions.
- Prepare. Lightly grease a 9 x 13″x 2″ pan. For easier removal, you can line the pan with parchment paper and then grease the paper.


- Make the peanut butter layer. In a large mixing bowl, stir together the confectioners’ sugar, graham cracker crumbs, peanut butter, and melted butter until well-combined.


- Chill. Spread the peanut butter mixture into the bottom of the prepared pan. Refrigerate for 10 minutes.
- Melt the chocolate. Place the chocolate in a microwave-safe bowl. Microwave at half-power in 30-second intervals until the chocolate is completely melted and smooth when stirred.
- Add the chocolate layer. Use a rubber spatula or offset spatula to spread the melted chocolate over the chilled peanut butter layer.
- Chill again, then serve. Place the pan in the refrigerator for at least an hour; when you’re ready to serve, let the bars sit at room temperature for about 10 minutes before cutting.

Tips for Success
- Don’t skip the chilling. If you spread the warm chocolate over the peanut butter layer without chilling it first, your layers will mix together.
- Add some salt. The salt is optional, but it takes these no-bake peanut butter chocolate bars to the next level. You can add salt to the peanut butter, or even sprinkle some flaky Maldon salt or fleur de sel over the chocolate before it sets.
- Make perfect squares. Let the bars sit at room temperature for at least 10 minutes to keep the chocolate layer from cracking when cut. Get out a ruler and make small notches in the bars to mark where you want to cut. Then, use a large chef’s knife to make quick, confident cuts through the bars.

Easy Variations
This is the kind of recipe that’s open to minor tweaks and changes. I love finding new ways to customize these peanut butter bars, and I’m sure you will, too! Try these ideas:
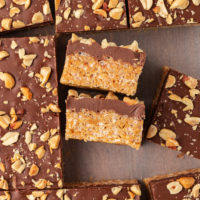
- Add nuts. Sprinkle chopped peanuts, pecans, or hazelnuts over the chocolate topping. Do this before refrigerating while the melted chocolate is still wet.
- Different cookies. Graham cracker crumbs act as a binding agent in this no-bake recipe. If you don’t have graham crackers, feel free to grind up another cookie, like vanilla wafers or chocolate wafer cookies, gingersnaps, or even crushed corn flakes cereal.
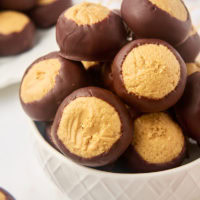
- Fold candy into the filling. Reese’s Pieces, or chopped candy bars in the peanut butter layer or over the chocolate layer.
- Make nut-free bars. If you’d like to make similar bars for someone with peanut allergies, sunflower seed butter works well as a substitute. They won’t be peanut butter bars, but they’ll still be delicious!
- Caramel. Instead of chocolate, top these bars with caramel sauce and crushed pretzels as I do in my sweet-salty caramel pretzel peanut butter bars.
- More add-ons. Top these bars with cereal to make a variation of chocolate peanut butter cereal bars, or add mini marshmallows, toasted coconut, or sprinkles.

How to Store
- Refrigerate. Store no-bake peanut butter chocolate bars in an airtight container in the refrigerator for up to 5 days.
- Freeze. These peanut butter bars can be frozen for longer-term storage. Place the bars in a single layer in an airtight container (or separate the layers with parchment paper) and freeze for up to two months. Let the bars thaw overnight in the refrigerator before enjoying.
More No Bake Desserts


No-Bake Peanut Butter Bars
Ingredients
- 2 ½ cups (275 g) confectioners' sugar
- 1 ½ cups (150 g) graham cracker crumbs
- 1 cup (255 g) peanut butter, (creamy or crunchy)
- 1 cup (226 g) unsalted butter, melted
- ¼ to ½ teaspoon salt, optional*
- 1 ⅓ cups (227 g) semisweet chocolate
Instructions
- Lightly grease a 9 x 13"x 2" pan. If you like, line the pan with parchment paper and lightly grease the paper.
- Combine the confectioners' sugar, graham cracker crumbs, peanut butter, and melted butter until well-mixed.
- Spread the mixture evenly in the prepared pan. Place in the refrigerator for 10 minutes.
- Place the chocolate in a microwave-safe bowl. Heat in the microwave at half-power in 30-second intervals until the chocolate melts when stirred.
- Spread the melted chocolate over the chilled peanut butter layer. Place the pan in the refrigerator for at least an hour.
- After the bars have chilled, let them sit at room temperature for about 10 minutes before cutting into bars.
Notes
- *I like to add some salt to these. Adjust the amount to your taste, considering how salty your peanut butter is.
- Recipe slightly adapted from King Arthur Flour.
- Store in an airtight container in the refrigerator up to 5 days.


26 Comments on “No-Bake Peanut Butter Chocolate Bars”
Despite my overpowering love of all things PB+Choc, somehow I have managed to not yet make these or any version of them. Look so good!
Jen,
I’ve got to try these bars. Pinned.
Annamaria
BUTTERFINGER taste, you say??!!
oh man. I like the idea of these even MORE now!
YUM. These are going to haunt me until I make them!
Perfect for sharing on Valentine’s Day!
Hello peanut butter and chocolate bars! These are too easy which means they are too dangerous!
Jen- I’ve been making these bars for 20 years! They truly are fabulous and so easy. I mix everything up in a Cuisinart which makes it even easier! Everyone always loves them- a perfect go-to bar that takes about 10 minutes!!
I love it when you see something that looks so delicious, you scroll down and there’s a tiny list of ingredients. Sheer joy. Thanks for sharing such a tempting and easy recipe!
A cross between butterfingers and Reese’s…AND it’s no bake?! These are almost too good to be true!
Butterfinger? that’s all you needed to say. 🙂 Definitely making these! Pinned 🙂
We are making them today! Today is cookie bak day for family G I s. Gotta get them on the mail! Let me sample them too, OK?
These look great, and simple. I’ve made a very similar thing before, but with crushed corn flakes instead of graham crackers. I love the idea of graham crackers, though!
I made these last night & took them to a friend’s house- they were devoured, & I had to email everyone the recipe when I returned home. They taste EXACTLY like a Reese’s peanut butter cup. Absolutely fantastic recipe!
Really like the looks of the peanut butter & chocolate bar
This is pretty interesting, a little twist for an all time favorite snack bites.
I might suggest trying milk chocolate chips for the frosting instead of semi – sweet. This could depend on your preference for chocolate, however me being not a huge fan of semi – sweet feel this would be a nice alternative. Just a thought. I really enjoyed them otherwise. Thanks for posting the recipe!
I grew up on these I add a tsp of vanilla to the peanit butter mixture and i put 1/2 c peanut butter in with the chocolate lets them stay creamier. I use semi-sweet, milk, white, and butterscotch sometimes individually sometimes swirled. My personal favorite it the butterscotch
I was thinking.. maybe just use salted butter (perfect amount of salt for me) then you wouldn’t have to add salt?
Made these only difference I made a chocolate graham cracker crust layer then added the peanut butter layer & then the chocolate chip layer. Added a whole new dimension to the dessert.
I was thinking the same thing.
Can you freeze these?
Hi, Nancy. They should freeze well if wrapped tightly and sealed. Toppings like this one sometimes don’t look their best after being frozen, but the flavor and texture shouldn’t be affected.
Made them last evening for a group of 8. Everyone said they tasted good, but the peanut butter part texture was like they were mixed with sand.
Definitely making these! Looks so tasty!
Loved these, as did everyone with whom I shared them! I should have added that tiny bit of salt, as it did need it to balance the sweetness, or else use salted butter as some have suggested. Interestingly though, while my first taste of the batter still in the bowl tasted too sweet, once it chilled and had the chocolate topping, it was fine– well, fantastic! Used chunky peanut butter, and for the chocolate, used Trader Joes dark chocolate bar– melts great. I have a special 13 x 9 pan that has not only a tray insert with handles on both ends, but also removable metal dividers which work great for brownies. However, I was reluctant to push those dividers into the chilled batter after adding the topping as I feared I’d bend the dividers. But it was so easy to lift out the tray and slice — you’re right– they slice very cleanly. Thank you for another great recipe!
Hi, Judy! It always makes me happy to hear when someone loves a recipe as much as I do. I bet that pan works really well for brownies. I need to be on the lookout for one!