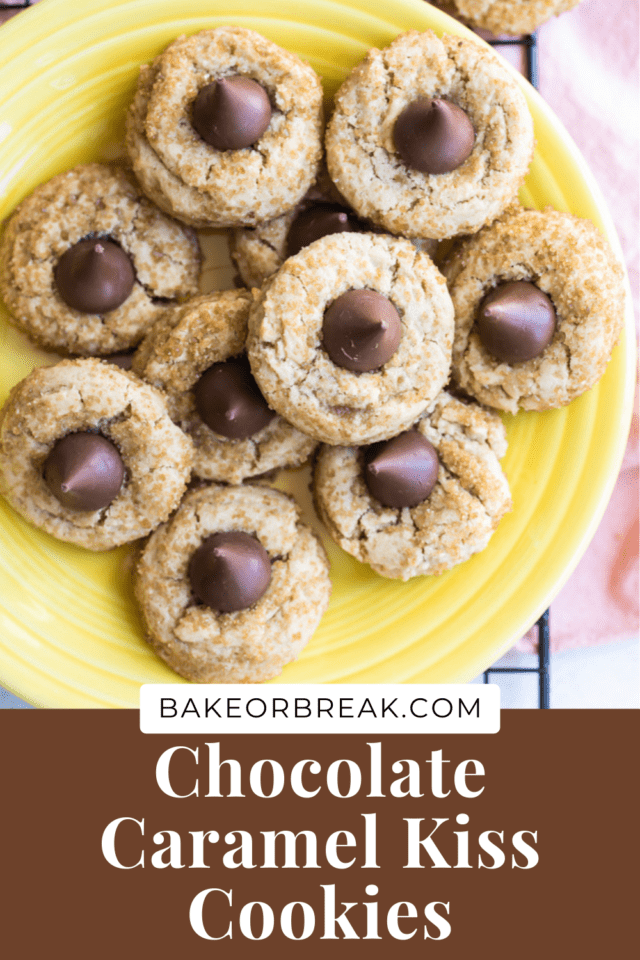
These Chocolate Caramel Kiss Cookies are a fun flavor twist on classic kiss cookies. Your favorite childhood cookie has gotten a serious upgrade!
Chocolate Caramel Kiss Cookies
I’m sure most of us have had a classic kiss cookie. They’re usually vanilla or peanut butter cookies with a Hershey’s Kiss filling an indentation on top. Such a simple combination, but oh-so good!
These Chocolate Caramel Kiss Cookies bring some interesting flavor in a fun twist on that classic cookie idea. This version is made with lots of brown sugar for a caramel flavor and with butterscotch sundae syrup to bring even more flavor to these guys.
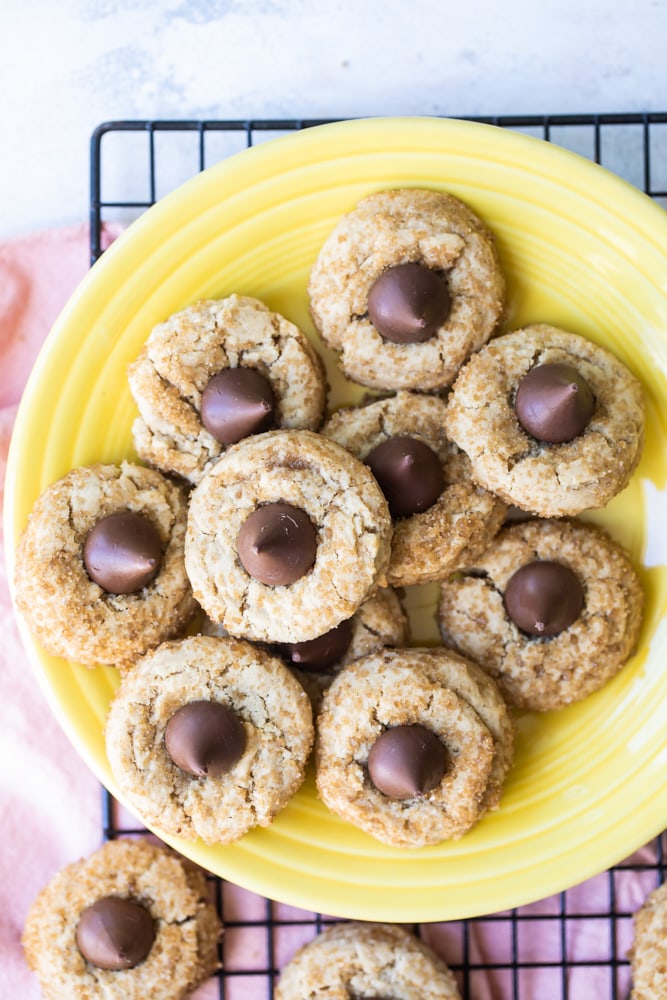
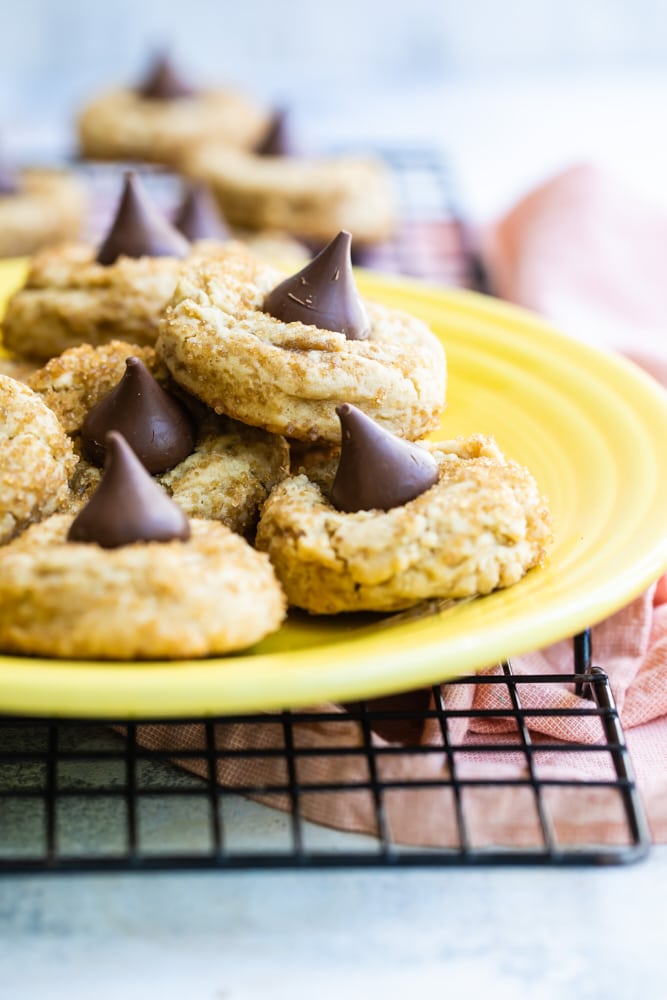
And right on top, of course, is a Kiss. While you can use regular ones for these cookies, I like caramel-filled Kisses for even more caramel flavor.
You won’t find the caramel and butterscotch flavors to be overwhelming here. You’ll certainly know it’s there, but it won’t knock you over the head. The whole cookie package is wonderfully delicious. I think you’ll love this take on the classic kiss cookie!
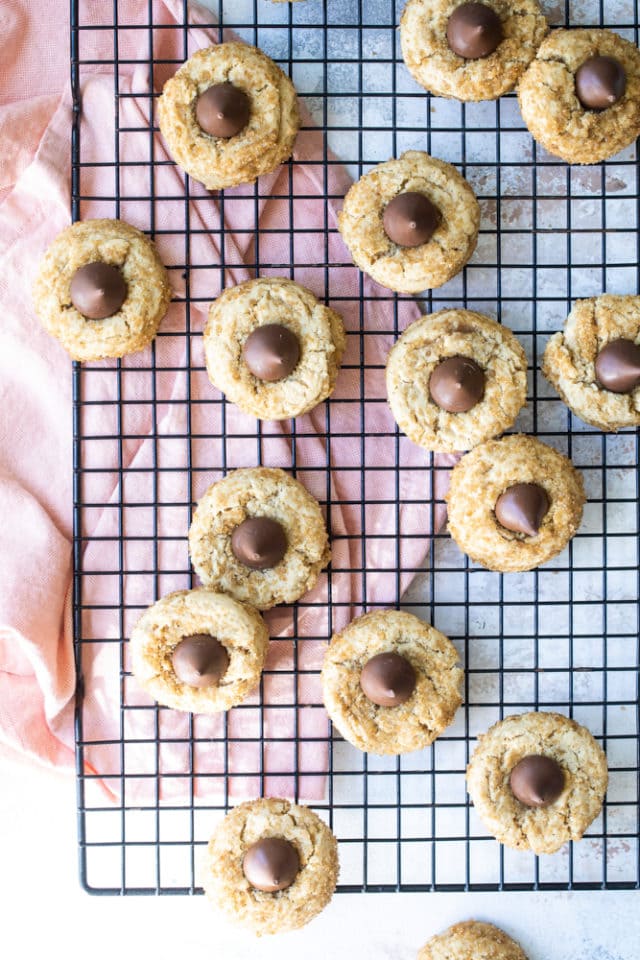
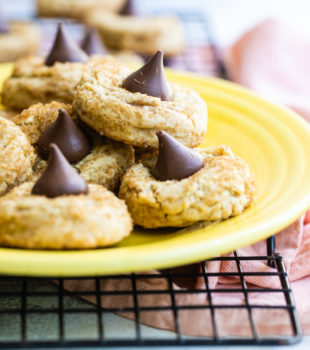
These fantastic Chocolate Caramel Kiss Cookies have such lovely flavor. They also have a light texture, with just a little crunch thanks to the turbinado sugar coating. And they’re just so pretty, too! They’re just the kind of cookies that warrant repeat baking!
What You’ll Need
Besides basic baking ingredients, you’ll need a few special ingredients, too. Here are some details about the ingredients, but be sure to scroll down to the recipe card below for the specific amounts of the ingredients.
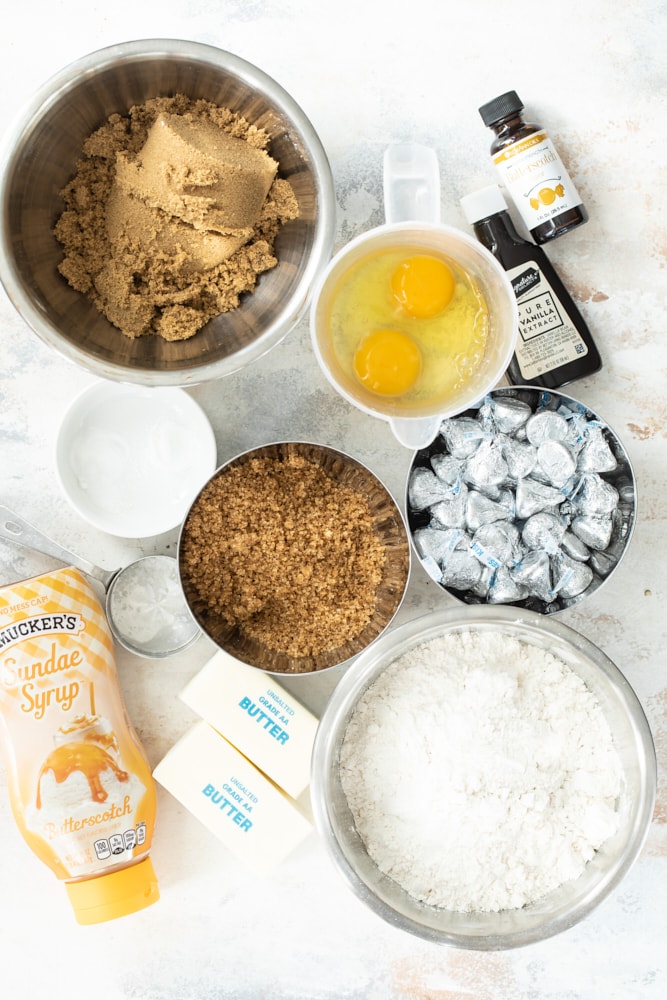
- All-purpose flour – Measure by weight or spoon and sweep. Learn more: How to Measure Flour
- Baking powder
- Baking soda
- Salt
- Unsalted butter – Let the butter soften at room temperature until it’s soft but still cold. Find out more here: How to Soften Butter
- Brown sugar – Using dark brown sugar in these cookies gives them a more caramel-like flavor. You can certainly use light brown sugar if you prefer. Either way, be sure your brown sugar is firmly packed or measure it by weight.
- Butterscotch sundae syrup – This is the kind of syrup or sauce you’ll find with the ice cream toppings. A caramel sundae syrup would also be a good choice.
- Vanilla extract
- Butterscotch flavoring – This is optional but adds even more flavor to these cookies. See my note in the tips section below for a different way to add more butterscotch flavor.
- Eggs – Allow these to come to room temperature.
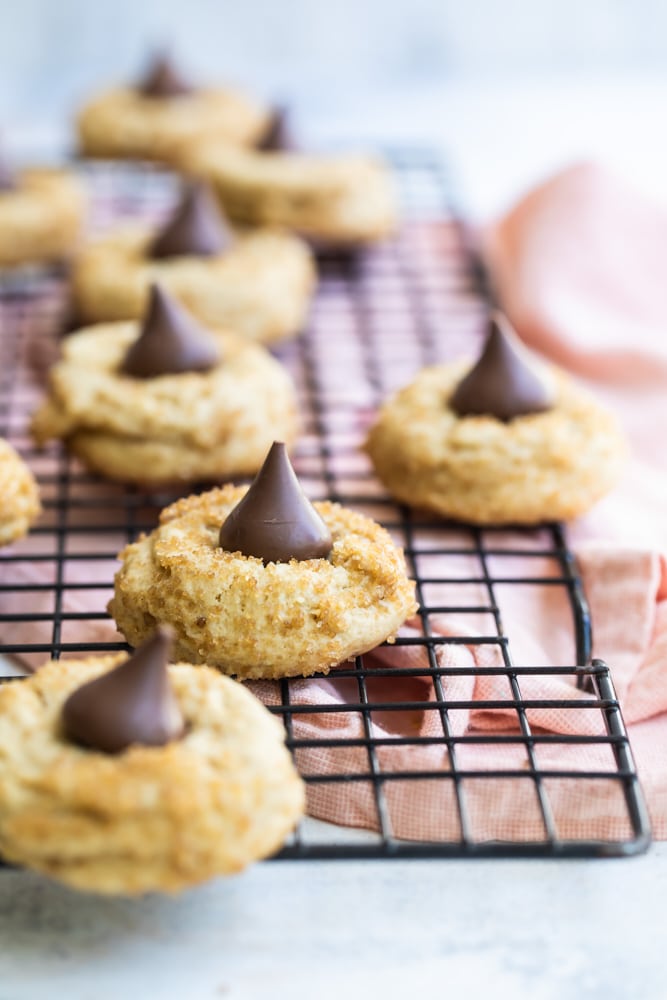
- Turbinado sugar – The cookie dough is rolled in the sugar to give them a little extra sweetness and a little crunch.
- Hershey’s Kisses – The caramel-filled kisses amp up the flavor of these cookies, but regular chocolate kisses will work, too.
What is turbinado sugar?
Turbinado sugar is a coarse, partially refined sugar. It still has some of the natural molasses from the sugar cane, giving it its signature brown color and caramel-like flavor. It’s the perfect addition to these cookies, giving them a sweet, crunchy, caramel-y coating.
You can usually find turbinado sugar in most grocery stores alongside the other sugars.
How to Make Chocolate Caramel Kiss Cookies
These cookies mix easily and don’t require any special equipment. You’ll find the full recipe below, but here are some further notes about the instructions.
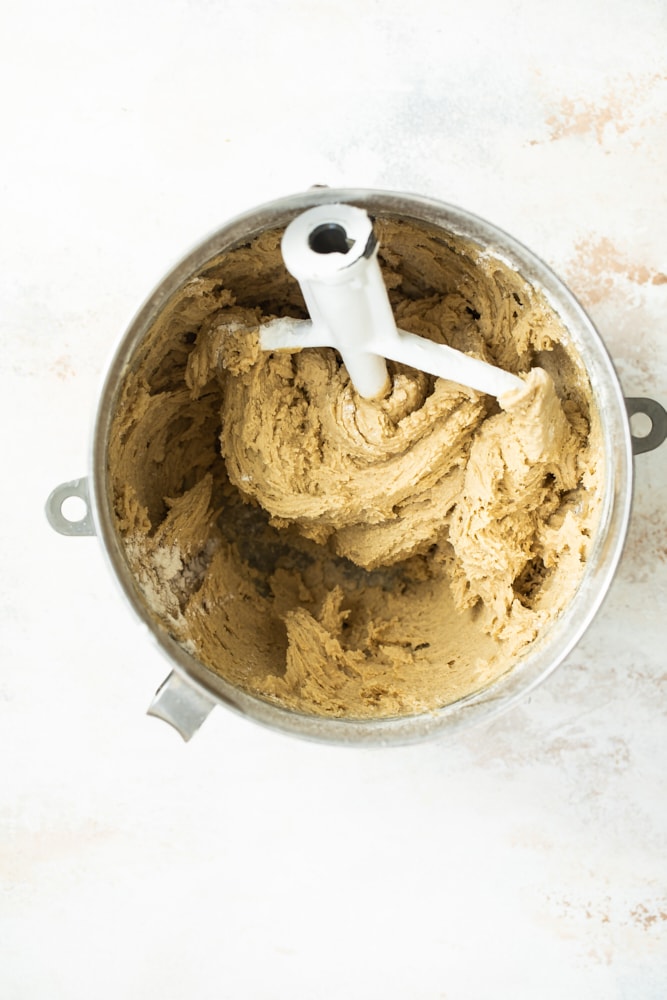
Combine the dry ingredients. Whisk together the flour, baking powder, baking soda, and salt in a medium bowl.
Combine the wet ingredients. With an electric hand mixer or stand mixer on medium speed, beat the butter, brown sugar, butterscotch syrup, and butterscotch flavoring until combined. Add the eggs one at a time, and beat well after adding each.
Add the dry ingredients to the wet ingredients. With the mixer on low speed, gradually add the flour mixture. Mix just until combined. Be sure not to over-mix, as that can lead to tough cookies.
Chill the dough. Cover the dough and place in the refrigerator for 30 minutes. (Longer is fine, but you may need to let the dough sit at room temperature for about 10 minutes so it’s easier to handle.)
Prepare for baking. Heat the oven to 350°F. Line baking sheets or cookie sheets with parchment paper or silicone liners.
Portion and shape. Using a tablespoonful of dough at a time, shape the dough into roughly 1-inch balls. Roll each dough ball in turbinado sugar. Then place the cookies on the prepared pans, leaving about 2 inches between the cookies.
Bake. Place the baking pan in the oven, and bake the cookies (one pan at a time) 8 to 10 minutes. When the cookies are done, they should be golden brown.
Cool. Place the pan on a wire cooling rack and allow the cookies to cool for 3 minutes. Press an indentation about the size of a Kiss into the top of each cookie. (Try using a measuring spoon or the rounded end of a wooden spoon.) Continue cooling the cookies.
Add the Kisses. Once the cookies are lukewarm, place a Kiss in the center of each one. Let the cookies cool completely before serving.
Tips for Success
- Don’t have butterscotch flavoring? No worries. It’s optional if you want to omit it. If you still want to add more flavor and have butterscotch extract, try using about 1/4 teaspoonful in place of an equal amount of the vanilla extract.
- Use a cookie scoop. It will help you portion the dough evenly and easily. Then just roll the dough between your hands to form a ball.
- Don’t skip the turbinado sugar. This coarse sugar adds even more caramel flavor, a little crunch, and a bit more sweetness to these cookies. The flavor and color work well for these cookies, but a white coarse sugar will work if you don’t have turbinado sugar.
How to Store
Once cooled, these cookies can be stored in an airtight container at room temperature for up to 3 days. To keep them looking their best, store them in a single layer.
Can These Cookies Be Frozen?
Yes! To freeze the baked cookies, place them in a container or zip-top bag that’s freezer-safe. They should keep in the freezer up to 3 months. Thaw at room temperature for an hour or two before serving. The chocolate candies may not look their best after being frozen, but the taste should be unaffected if your storage was airtight.
To freeze the unbaked cookies, form the dough into balls as directed. Place them on a rimmed baking sheet and freeze until solid (about 2 hours). Transfer the dough balls to a freezer-safe container or bag. When you’re ready to bake, place the frozen dough on a baking sheet as directed in the recipe. You’ll likely need to add a minute or two to the baking time. Once baked, cool and add the chocolate kiss as directed.
Find more cookie recipes in the Recipe Index.
Chocolate Caramel Kiss Cookies
Ingredients
- 3 ¼ cups (390 g) all-purpose flour
- ½ teaspoon salt
- ½ teaspoon baking powder
- ½ teaspoon baking soda
- 1 cup (226 g) unsalted butter, softened
- 1 ¼ cups (250 g) firmly packed dark brown sugar
- 2 tablespoons butterscotch-flavored sundae syrup
- 1 teaspoon vanilla extract
- ⅛ teaspoon strong butterscotch flavoring, optional
- 2 large eggs
- about 1 cup (180 g) turbinado sugar
- 60 Hershey's caramel Kisses or classic chocolate Kisses
Recommended Products
Instructions
- Whisk together the flour, salt, baking powder, and baking soda. Set aside.
- Using an electric mixer on medium speed, beat the butter, brown sugar, syrup, and flavoring together in a large bowl. Add the eggs, beating well after each addition.
- Reduce mixer speed to low. Gradually add the flour mixture, mixing just until combined.
- Refrigerate the dough for 30 minutes.
- Preheat oven to 350°F (175°C). Line baking sheets with parchment paper or silicone liners.
- Using about a tablespoonful of dough at a time, form the dough into 1-inch balls. Roll each in turbinado sugar. Place the cookies on the prepared pans.
- Bake for 8 to 10 minutes, or until golden brown. (Refrigerate the remaining dough between batches.) Cool the cookies on the pan on a rack for 3 minutes.
- Press an indentation about the size of a Kiss into the top of the cookies.
- When the cookies have cooled to lukewarm, place a Kiss in the center of each one. Cool completely before eating.
Notes
- Recipe slightly adapted from King Arthur Flour.


6 Comments on “Chocolate Caramel Kiss Cookies”
They’re very (visually) reminscent of the cookies my grandmother (and everybody else’s) made at Christmas with kisses and mini reese cups!
But these are definitely more posh – and that sugar coating is a fabulous idea.
It sounds like cookies in YOUR house disappear like the ones in MINE – few of them make it to my own belly!
They remind me of those peanut butter kisses everyone has made or had at point in life. Caramel sounds interesting; I shall give it a try 🙂
i very much agree with carla though yours are much more pleasing to the eye… and likely the tastebuds as well. i so enjoy your photographs. thanks for the post!
I love the drop of Choco-Caramel
I always have problems with these type of cookies with a chocolate kiss pressed on top. The chocolate kiss gets all melty and while it keeps its shape, it is impossible to store becuase I can’t stack them on top of each other…
i saw this way back and really liked it… but i somehow missed the recipe link and was disappointed, and today i noticed and was pleasantly surprised… i intend to try it!