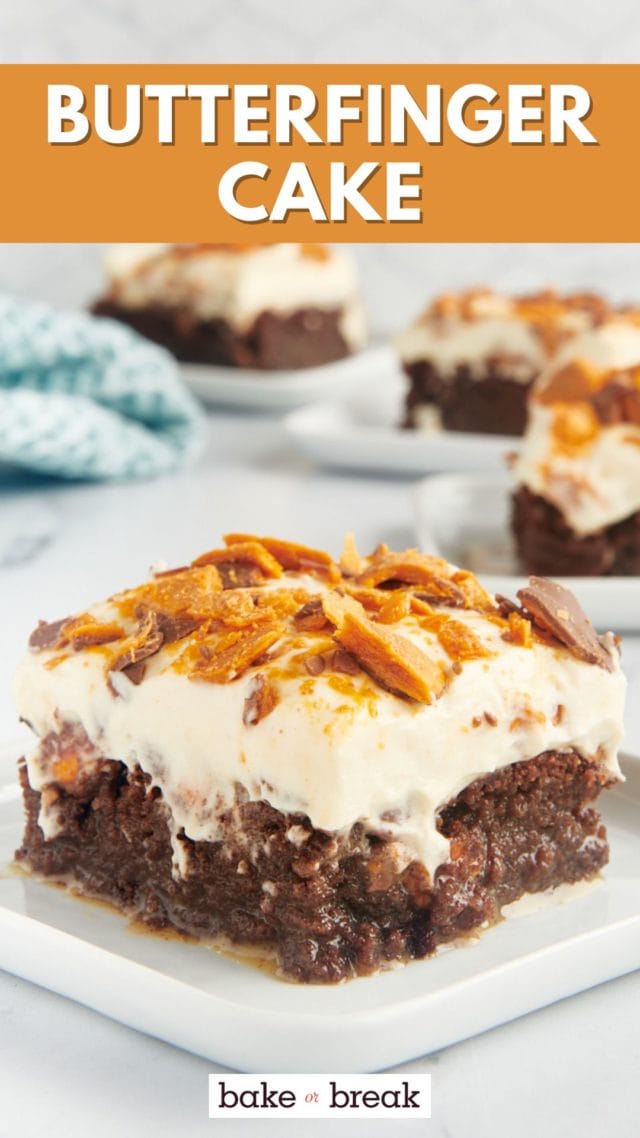
This Butterfinger cake takes a classic poke cake to the next level by adding layers of chopped Butterfinger candy bars along with a rich caramel filling. The fluffy peanut butter cream cheese frosting is the perfect finishing touch!

Poke cakes, like my lemon poke cake, butterscotch spice poke cake, and this Butterfinger cake, are favorites for potlucks and any other gathering where you’re feeding a crowd. Not only do they make a lot of cake, but they’re also guaranteed to please—and this Butterfinger cake is no exception!
Why You’ll Love This Butterfinger Cake Recipe
- A dessert for Butterfinger lovers. There’s no shortage of recipes for Reese’s lovers, but desserts with Butterfingers are in short supply. Consider this Butterfinger cake my attempt to remedy this imbalance!
- Poke cake from scratch. A lot of poke cake recipes rely on store-bought boxed mixes, whipped topping, and puddings. This recipe is made from scratch—well, except for the candy bars!
- Perfect for a crowd. This Butterfinger cake serves 18 to 24 people, so it’s great when you need a dessert that feeds a crowd.

What You’ll Need
Scroll down to the recipe card to find the ingredient quantities and recipe instructions.
For the Chocolate Cake:

- All-purpose flour – Measure by weight or use the spoon and sweep method. Learn more: How to Measure Flour
- Baking powder and baking soda – These give the cake rise.
- Salt
- Unsalted butter – Learn more: Unsalted or Salted Butter: Which is Better for Baking?
- Granulated sugar
- Eggs – Let these come to room temperature; they’ll hold more air when beaten that way.
- Unsweetened chocolate – Melt the chocolate, then let it cool slightly.
- Vanilla extract – Homemade vanilla extract or a high-quality store-bought brand.
- Buttermilk – Here’s how to make buttermilk if you don’t want to buy a bottle.
For the Topping and Frosting:

- Sweetened condensed milk – Don’t confuse this with evaporated milk, which is unsweetened.
- Caramel topping – You can use store-bought or homemade caramel.
- Butterfinger candy bars – You can buy chopped Butterfinger pieces online, or you can chop them with a knife or pulse them in your food processor.
- Cream cheese – Use the kind that comes in bars, not tubs.
- Creamy peanut butter – You want creamy peanut butter for a smooth frosting.
- Confectioners’ sugar – Also known as powdered sugar. Sift it first for a smooth frosting.
- Vanilla extract
- Heavy cream – Look for heavy cream or heavy whipping cream.
How to Make Butterfinger Cake
To Make the Cake:


- Prepare. Preheat your oven to 350°F and grease a 9” x 13” x 2” baking pan.
- Mix the dry ingredients. Whisk the flour, baking powder, baking soda, and salt in a mixing bowl.
- Mix the wet ingredients. In another bowl, use an electric mixer on medium speed to beat the butter and sugar until they’re light and fluffy. Beat in the eggs one at a time, followed by the cooled chocolate and vanilla.


- Finish the batter. Reduce the mixer speed to low and mix in the flour mixture in three portions, alternating with two portions of the buttermilk.
- Bake. Spread the batter into the prepared pan. Bake for 25 to 40 minutes, or until a pick inserted into the center comes out clean.


- Cool. Set the pan on a wire rack and allow the cake to cool for 10 minutes.
- Poke holes in the cake. Use a skewer, the end of a mixer beater, or the end of a wooden spoon to poke holes about 3/4 inches apart all over the cake.
To Make the Topping and Frosting:


- Add the filling. Mix together the condensed milk and caramel, then spoon or pour the mixture over the warm cake.
- Add Butterfingers. After the cake cools completely, sprinkle half of the Butterfinger pieces over the top.


- Mix the peanut butter and cream cheese. Use an electric mixer on medium speed to beat the cream cheese and peanut butter until the mixture is creamy.
- Add the sugar and vanilla. Beat in the sugar and vanilla and continue mixing until thoroughly combined and smooth.
- Add the cream. Switch to a whisk attachment and mix on low speed as you slowly, steadily add the cream. Increase the mixer speed to high and mix until stiff peaks form.


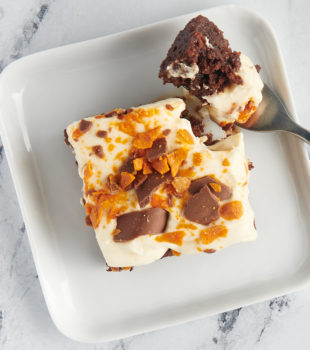
- Finish. Spread the frosting on top of the cake, then sprinkle the remaining Butterfinger pieces over the frosting.
Tips for Success
- Soften the butter. Letting the butter soften allows it to mix more evenly into the other cake ingredients. Learn more: How to Soften Butter.
- Use parchment for easy removal. If you want to take the Butterfinger cake out of the pan to serve it, I recommend adding parchment paper to the pan and then greasing it. When the cake is done baking, you can lift it out of the pan and transfer it to a serving platter.
- Let the cream cheese come to room temperature. If you don’t, it will likely stick to the beaters! You may also have little unmixed bits of cream cheese in the frosting.
- Don’t use natural peanut butter. Because the oil and solids separate, it doesn’t always behave well when you use it in recipes. Use the old-fashioned peanut butter that doesn’t need to be stirred or refrigerated.

Variations
You can really make this Butterfinger cake with any kind of chopped candy—Reese’s cups, Snickers bars, Take 5, and Heath bars would all work with the flavors in this recipe.
How to Store
Because of the cream cheese frosting, this Butterfinger cake will need to be stored in the refrigerator. Cover it in the pan or store leftovers in an airtight container in the refrigerator for up to 4 days.

Can I Freeze This Recipe?
You can freeze Butterfinger cake tightly wrapped in the pan or in an airtight container for up to 3 months. Let it thaw in the refrigerator before serving.
More Recipes with Candy


Butterfinger Cake
Ingredients
For the cake:
- 1 ½ cups (180 g) all-purpose flour
- 1 teaspoon baking powder
- ½ teaspoon baking soda
- ½ teaspoon salt
- 10 tablespoons (141 g) unsalted butter, softened
- 1 ¼ cups (250 g) granulated sugar
- 2 large eggs
- 4 ounces (113 g) unsweetened chocolate , melted and slightly cooled
- 1 teaspoon vanilla extract
- ½ cup (120 ml) buttermilk
For the topping and frosting:
- 14 ounces (397 g) sweetened condensed milk
- 1 cup caramel topping
- 4 1.9-ounce (54 g) Butterfinger candy bars, roughly chopped
- 8 ounces (226 g) cream cheese, at room temperature
- 2 tablespoons creamy peanut butter
- ¾ cup (83 g) confectioners’ sugar
- 1 ½ teaspoons vanilla extract
- 1 ½ cups (360 ml) heavy cream
Recommended Products
Instructions
To make the cake:
- Preheat oven to 350°F (175°C). Grease a 9” x 13” x 2” baking pan. If you prefer, first line the pan with parchment paper.
- Whisk together the flour, baking powder, baking soda, and salt. Set aside.
- Using an electric mixer on medium speed, beat the butter, and sugar until light and fluffy. Add the eggs one at a time, mixing well after each addition. Mix in the cooled chocolate and vanilla.
- Reduce mixer speed to low. Add the flour mixture in three portions, alternating with two portions of the buttermilk. Mix just until combined.
- Transfer the batter to the prepared pan and spread evenly. Bake 25 to 40 minutes, or until a pick inserted into the center comes out clean.
- Place the pan on a wire rack, and allow the cake to cool for 10 minutes. Then use a skewer, the end of a mixer beater, or the end of a wooden spoon to poke holes about 3/4 inches apart all over the surface of the cake.
To make the frosting:
- Mix together the condensed milk and caramel. Spoon or pour over the warm cake. Spread as needed to cover the entire cake. Allow the cake to cool completely.
- Sprinkle half of the Butterfinger pieces over the cooled cake.
- Using an electric mixer on medium speed, beat the cream cheese and peanut butter until creamy. (You can use a regular beater attachment or a whisk attachment.) Add the sugar and vanilla, and continue mixing until thoroughly combined and smooth.
- Switch to a whisk attachment, and mix on low speed as you slowly, steadily add the cream. Then increase the mixer speed to high and mix until stiff peaks form.
- Spread the frosting on top of the cake. Sprinkle the remaining Butterfinger pieces over the frosting.
Video
Notes
- Store in an airtight container in the refrigerator up to 4 days.


