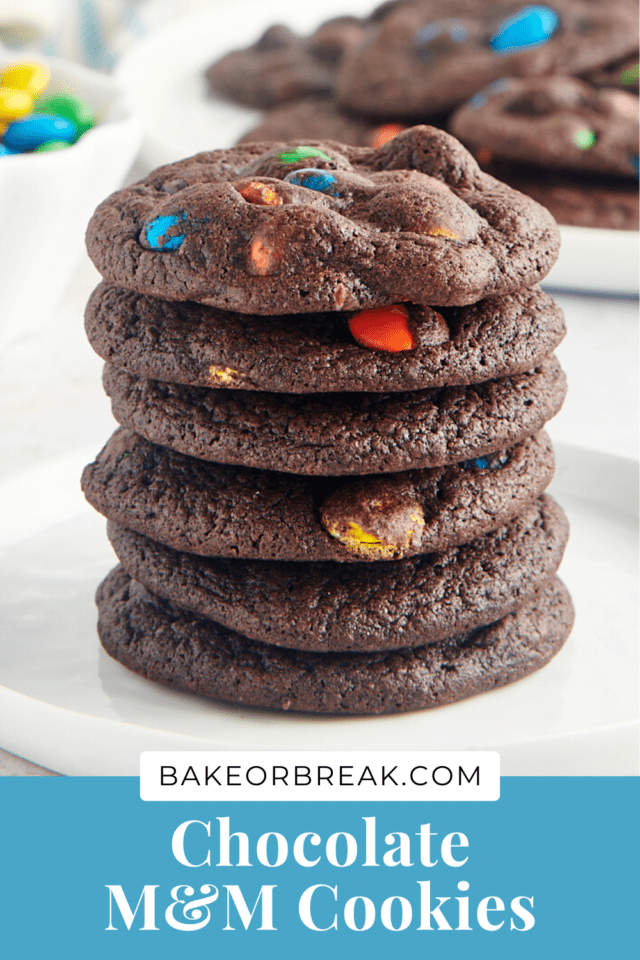
Chocolate M&M Cookies are wonderfully soft, fudgy, and fun! The dark chocolate cookies are a perfect backdrop for those colorful candies!

Soft, Fudgy Chocolate M&M Cookies
There are some treats that seem to be irresistible to everyone, and M&Ms fall firmly into that category. For us bakers, they’re a terrific add-in that you can use much like you would chocolate chips.
With this recipe, those colorful candies are mixed into the softest, fudgiest chocolate cookies for a serious chocolate indulgence. Undoubtedly, these cookies are an excellent choice when you’ve got a big chocolate craving.
If you’re making these cookies for a holiday or other special occasion, use M&M colors to suit the occasion. They’re sure to get snatched up in a hurry!
For those of you who share my M&M cookie love, try Big Chewy M&M Cookies, M&M Sugar Cookie Bars, and Christmas M&M Cookies, too!
What You’ll Need
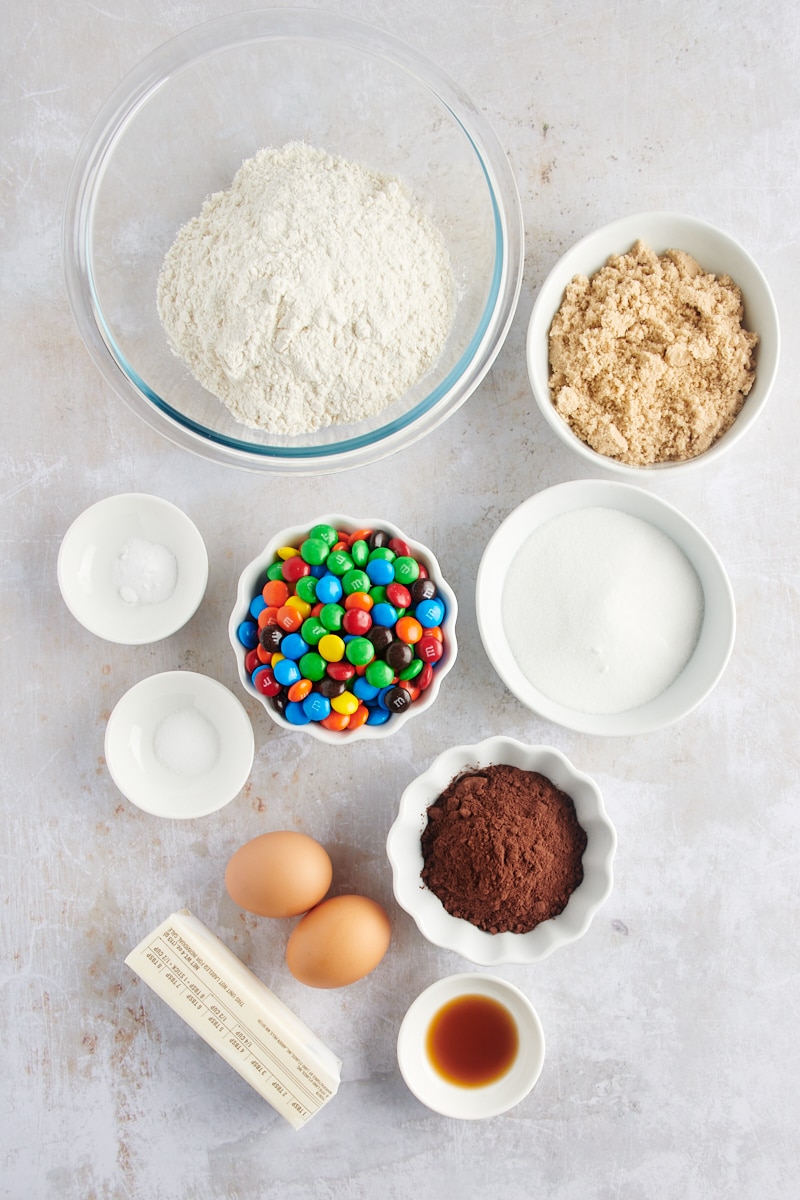
Along with the M&Ms, you’ll just need the basics for making a batch of these cookies. See the recipe card at the bottom of this post for ingredient quantities and full instructions. Here’s a list of what you’ll need with some helpful notes.
- All-purpose flour – As always, measure by weight or use the spoon and sweep method. Learn more: How to Measure Flour
- Cocoa powder – Use a good quality unsweetened natural cocoa powder. If yours is lumpy, be sure to sift it.
- Baking soda
- Salt
- Unsalted butter – Let the butter soften before mixing. It should hold a thumbprint when pressed and still be cool. Learn more: How to Soften Butter
- Granulated sugar
- Brown sugar – Using a bit of brown sugar helps makes these cookies super soft. I like light brown sugar here instead of the bolder flavor of dark brown sugar.
- Eggs – Allow these to come to room temperature before mixing.
- Vanilla extract
- M&Ms – I usually use plain M&Ms, but feel free to use another flavor variety if you like. The cookies in these photos were made with just regular ones, but you can use the mini size instead.
How to Make Chocolate M&M Cookies
These cookies mix quickly and easily, making them a great baking project for bakers of all skill levels. Now, let’s get baking!
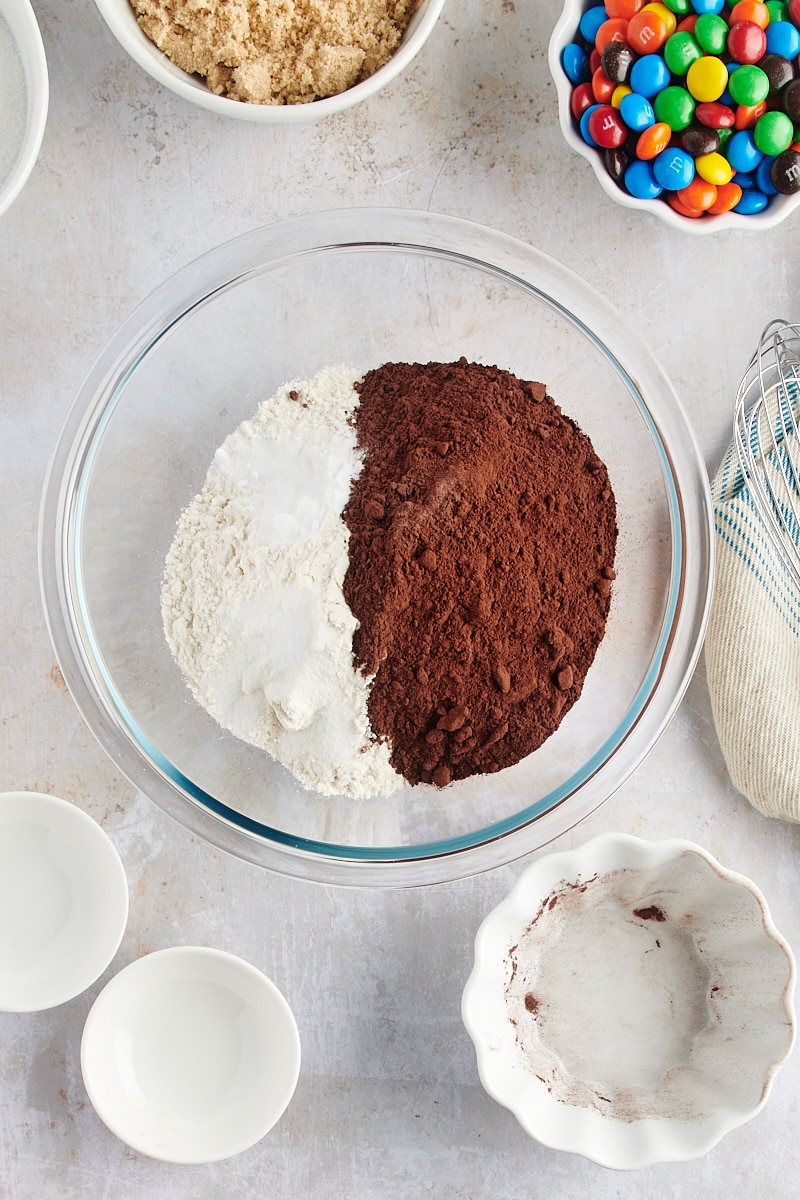
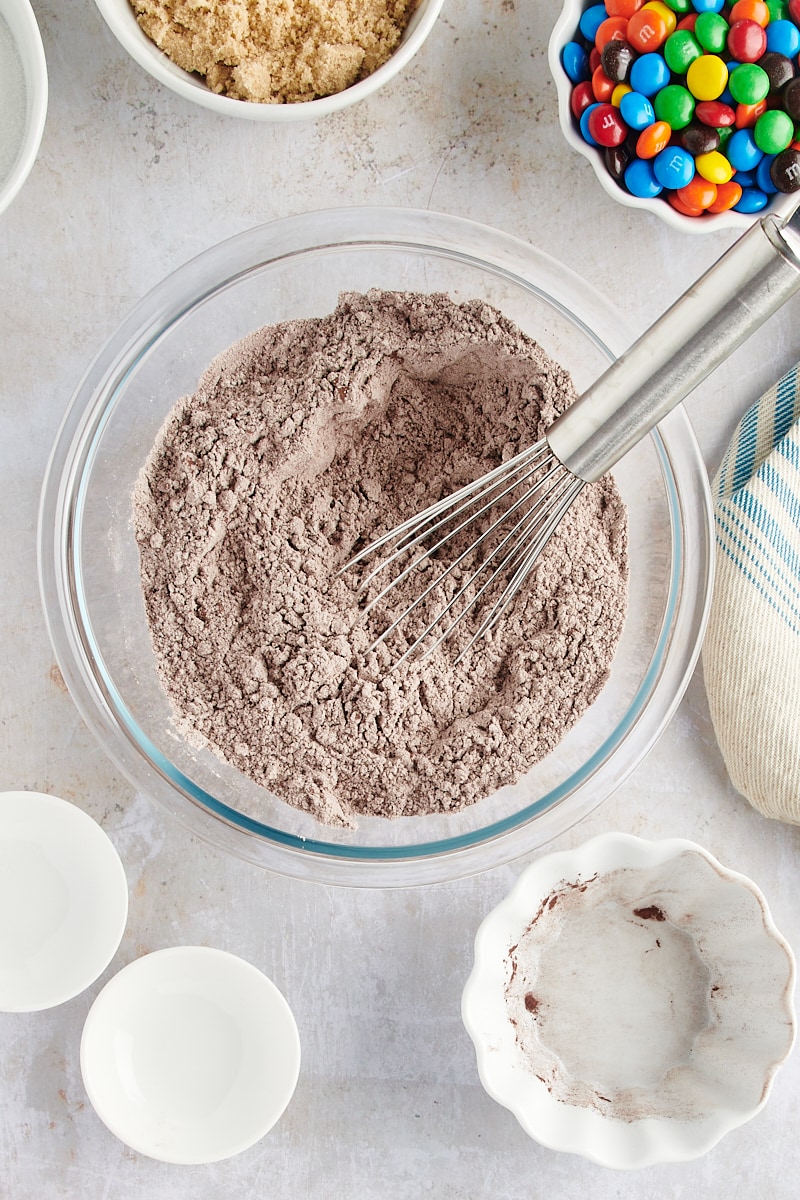
Combine the dry ingredients. Whisk together the flour, cocoa powder, baking soda, and salt.
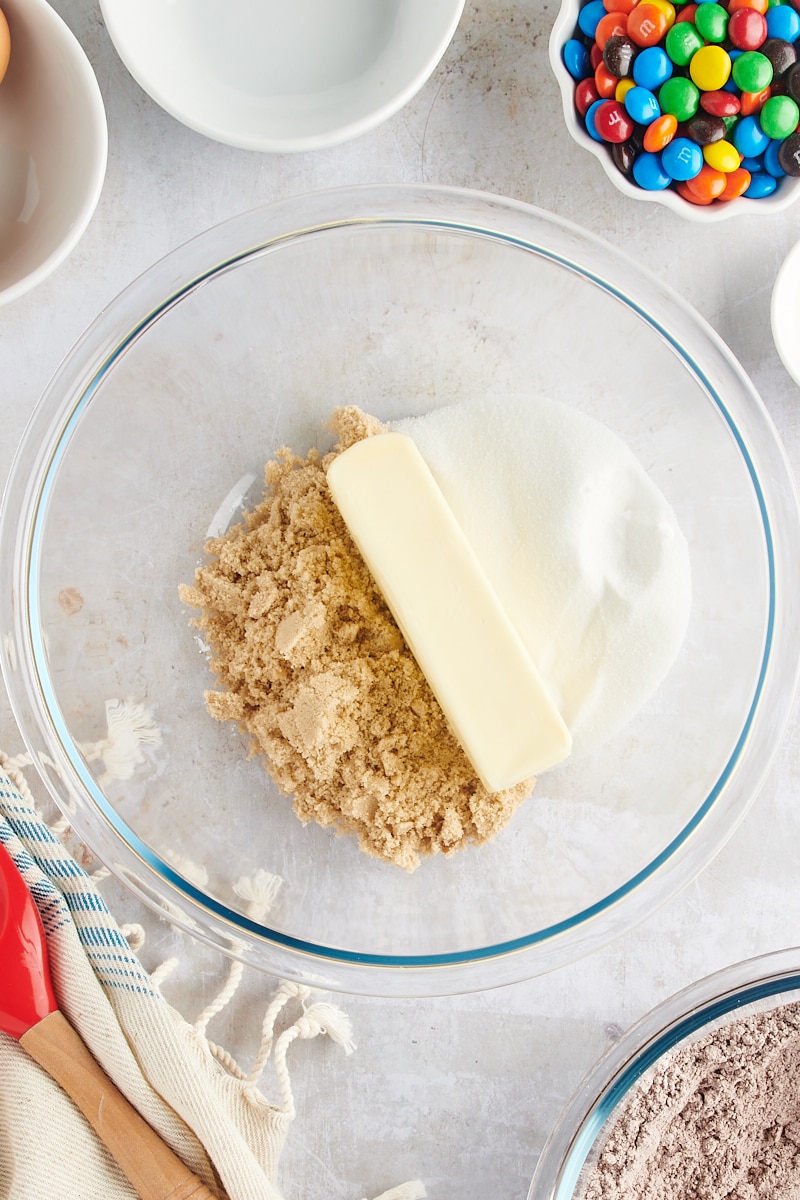
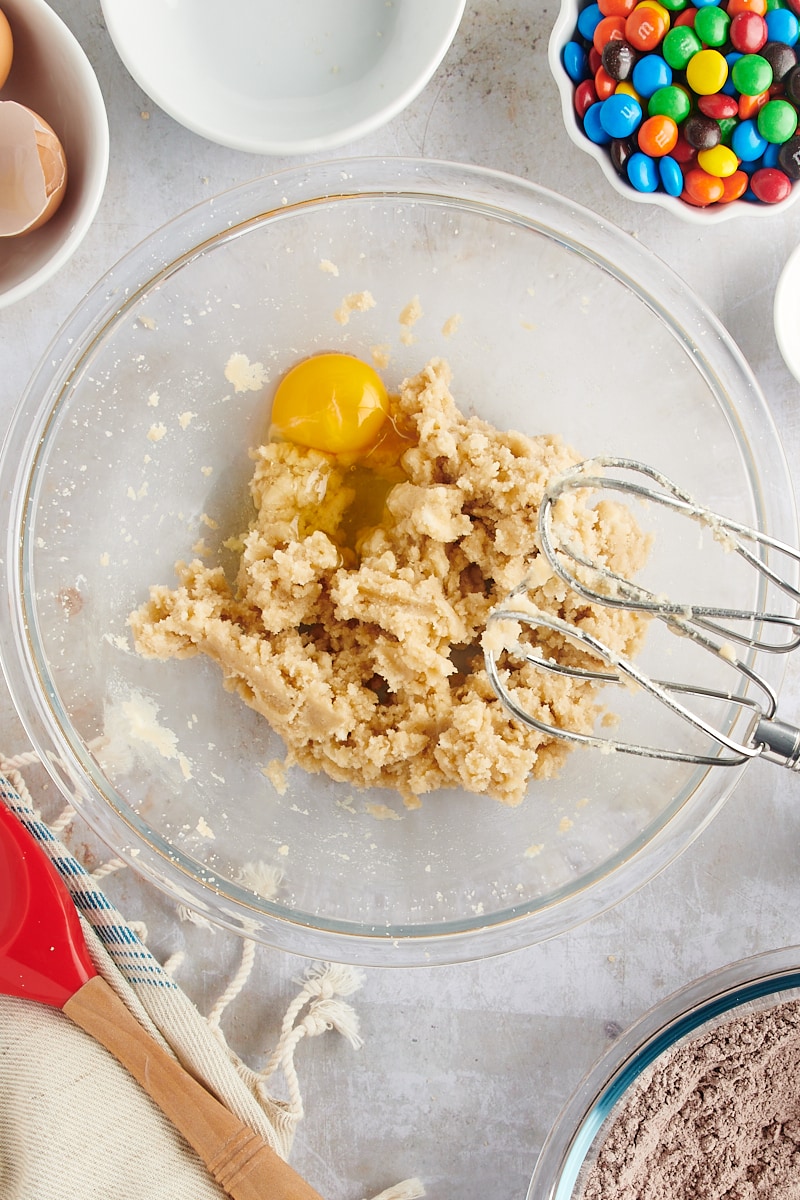
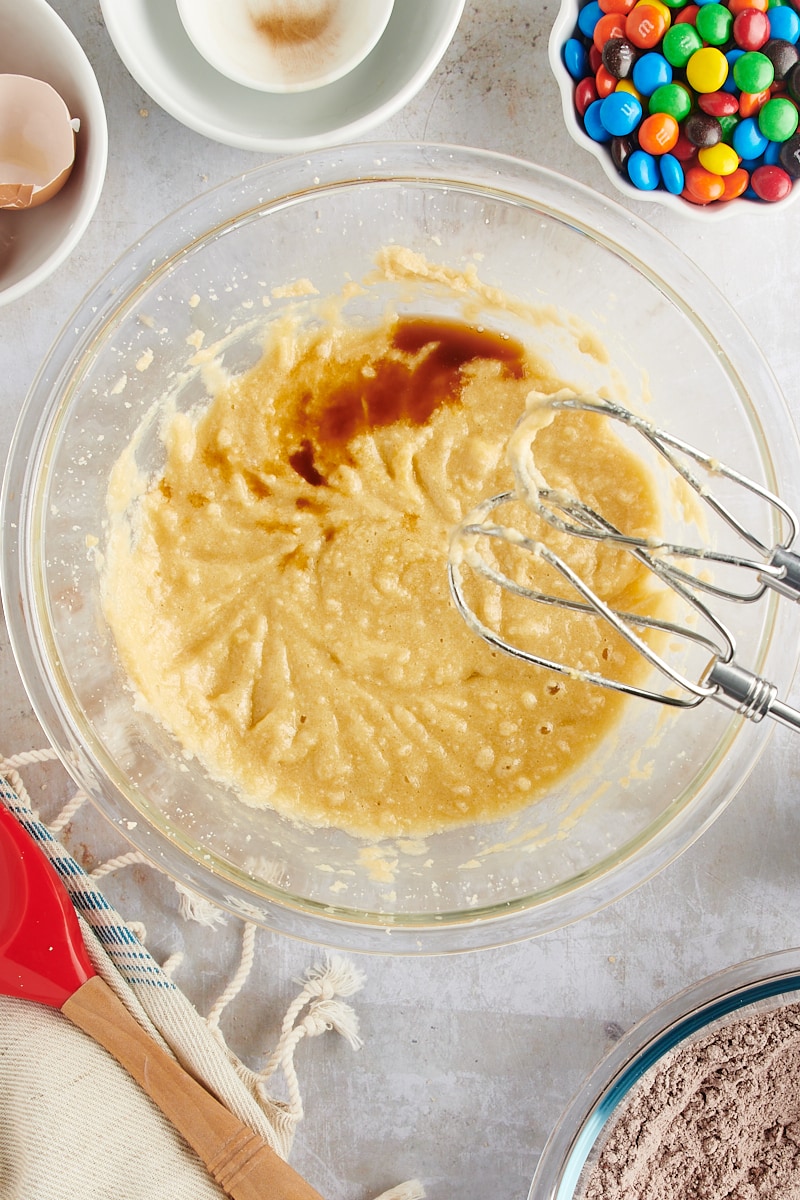
Combine the wet ingredients. In a large mixing bowl, beat the butter, sugar, and brown sugar with an electric hand mixer or stand mixer until fluffy and lightened in color. Next, add the eggs one at a time, mixing well after adding each. Finally, mix in the vanilla.
Add the dry ingredients to the wet ingredients. With the mixer speed on low, gradually add the flour mixture, mixing just until combined or a few streaks of flour remain.
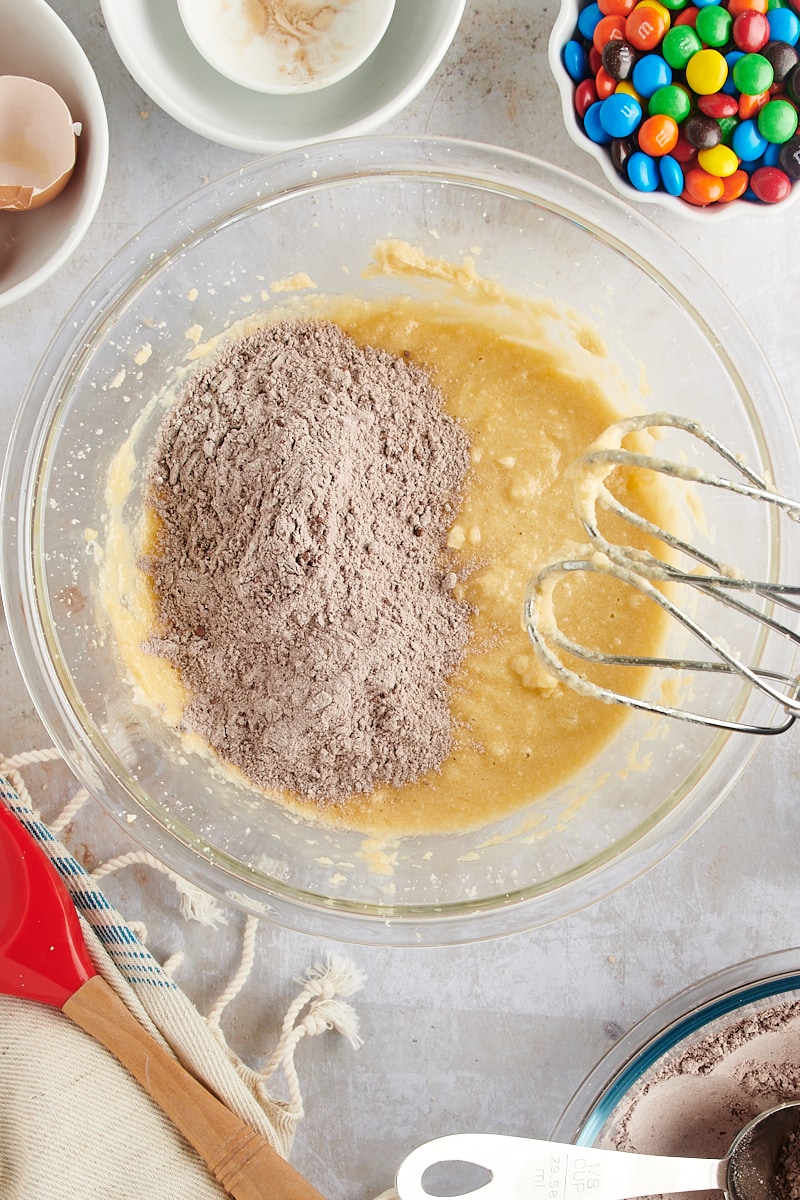
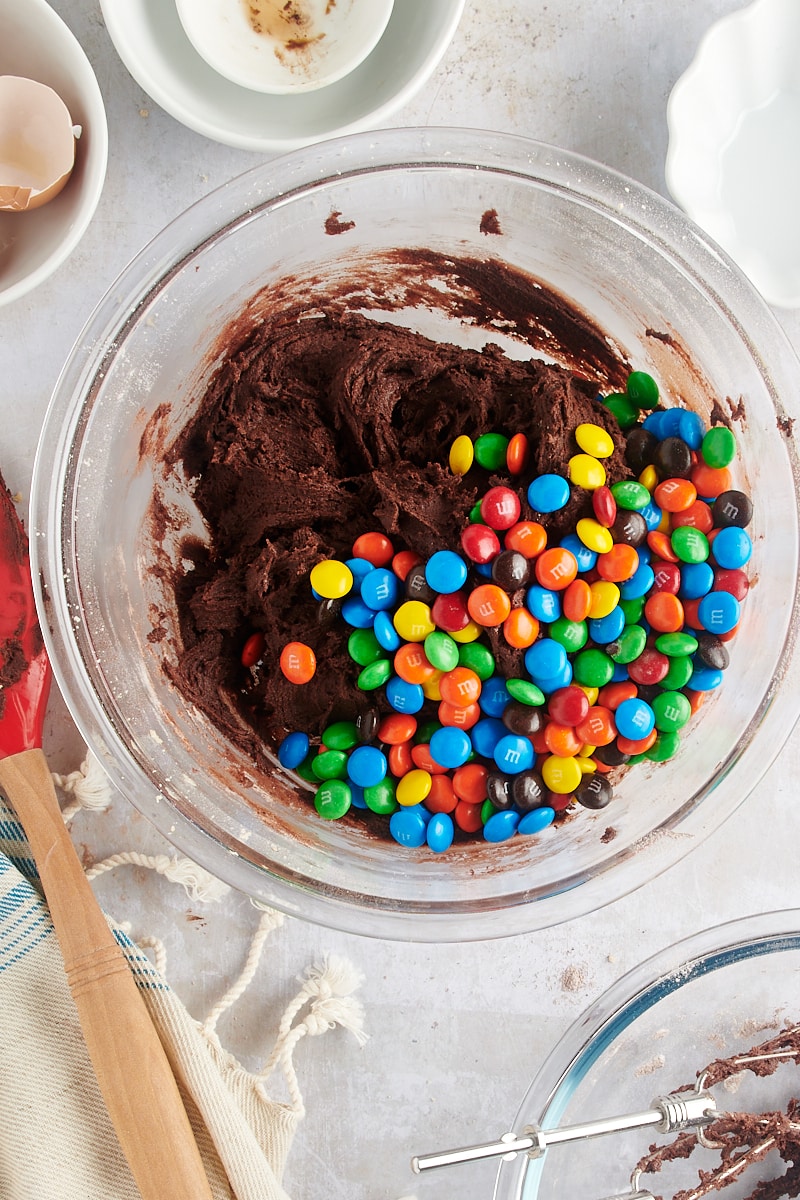
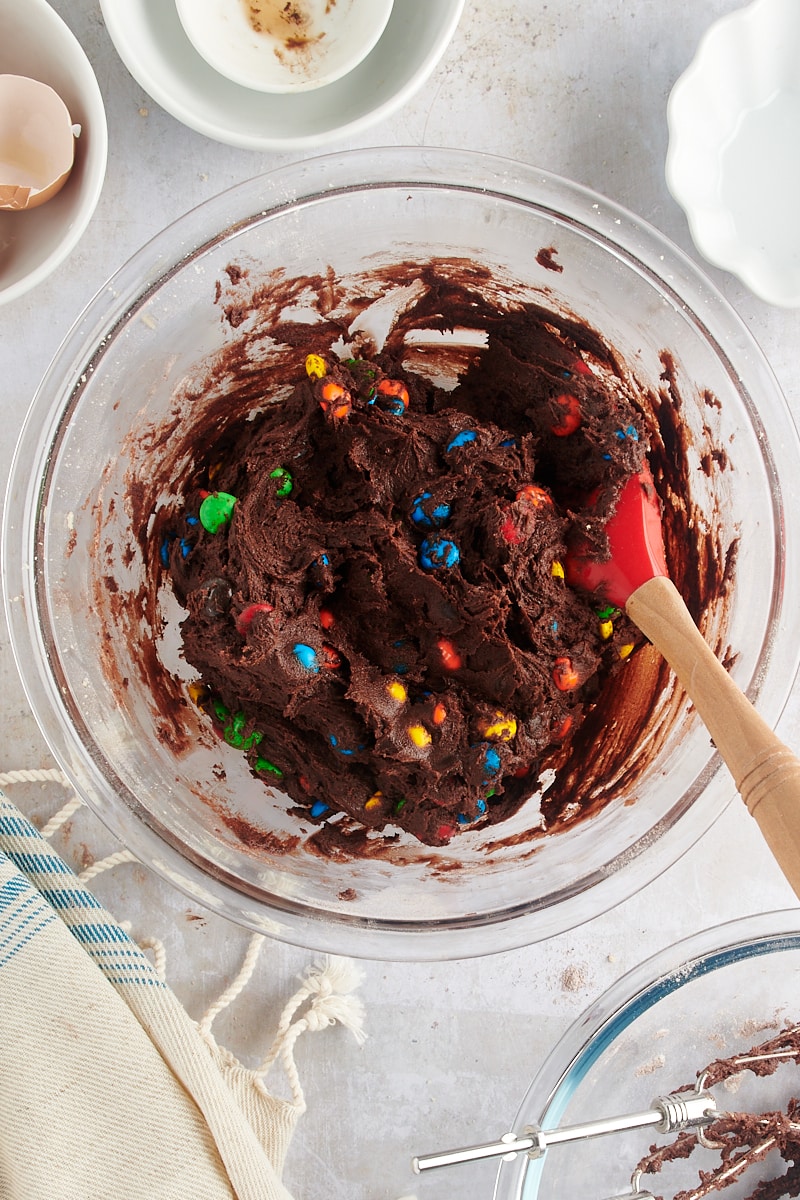
Add the M&Ms. Gently fold the M&Ms into the dough. If you like, save a handful of the M&Ms to press into the dough once it’s portioned so more of them are visible in the cookies.
Chill. Cover and refrigerate the cookie dough for 30 to 60 minutes. It should be cool and easy to handle.
Prepare for baking. Heat the oven to 350°F. Line baking sheets with parchment paper or silicone liners.
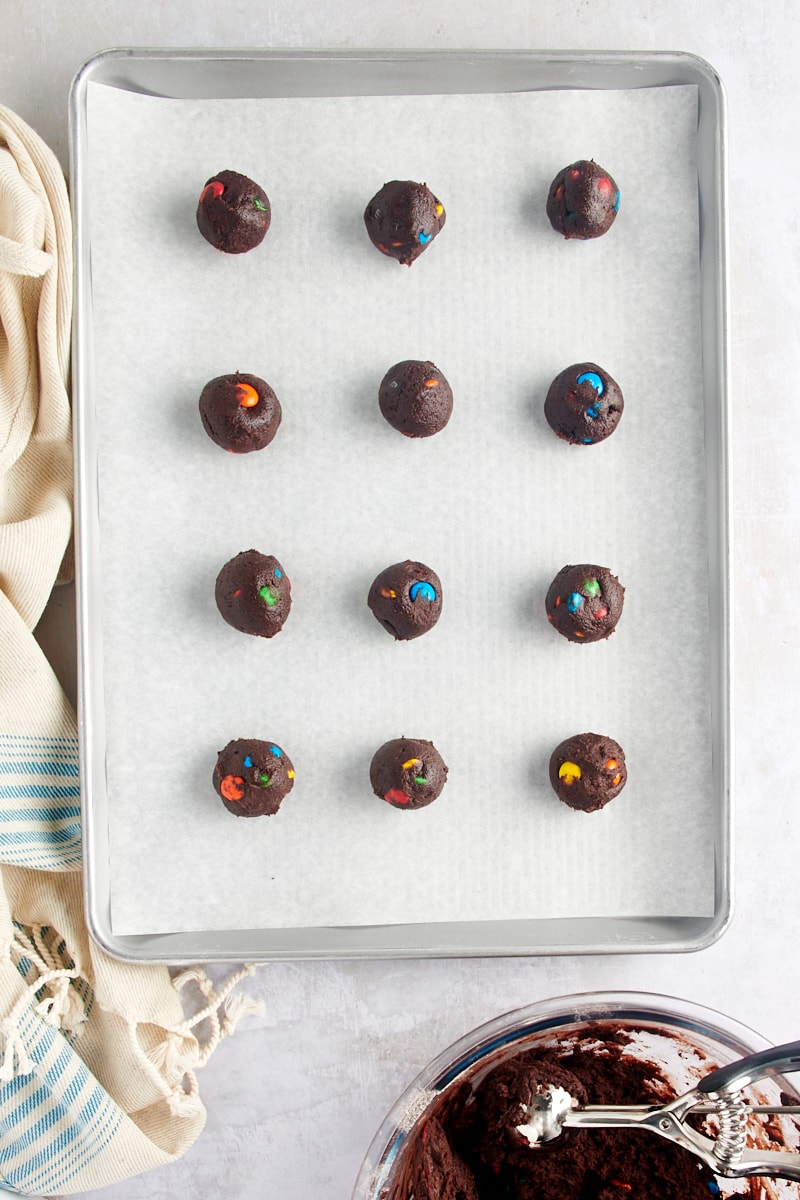
Portion. Scoop the dough in 2-tablespoon portions, and roll the dough between your hands to shape the dough into balls. Next, place the cookie dough balls on the prepared pans, leaving about 2 inches between each cookie. If you set aside any M&Ms to add to the outside of the dough balls, add those now.
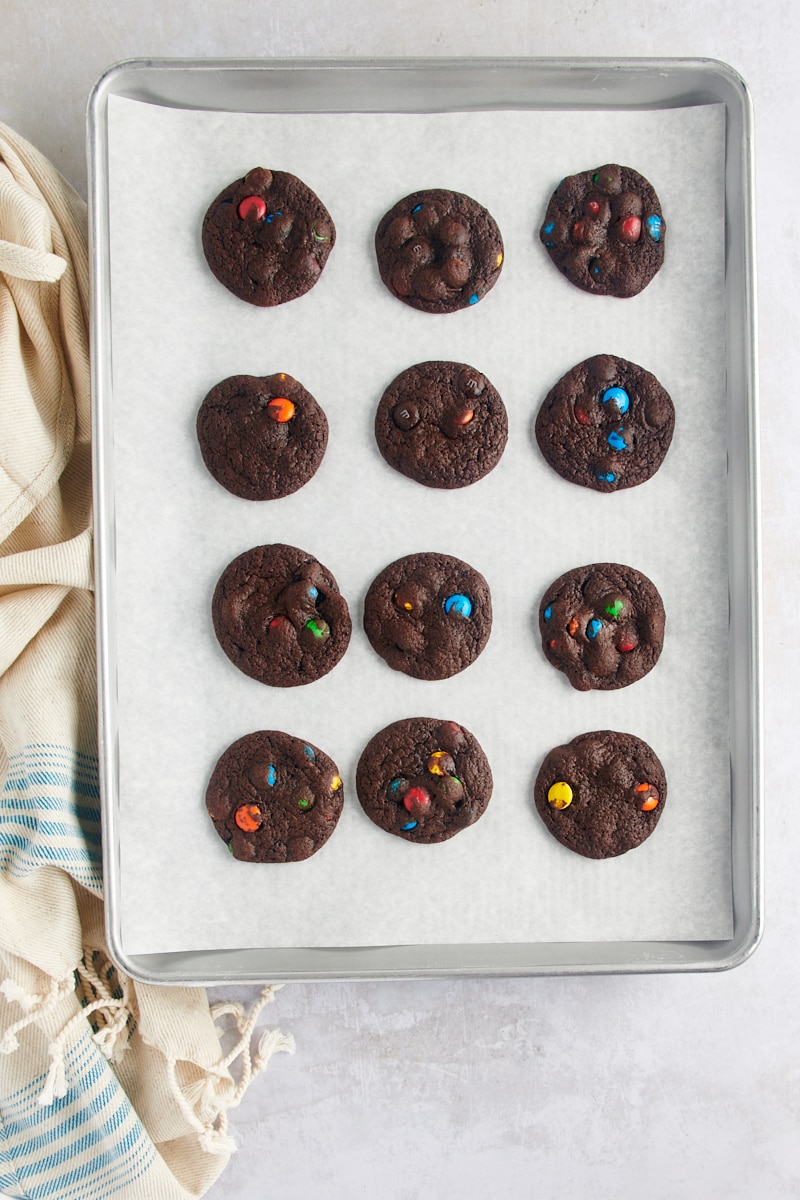
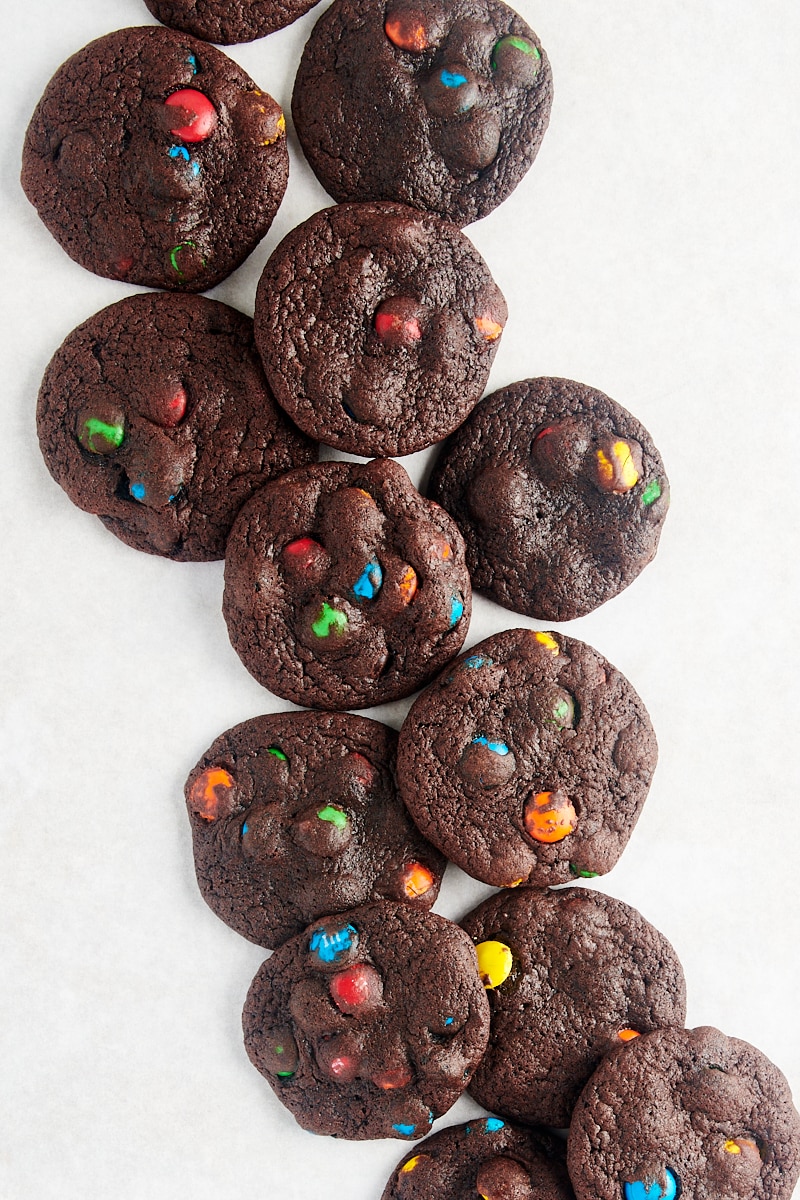
Bake. Place one baking pan in the oven, and bake for 8 to 10 minutes. When they’re ready to come out of the oven, the cookies should appear set and dry. Repeat with the remaining cookie dough.
Cool. Place the pans on wire racks and allow to cool for 5 to 10 minutes. Then transfer the cookies from the pans directly to a wire cooling rack to continue cooling. The cookies are very soft, so be gentle with them while they’re warm. A cookie spatula is very helpful.

Tips for Success
I think you’ll find this cookie recipe easy and straightforward. Here are some tips to help make sure yours turn out perfectly.
- Use good quality cocoa powder. There’s a lot of chocolate flavor here, so you’ll get the best results from a good cocoa powder.
- Don’t skip the chilling time. This dough will handle much better after it’s been refrigerated for even just 30 minutes. You may need a bit more time, depending on how warm your kitchen is. That chill time will help keep the cookies from spreading too much while baking, too. Be sure to keep the dough refrigerated between baking batches.
- Use a cookie scoop. A scoop will help make quick work of portioning the dough, while ensuring that all of your cookies are the same size. That means even, thorough baking. I use a #30 scoop for these cookies.

How to Store Leftovers
After the cookies have cooled completely, place them in an airtight container. To keep them looking their best, place a layer of waxed paper or parchment paper between layers. They should keep at room temperature up to 3 days.
How to Freeze These Cookies
Place the cooled cookies in an airtight, freezer-safe container or zip-top bag. Place waxed paper or parchment paper between layers. Properly stored, the cookies should keep up to 3 months in the freezer. When you’re ready to serve, thaw the cookies at room temperature for a couple of hours.


Chocolate M&M Cookies
Ingredients
- 1 ¾ cups (210 g) all-purpose flour
- ½ cup (42 g) unsweetened natural cocoa powder
- ½ teaspoon baking soda
- ½ teaspoon salt
- ½ cup (113 g) unsalted butter, softened
- ½ cup (100 g) granulated sugar
- ½ cup (100 g) firmly packed light brown sugar
- 2 large eggs
- 1 teaspoon vanilla extract
- 1 cup M&Ms
Recommended Products
Instructions
- Whisk together the flour, cocoa powder, baking soda, and salt. Set aside.
- Using an electric mixer on medium speed, beat the butter, sugar, and brown sugar until light and fluffy. Add the eggs, one at a time, mixing well after each addition. Mix in the vanilla.
- Reduce mixer speed to low. Gradually add the flour mixture to the butter mixture, mixing just until combined or a few small streaks of flour remain.
- Gently stir in the M&Ms. If you like, save a handful to add to the outside of the rolled cookie dough balls before baking.
- Cover and refrigerate the cookie dough for 30 to 60 minutes, or until the dough is cool and easy to handle.
- Preheat the oven to 350°F (175°C). Line baking sheets with parchment paper or silicone liners.
- Using 2 tablespoons of dough at a time (I use a #30 scoop), roll the dough into balls. Place them on the prepared pans, leaving about 2 inches between each cookie. Add any reserved M&Ms to the outside of the cookies.
- Bake (one pan at a time) 8 to 10 minutes, or until the cookies appear set.
- Cool the cookies on the pan on a wire rack for 5 to 10 minutes. Then carefully transfer the cookies from the pan directly onto a wire rack to cool completely.
Notes
- Store leftovers in an airtight container at room temperature up to 3 days or in the freezer up to 3 months. Place parchment paper or waxed paper between layers.


