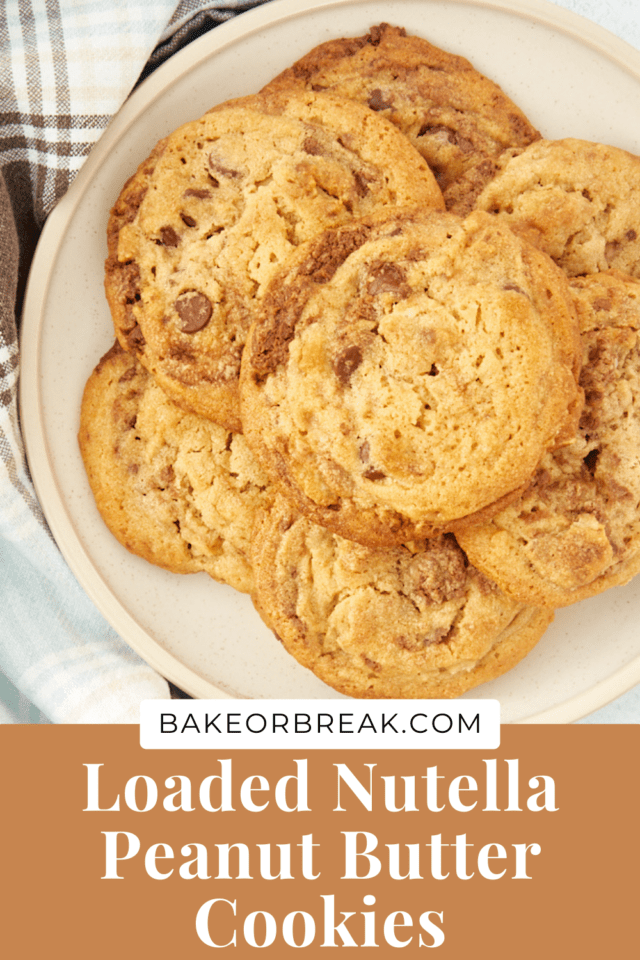
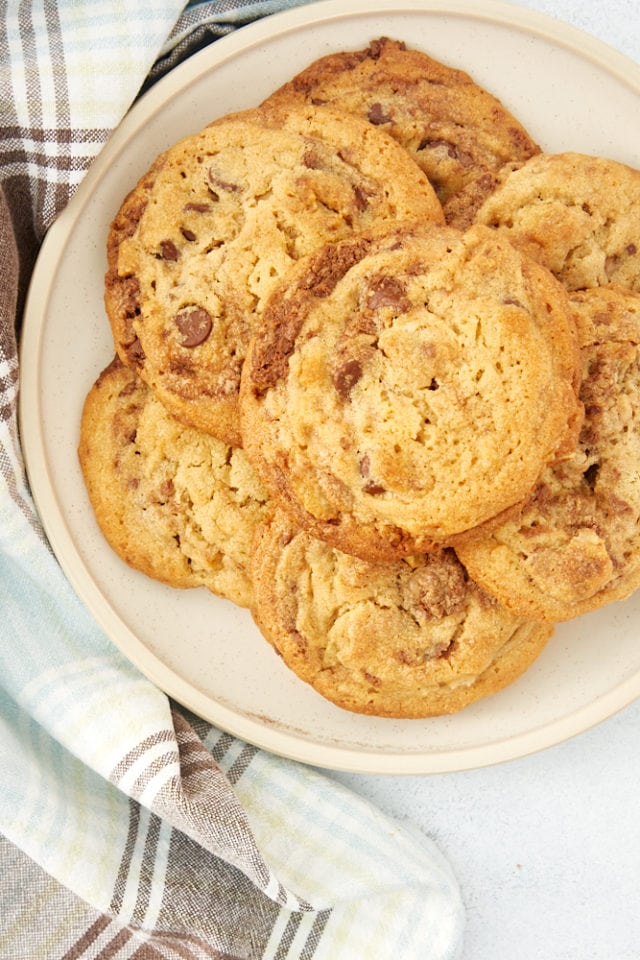
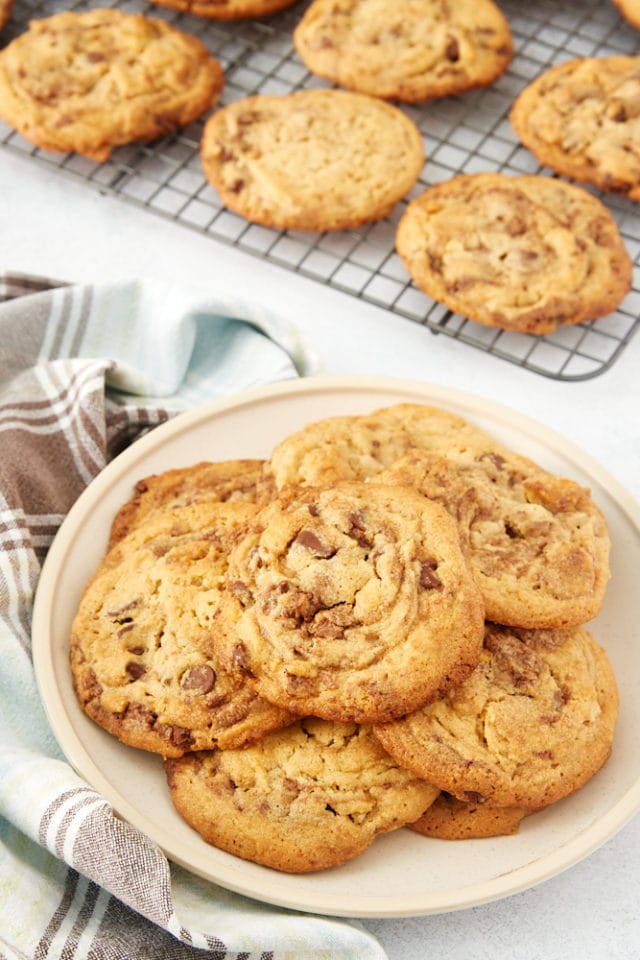
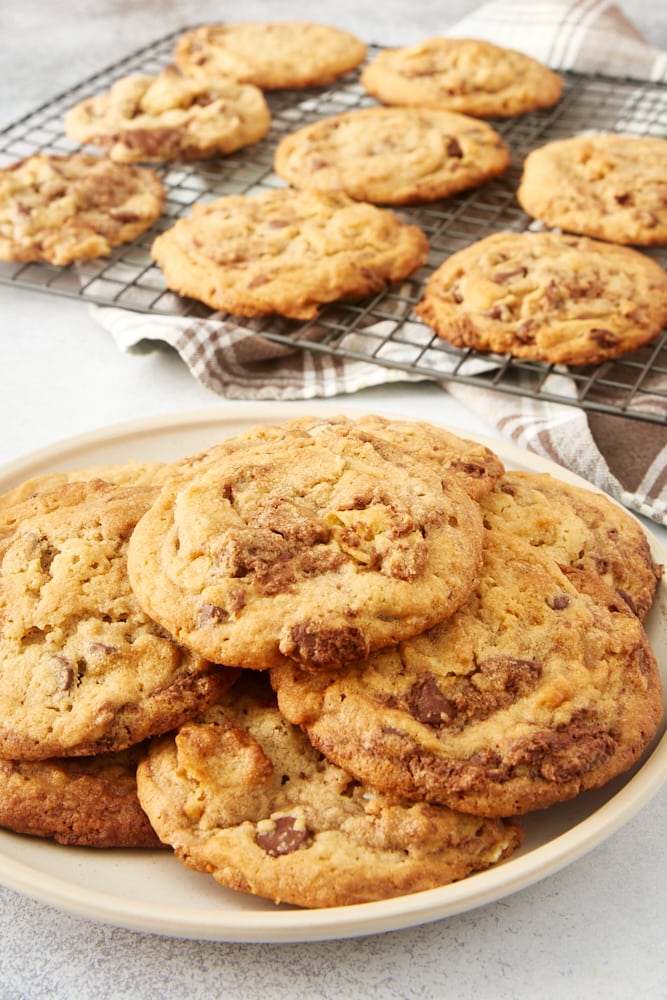
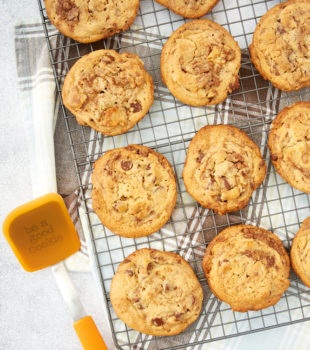
These Nutella Peanut Butter Cookies are jam-packed with so much flavor, crunch, and deliciousness. They’re over-the-top cookies that are still easy to make and are completely irresistible!
Easy Nutella Peanut Butter Cookies
Simple flavors are great, but sometimes you just want to go big. That’s exactly what’s happening with these Nutella Peanut Butter cookies.
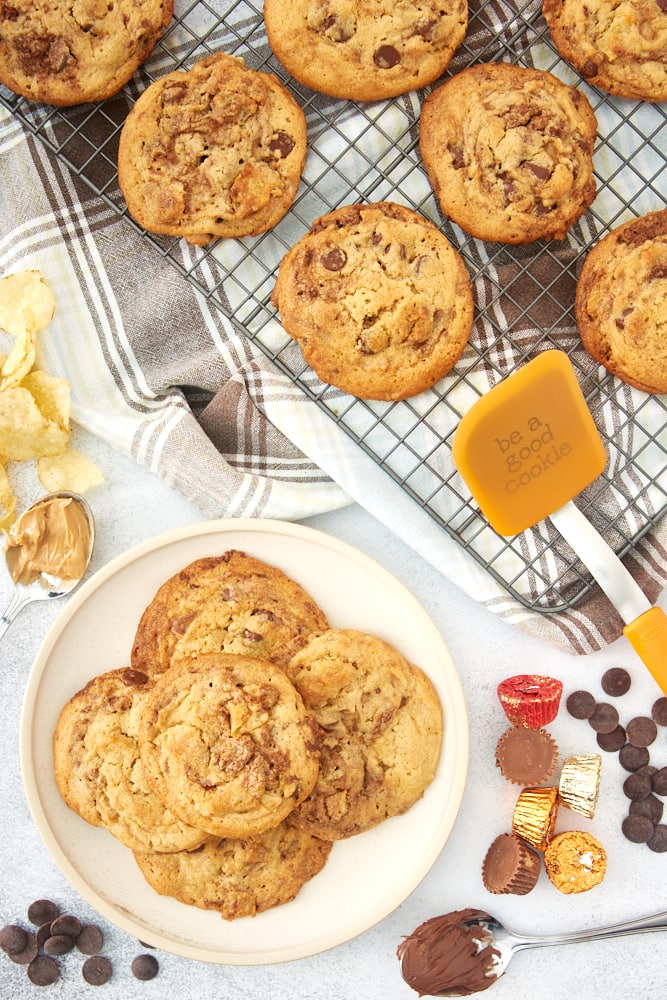
They’re big, soft peanut butter cookies swirled with Nutella and filled with all kinds of good things – chocolate chips, toffee bits, potato chips, and peanut butter cups. Whew. These guys are certainly not short on flavor, making them deliciously indulgent.
What I Love About These Peanut Butter Cookies
At their heart, these are simple, soft peanut butter cookies. But they’re just the basic building block to start making some incredibly delicious, flavor-packed cookies.
The salty bite of potato chips adds a lot of interest, while the chocolate and peanut butter cups add more traditional flavors, and the toffee bits add flavor and crunch. While I adore the flavor combination I use in these cookies, you can add most anything you like to them so that they suit your tastes.
And if you’re in the mood for something more traditional, try Classic Peanut Butter Cookies or 3-Ingredient Peanut Butter Cookies.
Cookie Ingredients
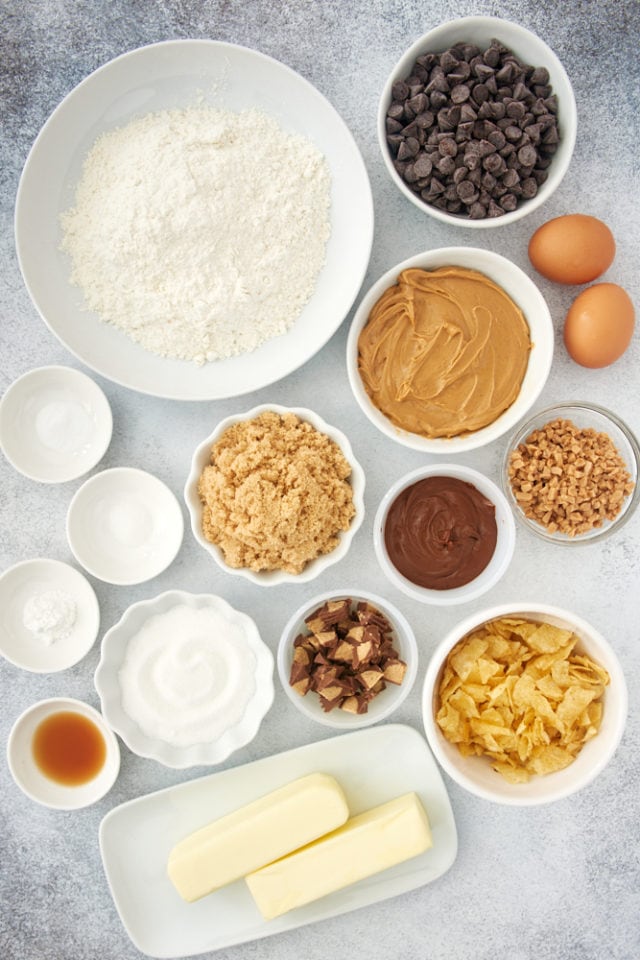
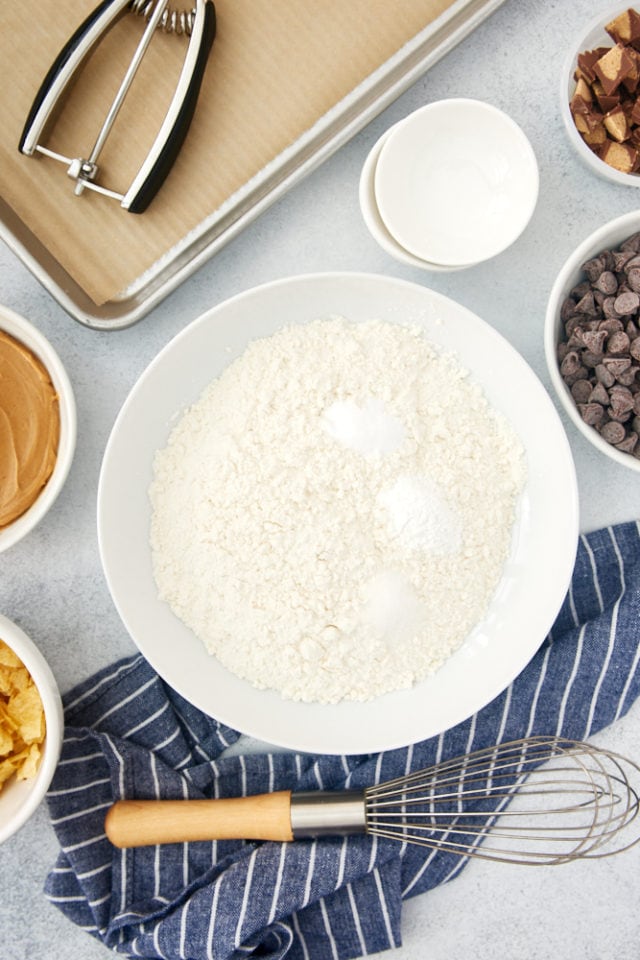
Besides basic baking ingredients, you’ll need your favorite add-ins to make these Loaded Nutella Peanut Butter Cookies.
- All-purpose flour – Measure by weight or use the spoon and sweep method. Learn more: How to Measure Flour
- Baking powder
- Baking soda
- Salt
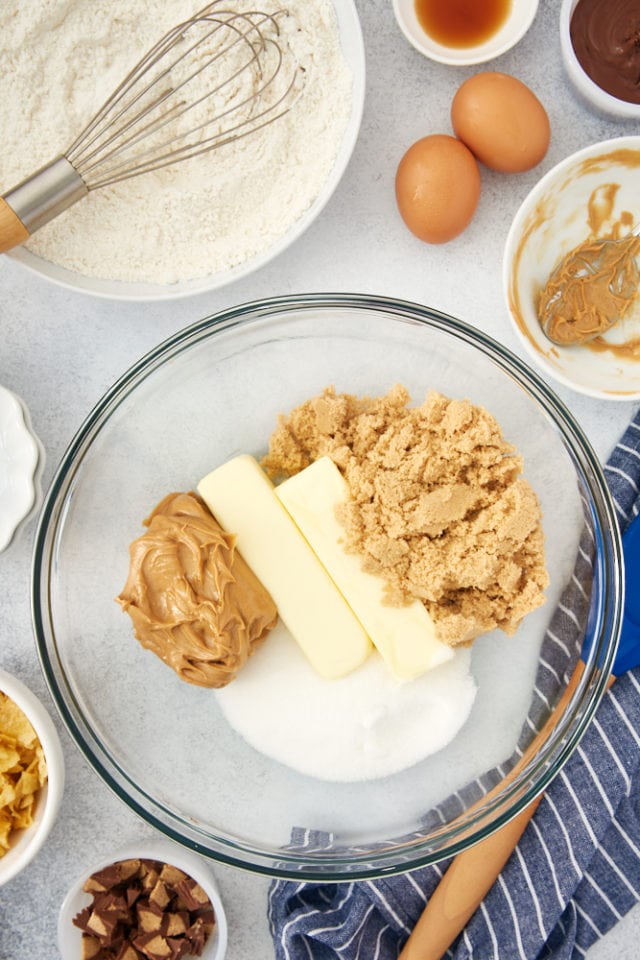
- Butter – I always bake with unsalted butter. The butter needs to be softened, so set it out a half hour or so before baking. (See How to Soften Butter for more info.)
- Peanut butter – For baking, I prefer regular peanut butter. Use natural peanut butters with caution, as they are likely to work quite differently.
- Brown sugar – Light or dark brown sugar is fine. Make sure yours is firmly packed in the measuring cup, or measure by weight for consistent results.
- Granulated sugar
- Eggs
- Vanilla extract
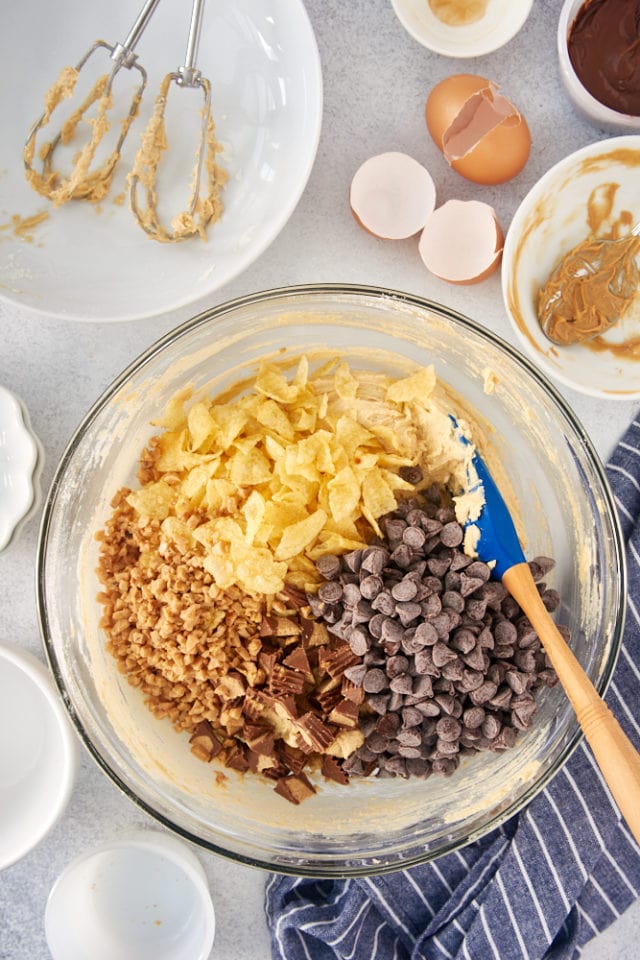
- Add-ins – Have fun with these! For the cookies you see here, I added chocolate chips, chopped peanut butter cups, toffee bits, and potato chips. (Kettle chips work great in baking because they keep their crunch!)
- Chocolate-hazelnut spread – The most common brand is Nutella, but any similar product should work.
How to Make Nutella Peanut Butter Cookies
These cookies mix quickly and easily with a little extra effort from all the additional flavors mixed into the dough. You’ll need an electric mixer, a couple of mixing bowls, and two or three half sheet pans or cookie sheets. I also recommend using a cookie scoop for portioning the dough.
Combine the dry ingredients. Whisk together the flour, baking powder, baking soda, and salt.
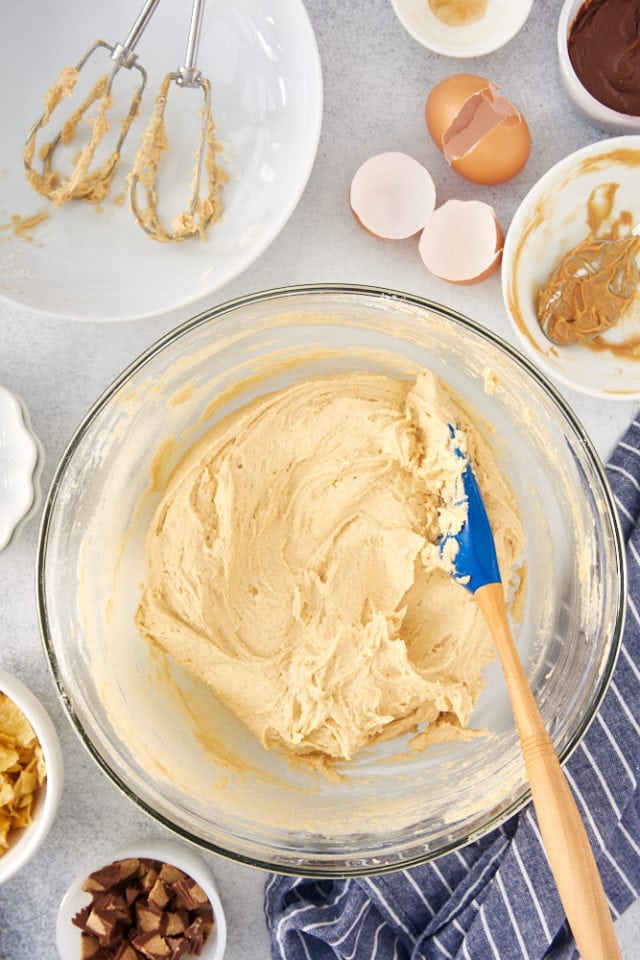
Mix the wet ingredients. Beat the butter, both sugars, and the peanut butter using a hand or stand mixer. Once that mixture is lightened and fluffy, add the eggs (one at a time) and then the vanilla. Be sure to scrape down the sides of the bowl as needed.
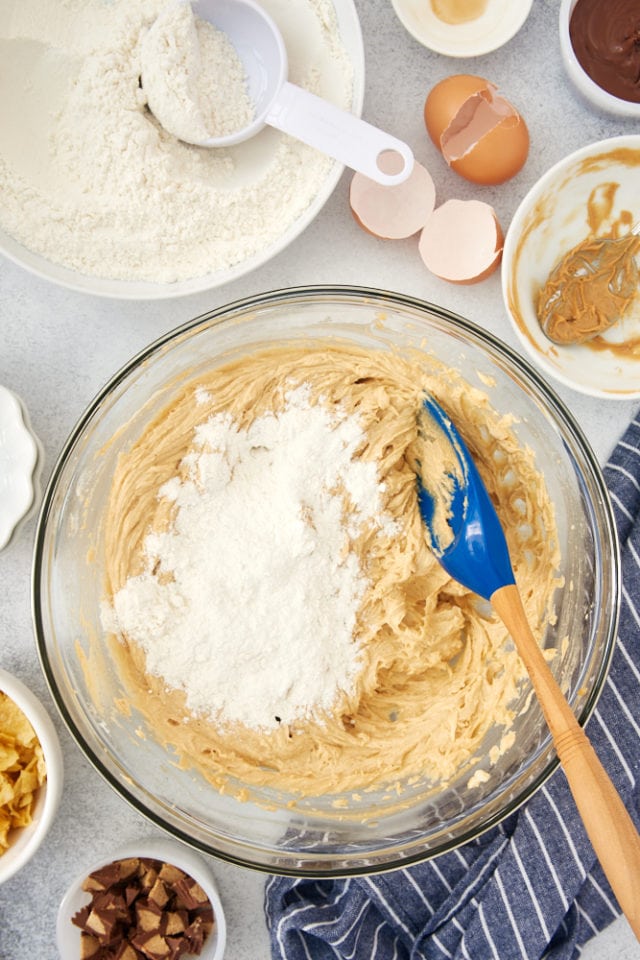
Mix the dry ingredients with the wet ingredients. Using your mixer on low speed, gradually add the flour mixture to the butter mixture. Mix just until you see a few streaks of flour remaining. That will allow you to finish mixing the dough without over-mixing it when you stir in the other ingredients.
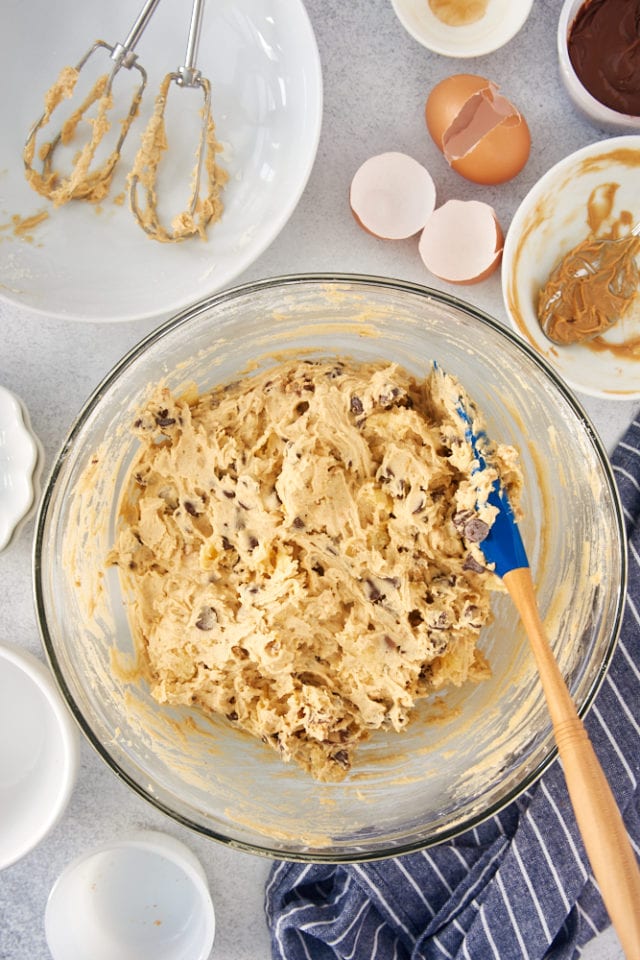
Stir in the add-ins. Gently mix in all of your add-ins. You should now no longer see any streaks of flour in the dough.
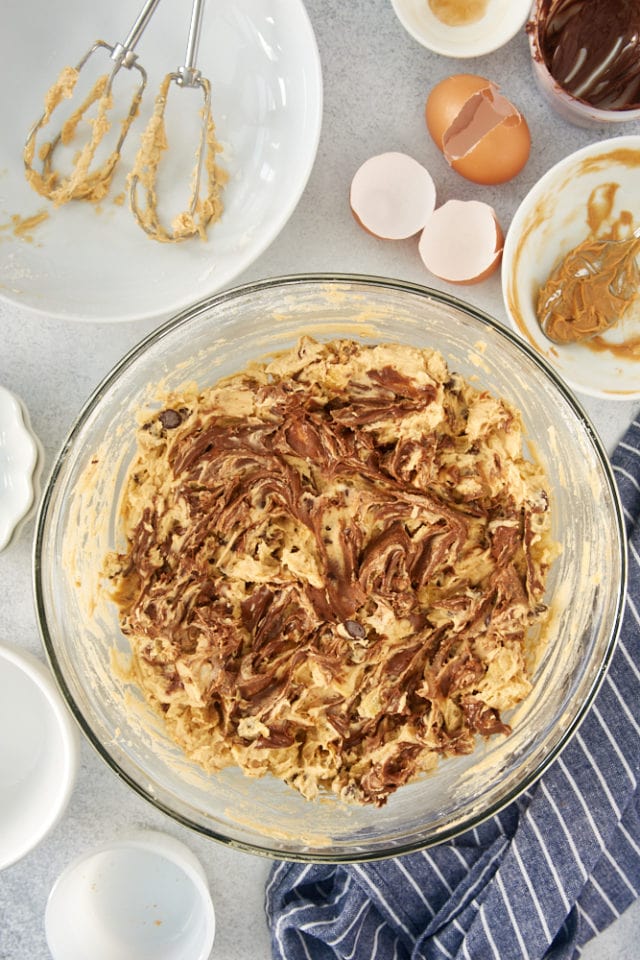
Swirl the Nutella into the dough. Dollop the Nutella by small amounts over the top of the dough. Use a thin knife or spatula to swirl it lightly into the dough. Use an up-and-down motion to get it swirled into all of the dough as best you can. Don’t overdo it.
Chill the dough. Cover and refrigerate the dough for at least an hour before scooping and baking. This allows the dough time to rest, the Nutella time to set, and the flavors to distribute. You can even make the dough the day before you’re planning to bake it to allow additional chilling time. If the dough is difficult to scoop after a long chilling time, let it sit at room temperature for about 10 minutes to soften it a bit.
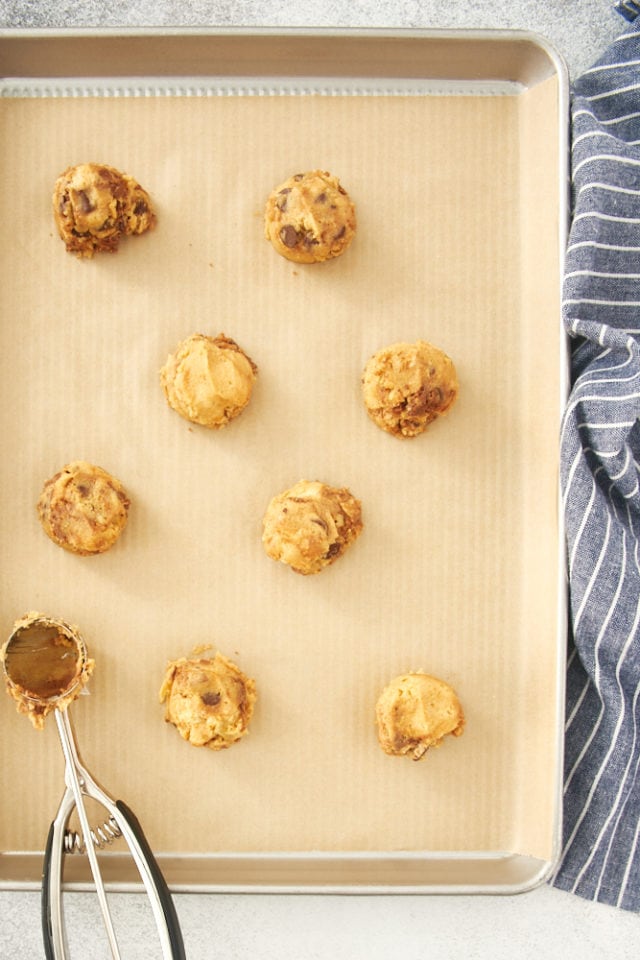
Bake the cookies. Heat the oven to 350°F, and line baking sheets with parchment paper or silicone liners. Drop the dough by 3-tablespoon portions onto the pans. I like to use a cookie scoop for portioning so that it’s quicker and the cookies are all the same size. These cookies spread quite a bit, so be sure to leave sufficient room between them.
Tips for Success
Here are a few tips to help make sure your Nutella Peanut Butter Cookies turn out perfectly!
- Keep the swirling to a minimum. Too much swirling, and the Nutella will just mix into the dough. There’s nothing really wrong with that, but the cookies do tend to look less appealing that way.
- Chill the cookie dough. That time in the refrigerator is important to let the dough rest. It minimizes spreading, lets the Nutella set, and allows the flavors to meld together.
- Use a cookie scoop. A scoop will make your cookie scooping quicker and easier, while helping to ensure even baking. To combat some spreading here, I like to scoop 2 tablespoons of dough and then top that portion with 1 tablespoon of dough, pressing down to flatten the dough ever so slightly. It’s easier to make a taller scoop of dough that way versus with just a 3-tablespoon scoop. Plus, it creates a more interesting final result with lumps and ridges.
- Don’t overcrowd the cookies on the pan. These cookies will spread as they bake, so be sure to leave about 3 inches between them on the pan. Otherwise, you’re likely to end up with a uni-cookie.
- Don’t under-bake the cookies. I’m usually telling you not to over-bake, and that’s still true here. But I am a notorious under-baker and I’m sure many of you are, too. With these soft-baked cookies, not leaving them in the oven long enough can mean they’ll be a lot less sturdy. If you share my tendencies, then fight the urge to take them out of the oven too soon and wait until you see a nice, golden brown.
How to Store Cookies
These cookies should keep in an airtight container at room temperature for up to 3 days. Because these are soft cookies, I recommend storing them in single layers between sheets of wax paper. That should minimize sticking and breaking.
For longer storage, you can freeze these cookies for up to 3 months. You can also freeze the cookie dough for freshly baked cookies for your future self. Get my tips for doing that here: How to Freeze Drop Cookie Dough.
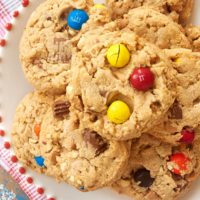
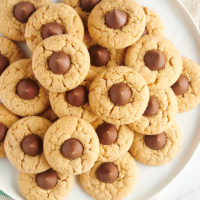
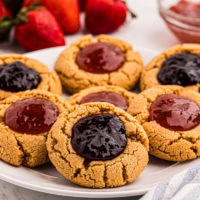
More Peanut Butter Cookie Recipes

Loaded Nutella Peanut Butter Cookies
Ingredients
- 2 cups (240 g) all-purpose flour
- 1 teaspoon baking powder
- ½ teaspoon baking soda
- ¼ teaspoon salt
- 1 cup (226 g) unsalted butter, softened
- ¾ cup (191 g) creamy peanut butter
- ½ cup (100 g) granulated sugar
- ¾ cup (150 g) firmly packed light brown sugar
- 2 large eggs
- 1 ½ teaspoons vanilla extract
- 1 cup (170 g) semisweet chocolate chips
- 1 cup (50 g) potato chips, broken into bite-size pieces
- ½ cup (50 g) peanut butter cups, chopped (about 6 mini cups)
- ½ cup (80 g) toffee bits
- ⅓ cup (93 g) chocolate hazelnut spread, such as Nutella
Recommended Products
Instructions
- Whisk together the flour, baking powder, baking soda, and salt. Set aside.
- Using an electric mixer on medium speed, beat the butter, peanut butter, sugar, and brown sugar until light and fluffy.
- Add the eggs, one at a time, mixing well after each addition. Mix in the vanilla.
- Reduce mixer speed to low. Gradually add the flour mixture, mixing just until a few streaks of flour remain.
- Stir in the chocolate chips, potato chips, peanut butter cups, and toffee bits.
- Dollop the chocolate-hazelnut spread over the top of the dough. Use a thin knife or spatula to swirl the spread gently into the dough.
- Cover and refrigerate the dough for at least an hour up to overnight.
- Preheat oven to 350°F (175°C). Line baking sheets with parchment paper or silicone liners.
- Drop the dough by 3-tablespoon portions onto the prepared pan. (See my note in the Tips for Success section above.) Leave about 3 inches between the cookies.
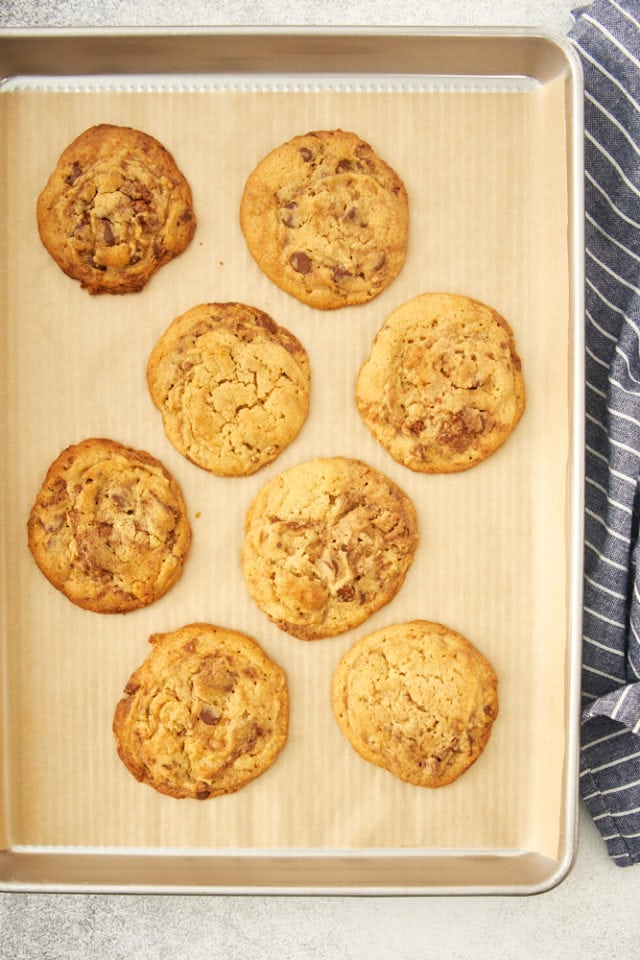
- Bake, one pan at a time, 12 to 15 minutes, or until the cookies are golden brown. (Refrigerate remaining dough between batches.)
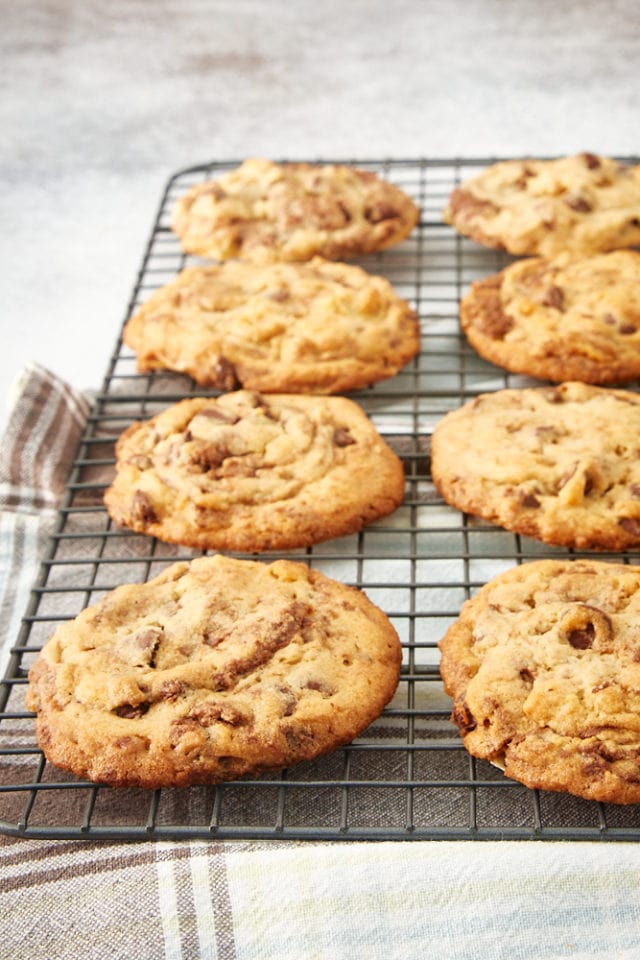
- Cool the cookies on the pans on wire racks for 10 minutes. Then transfer the cookies from the pan to a wire rack to cool completely.
Notes
- These are soft-baked cookies, so be sure not to under-bake them or they may not hold together well.
- Store in an airtight container at room temperature up to 3 days.


3 Comments on “Loaded Nutella Peanut Butter Cookies”
Omgoodness, these look and sound AMAZING!!! I’m running to the store shortly to get the couple ingredients I don’t have on hand!!! I’m also “thinking” I may add about 1/2 – 3/4 cup of dried banana chips ((that I give a few pulses in my food processor first)) to the batter as well…. Peanut butter and Nutella sandwiches are AWESOME with sliced bananas so thinking might be good in the cookies as well!!! Thank you for sharing such a great recipe!!
Love your addition of banana chips! Enjoy!
This peanut butter cookie looks delicious