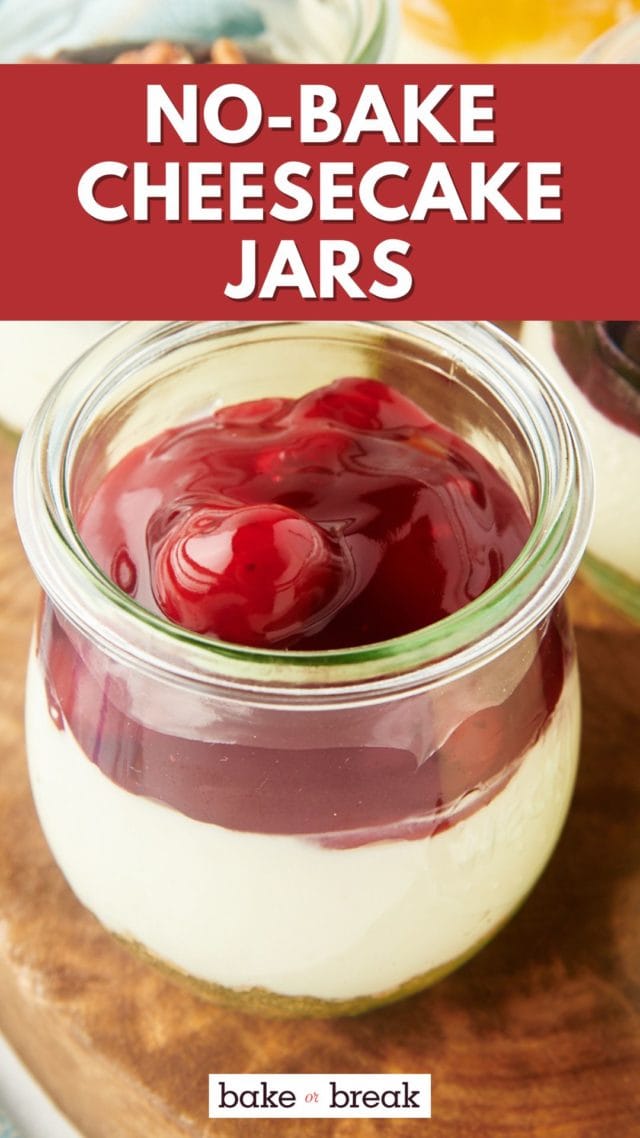
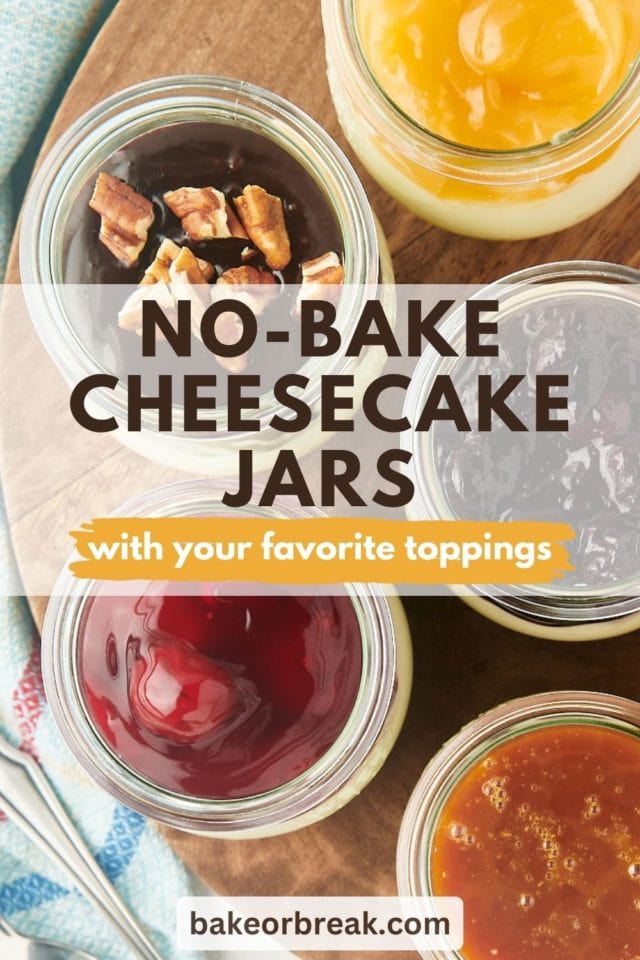
These light, airy cheesecake jars are beautifully presented in individual jars. Customize them with your favorite toppings for endlessly delicious possibilities!
There’s something incredibly satisfying about a dessert that’s both simple to make and utterly delicious. These no-bake cheesecake jars fit the bill perfectly, offering a creamy, rich cheesecake experience without the need for an oven. Whether you’re looking for a quick dessert to whip up for a gathering or a make-ahead treat to enjoy throughout the week, these cheesecake jars are a fantastic choice!
Why You’ll Love This Cheesecake Jars Recipe
- Easy to make. With no need for baking, these cheesecake jars come together quickly and effortlessly. Perfect for when you want a delicious dessert without spending hours in the kitchen!
- Versatile. This recipe is incredibly adaptable. You can easily customize them by adding different toppings like fruit preserves, chocolate chips, or caramel sauce. The possibilities are endless!
- Light and creamy. The combination of cream cheese and whipped cream creates a light, airy texture that’s perfectly creamy and satisfying without feeling too heavy.
- Make-ahead friendly. Cheesecake jars can be made in advance and stored in the refrigerator, making them an excellent option for entertaining or meal prepping.
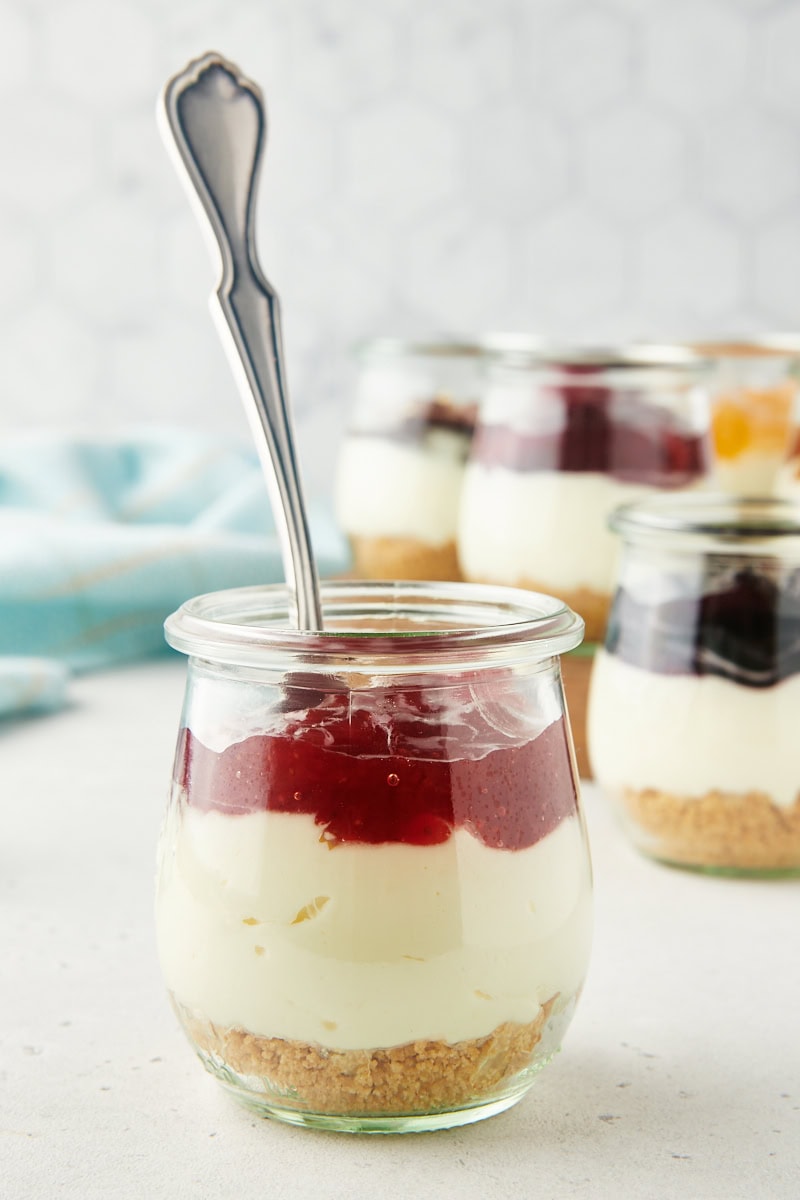
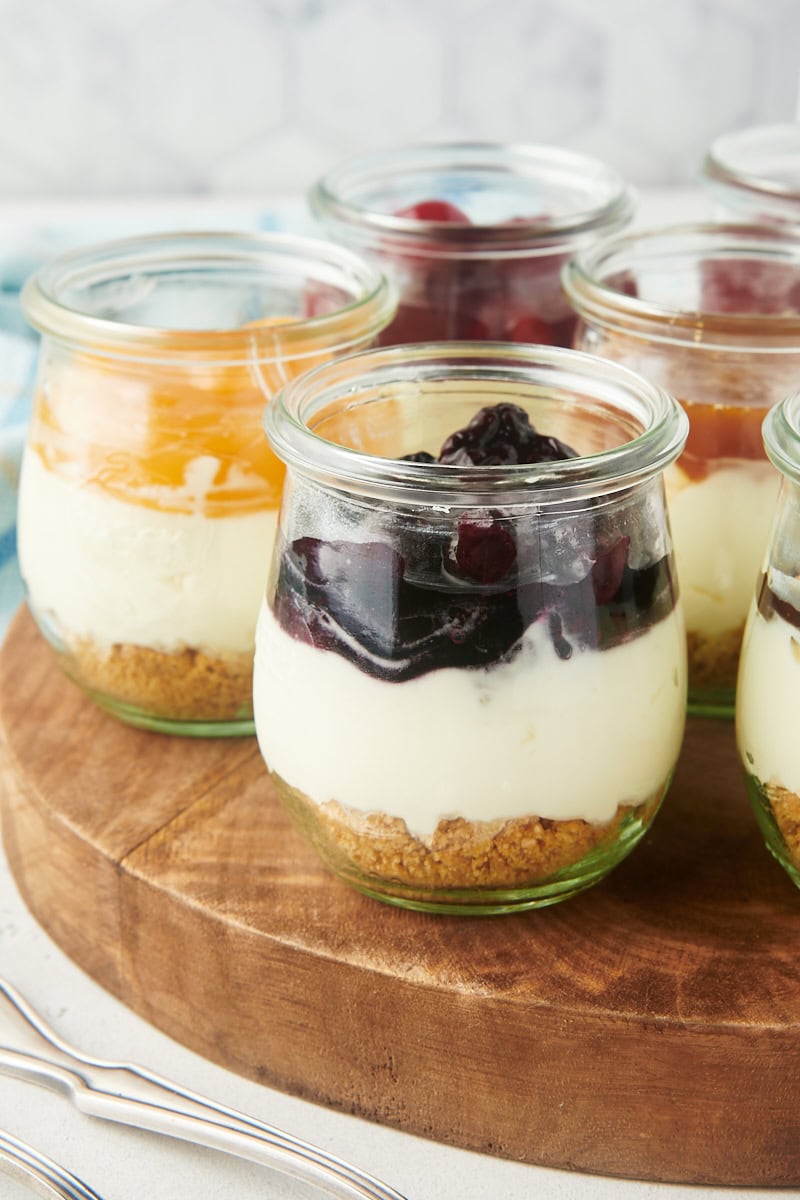
- Beautiful presentation. The layered look of the cheesecake filling and graham cracker crust in individual jars is not only practical but also visually appealing. It’s a dessert that looks as good as it tastes!
What You’ll Need
See the recipe card below for the full recipe, including ingredient quantities and complete instructions.
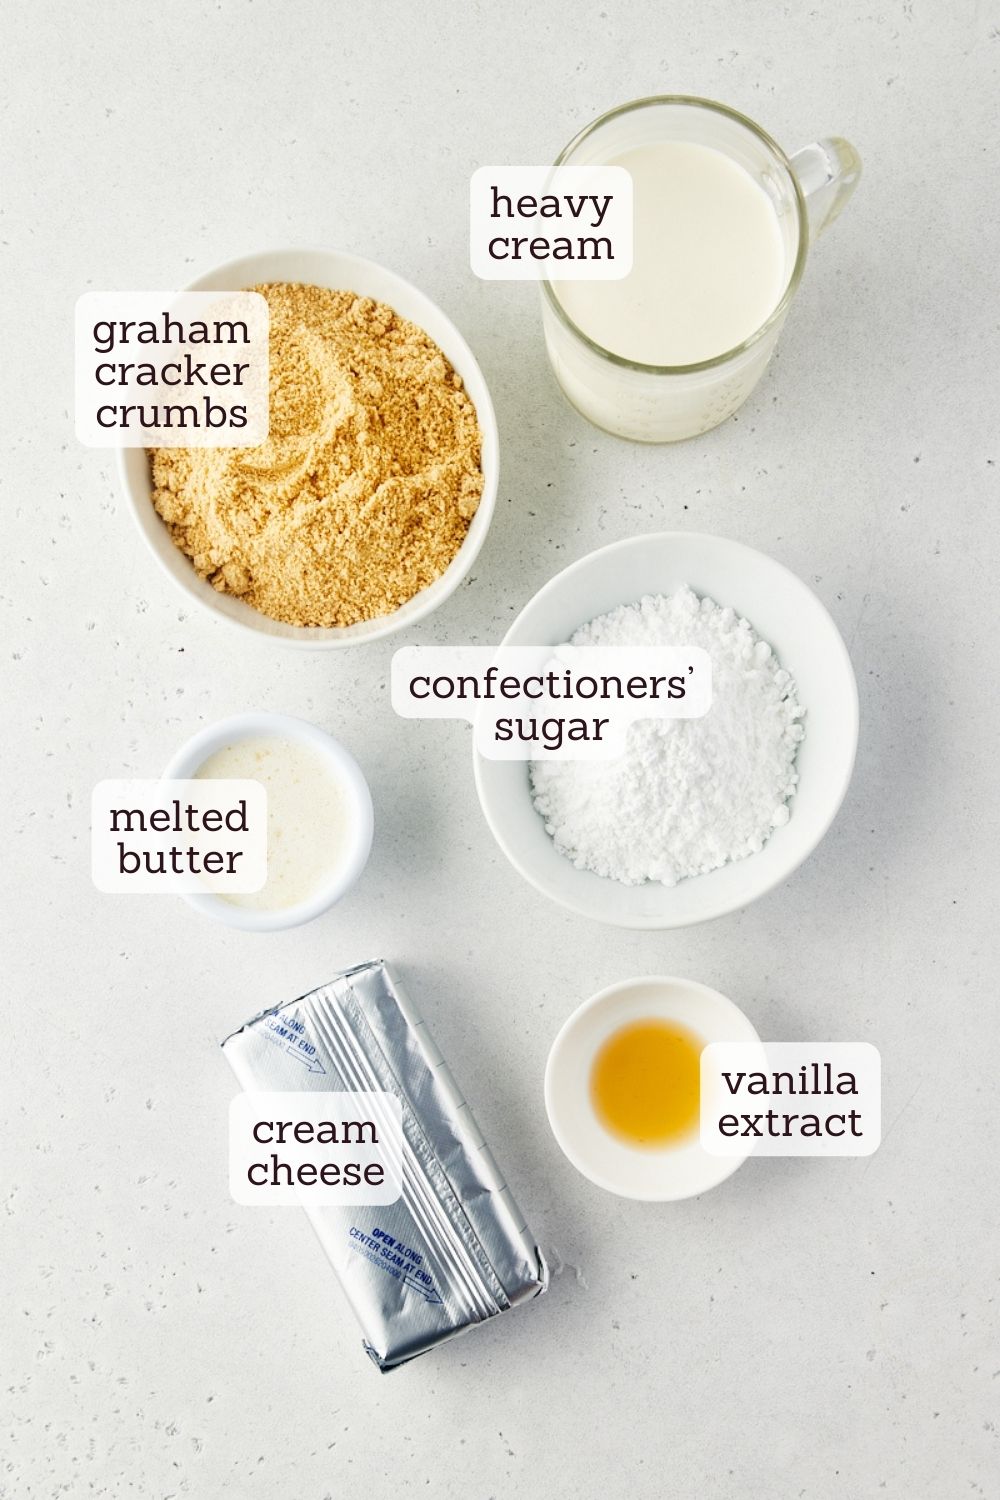
- Graham cracker crumbs – You’ll need about 7 full graham cracker sheets to make the amount of crumbs needed. Grind them finely in a food processor, or place them in a resealable bag and crush with a rolling pin.
- Unsalted butter
- Cream cheese – Let this come to room temperature so it will mix smoothly. Full-fat brick cream cheese works best.
- Confectioners’ sugar – If yours is lumpy, you may want to sift it first.
- Heavy cream – Make sure this is very cold so it will whip more easily.
- Vanilla extract
- Toppings and garnishes – See below for some suggestions.
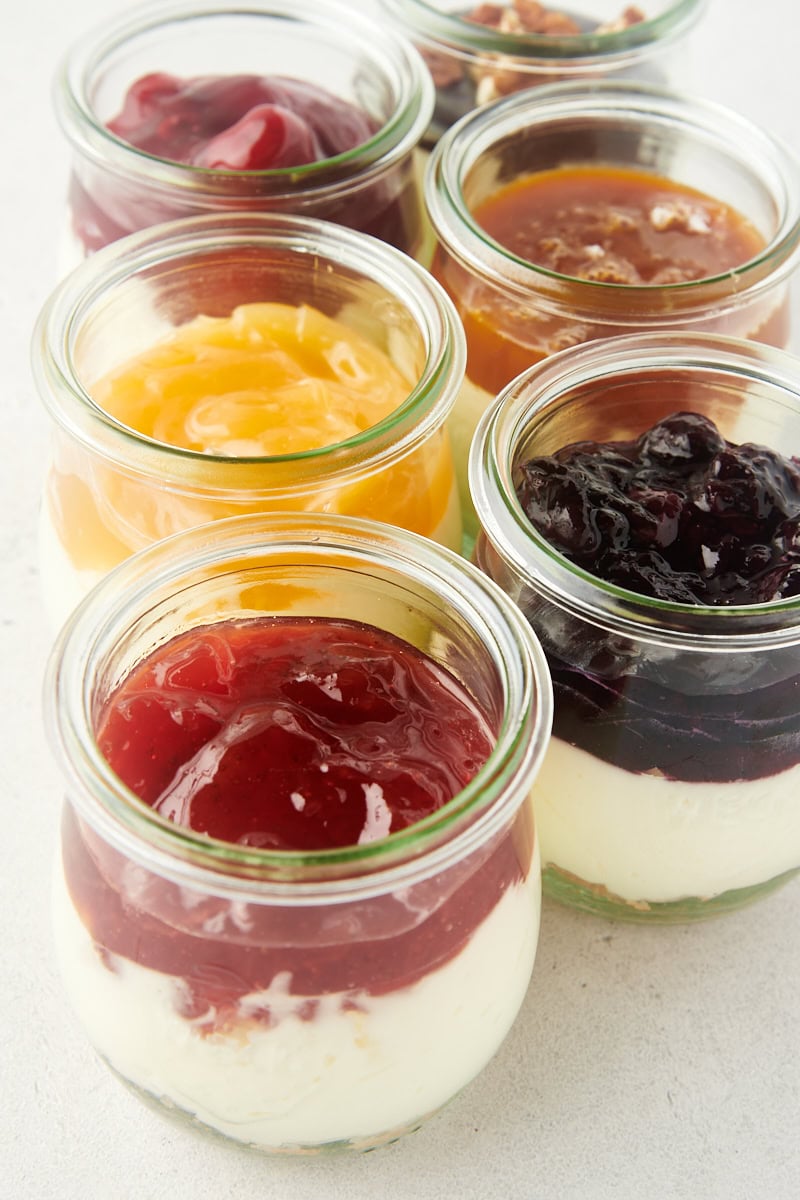
Topping Ideas for Cheesecake Jars
There are seemingly limitless options for how you can top your cheesecake jars! Choose just one topping or make each one different. Here are some ideas to spark your creativity:
Fruit
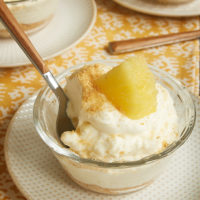
- Fresh fruit – Keep it simple with a garnish of your favorite fresh fruits. I usually add berries, but don’t forget other options like peaches, kiwi, and plums. For a little something extra, add a small dollop of whipped cream or some fresh mint leaves.
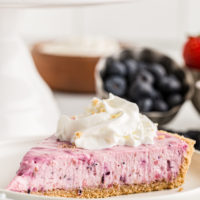
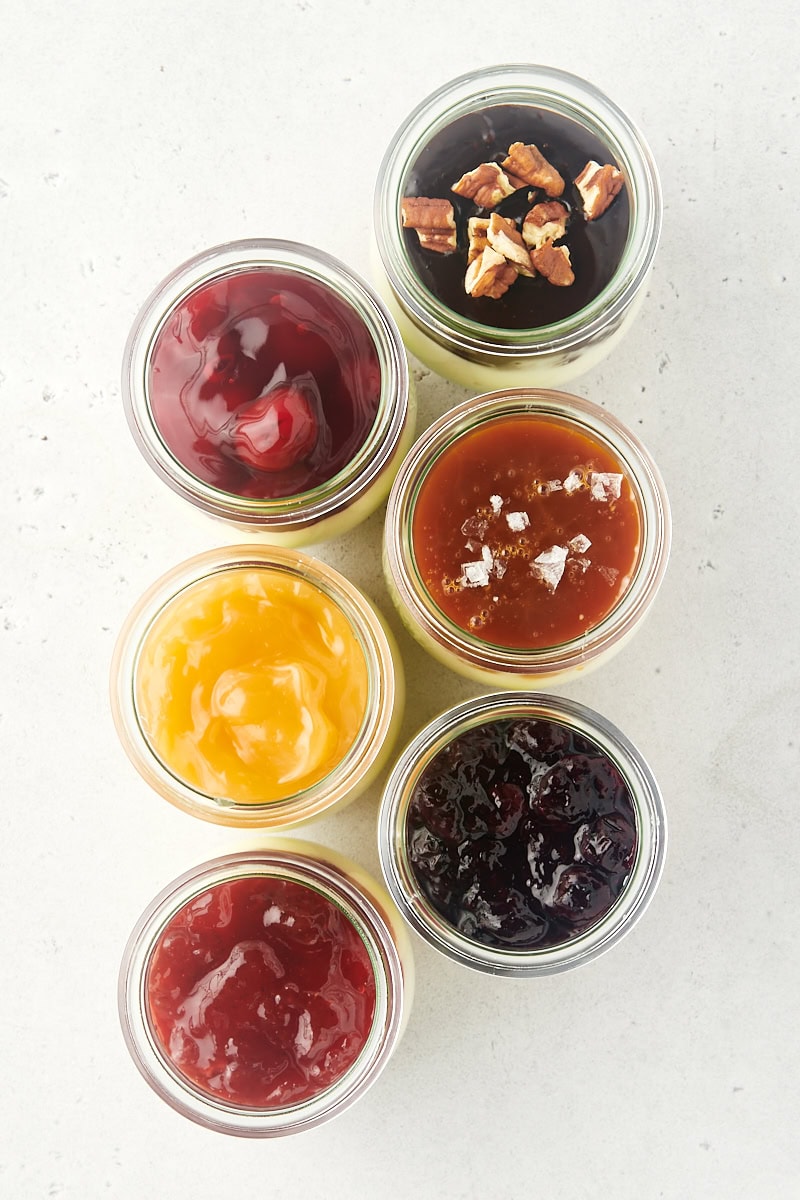
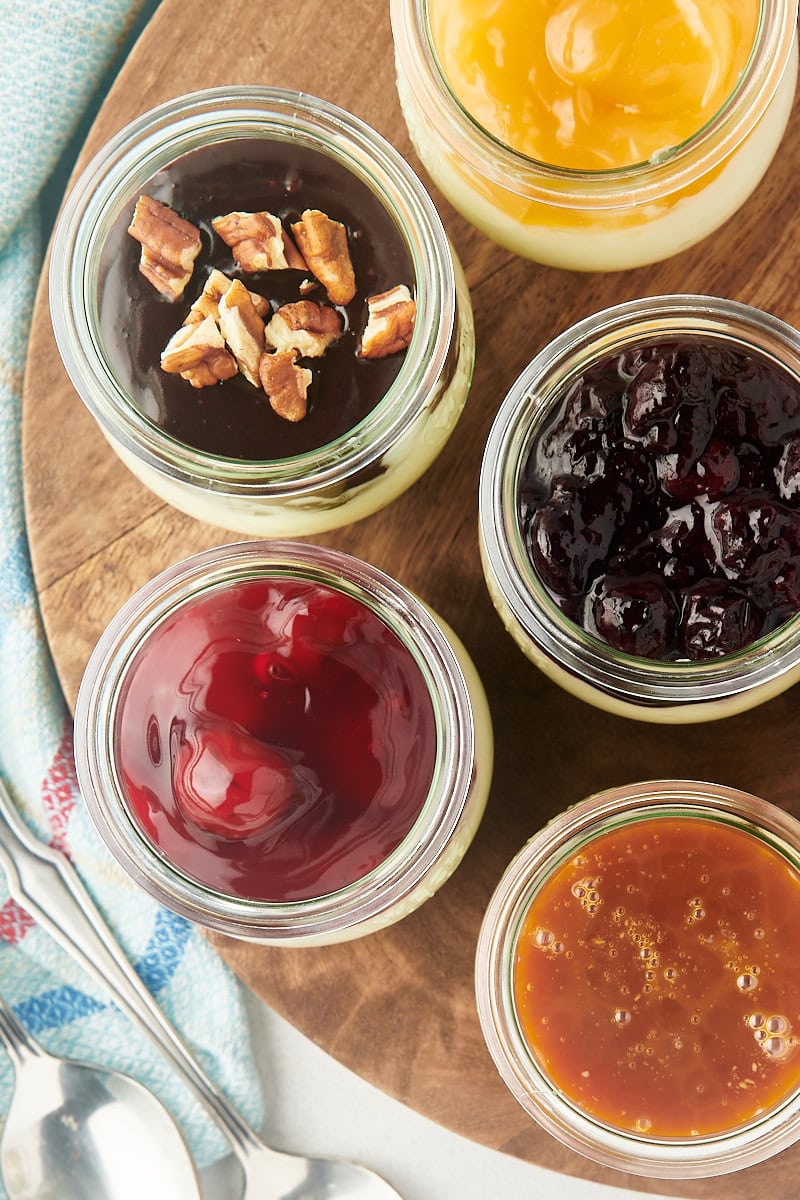
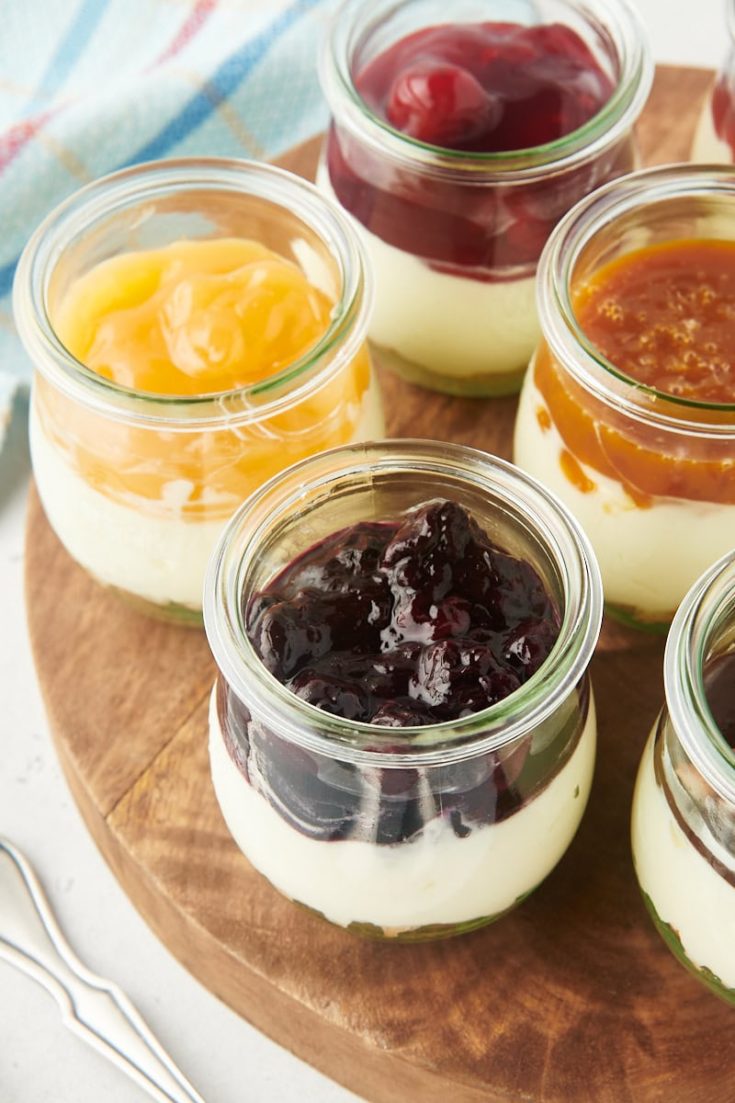
- Fruit compote – If you don’t want individual pieces of fruit on top, go with a compote. My favorite blueberry compote is pictured in these photos.
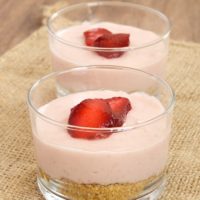
- Preserves – Fruit preserves and jams make for an easy fruity topping. If you’re like me, you’ve always got a tasty selection in your kitchen. You can see raspberry preserves in these photos.
- Fruit coulis – A coulis is thinner and smoother than a compote, so it’s a good choice if you want a smoother topping. (Try my raspberry coulis!)
- Lemon curd – If you love lemon desserts, this is the way to go. Either store-bought or homemade lemon curd will work just fine. (I used some in these photos.) Add a bit of fresh lemon zest or a few fresh berries, too, if you like.
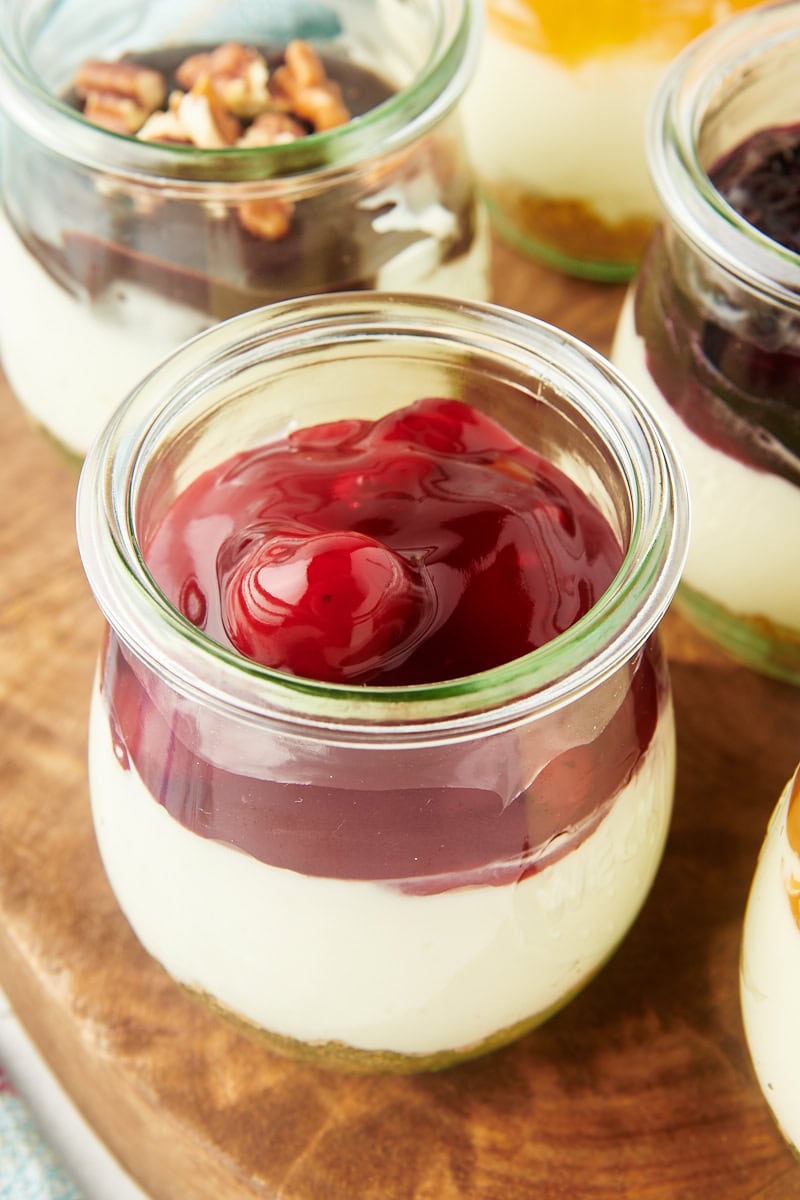
- Pie filling – Want an easy, crowd-pleasing topping? Pie filling is the answer. Make your own or go with store-bought for convenience. You can see cherry pie filling in these photos.
Chocolate
- Candy bar pieces – Chop or crush your favorite candy bars for another fun topping option. Some of my go-to picks are Butterfinger, Snickers, mini Reese’s Cups, Kit Kats, and Crunch.
- Chocolate chips – I like mini chocolate chips or roughly chopped chocolate bars for an easy chocolate topping.
- Chocolate ganache – Add a simple chocolate ganache (like the one in my eclair cake) for the chocolate lovers. Add some chopped toasted nuts, candy bars, or cookie pieces to take it over the top.
- Hot fudge sauce – For a warm topping for your cheesecakes, try hot fudge sauce as seen in these photos. Like the ganache, it’s a great foundation for topping with some fun garnishes.
Other toppings
- Caramel sauce – As a departure from fruity toppings, top your cheesecake jars with rich, gooey caramel sauce. If you like sweet and salty treats, add a sprinkle of flaky sea salt, too, like I did in these photos.
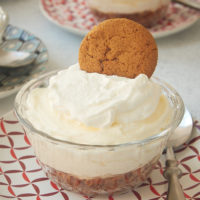
- Cookie butter – This adds a kick of spice that’s irresistible. Warm it slightly in the microwave, just until it’s more spoonable.
- Peanut butter – My fellow peanut butter lovers will definitely go for this option. Like the cookie butter, it will spoon more easily if you gently warm it in the microwave.
- Cookie pieces – Add some pieces of your favorite crunchy cookies for a fun topping. Try chocolate chip, Oreos, shortbread, Biscoff, or another favorite.
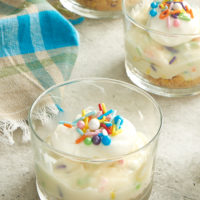
- Sprinkles – Garnish simply with sprinkles to suit the occasion!
How to Make No-Bake Cheesecake Jars
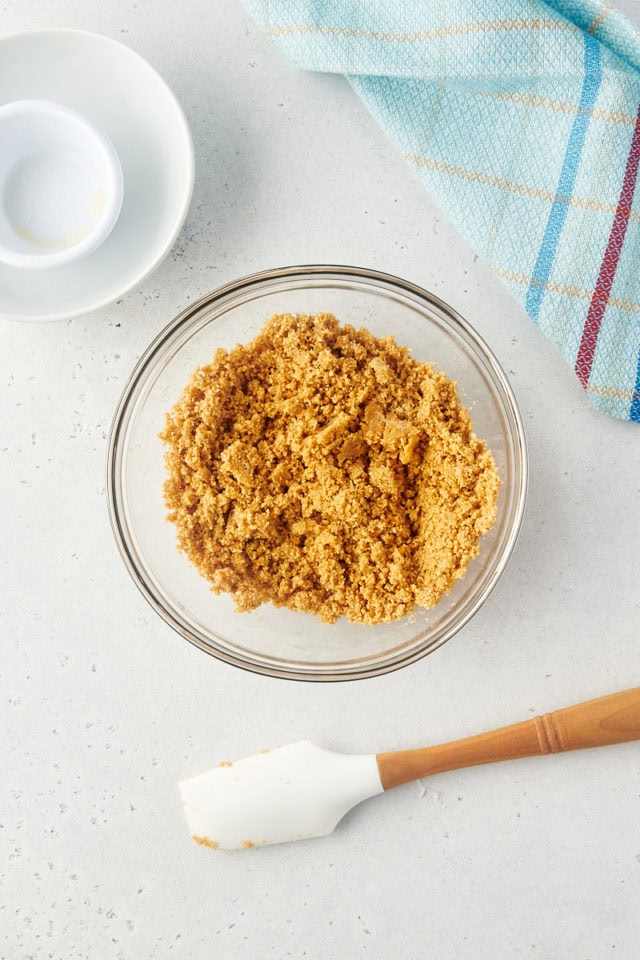
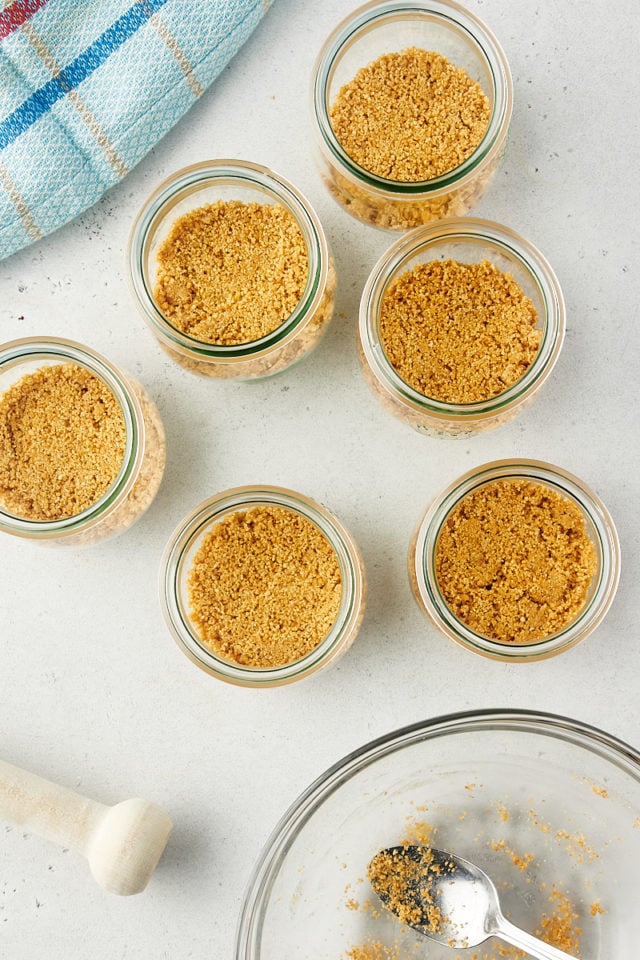
- Make the crust. Mix together the graham cracker crumbs and butter. Place in the bottom of six 6-8 ounce jars, glasses, or other containers.
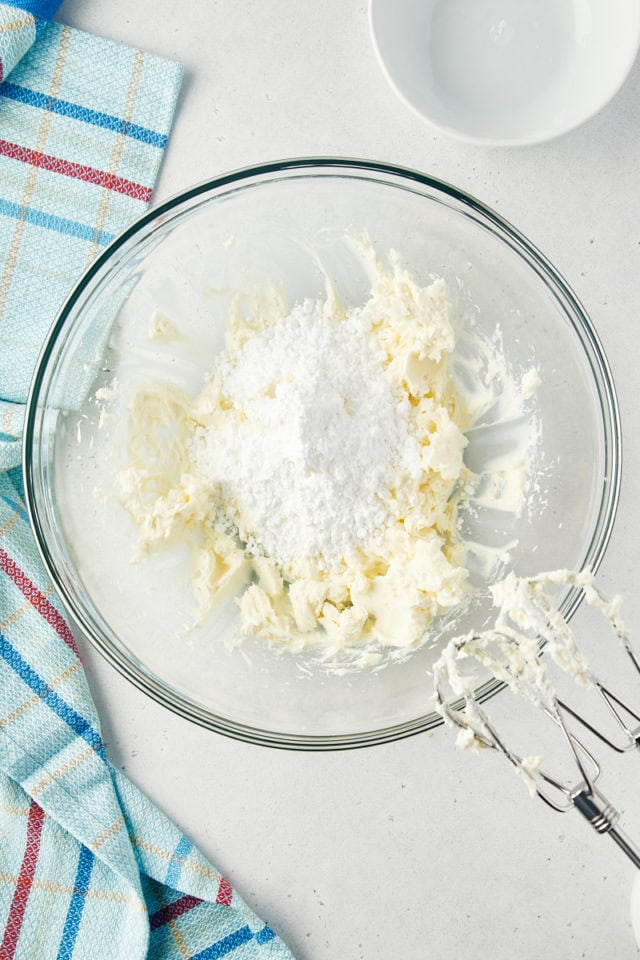
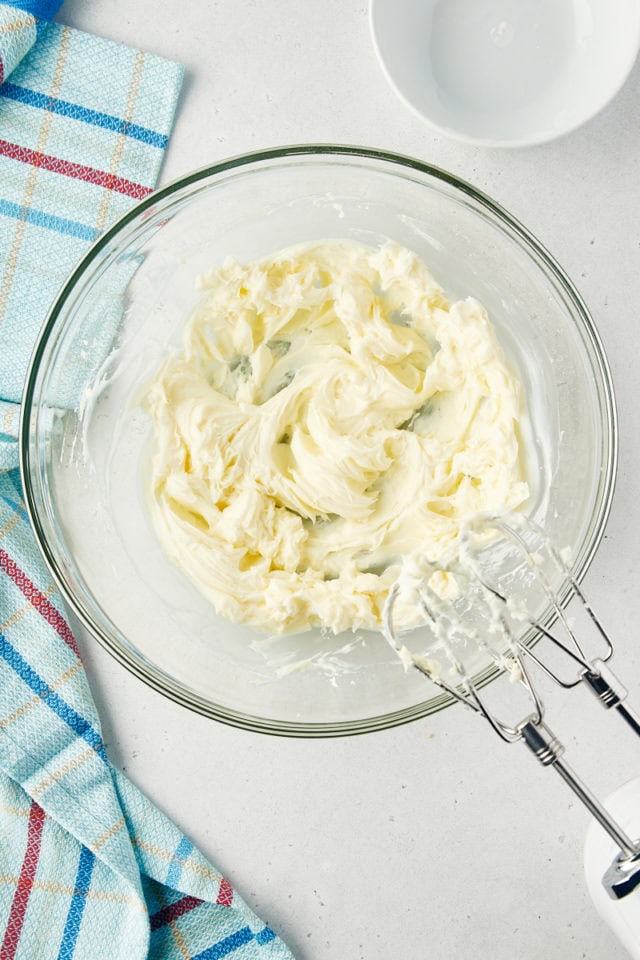
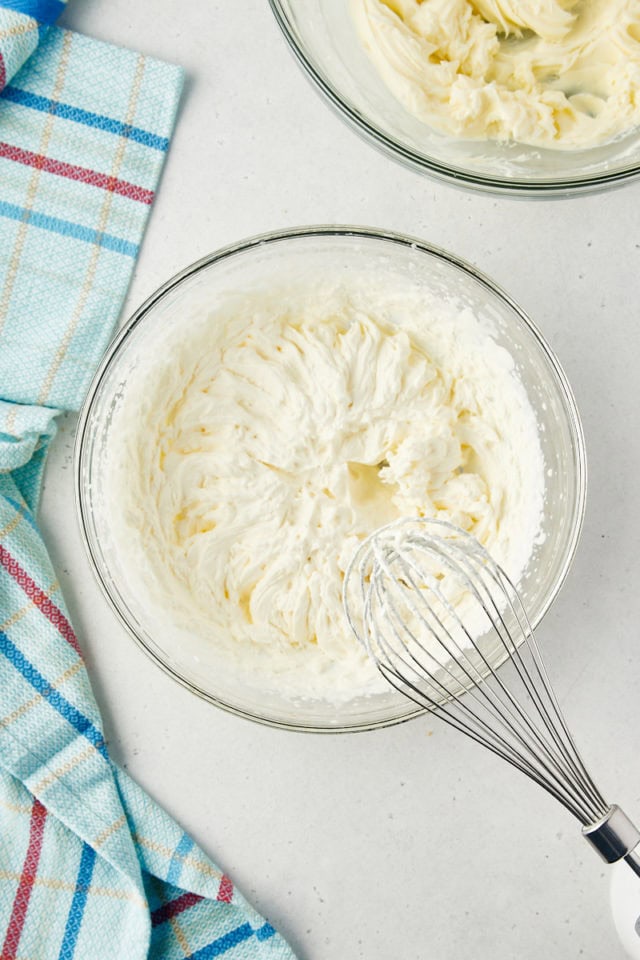
- Start mixing the filling. Beat the cream cheese until smooth and creamy. Then mix in the confectioners’ sugar.

- Whip the cream. Using a mixer with a whisk attachment, whip the cream and vanilla to stiff peaks.
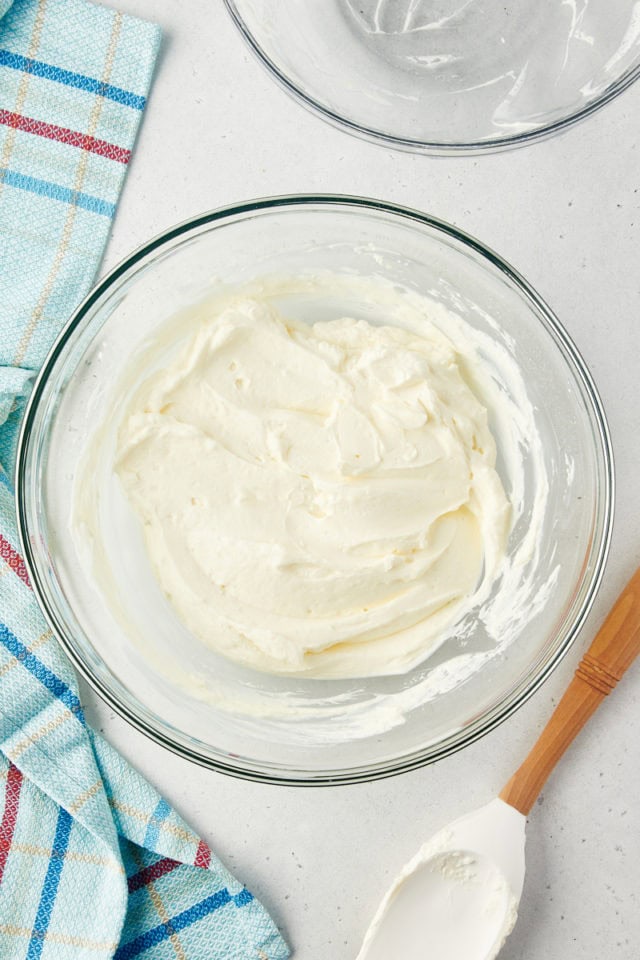
- Finish mixing the filling. Fold about a quarter of the whipped cream into the cream cheese mixture, and then fold in the remaining whipped cream.
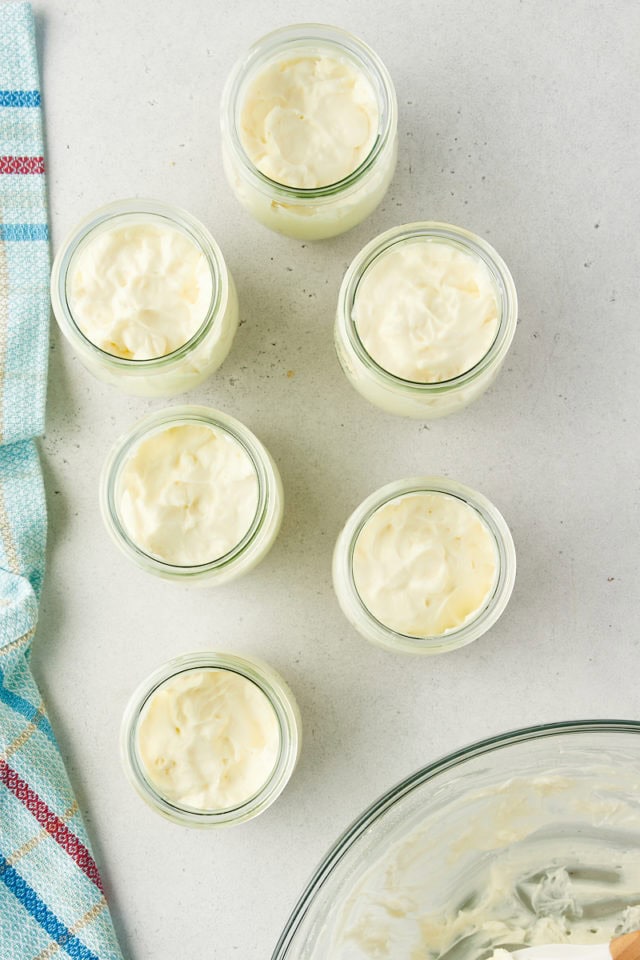
- Portion. Divide the filling evenly among the jars, using roughly just over 1/4 cup per jar.
- Chill. Cover and refrigerate at least 2 hours.
- Add toppings. When it’s time to serve, add your chosen toppings.
Tips for Success
- Temperature matters. Your cream cheese should be at room temperature, and your heavy cream should be very cold. This will give your cheesecakes the best texture.
- Don’t over-mix. When adding the whipped cream to the cream cheese mixture, take care to mix only enough to make a smooth mixture. Too much mixing will deflate your whipped cream, which will affect the texture of your cheesecakes.
- Don’t skip the chilling time. That bit of time in the refrigerator will help the filling set.
- Have fun! Enjoy adding tasty toppings and garnishes to these little cheesecakes.
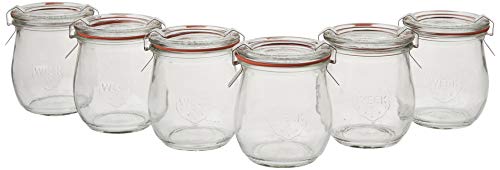
Jars for No-Bake Cheesecake Jars
When making cheesecake in a jar, you’ll want to use jars that are 6 to 8 ounces in capacity, depending on how you want them to look and how much topping and/or garnish you plan to add. I tend to go larger so there’s a gap between the top of the cheesecakes and the lids to make them easier to store. You can also use small glasses or bowls if you prefer. Here are some affiliate links to jars I suggest for making these cheesecakes:
- 7.4 ounce tulip jars (pictured here)
- 8 ounce short jars
- 8 ounce classic jars
- 8 ounce ribbed jars
- 7 ounce ribbed jars
- 6 ounce classic jars
- 6 ounce hexagon jars
Variations
- Change the crust. Graham crackers are the classic choice, but try another variety of graham crackers, Oreos, shortbread, or another crispy cookie. Because of differences among cookies, you may need to adjust the amount of butter you use.
- Add a citrus twist. Depending on the toppings you plan to use, you may like to use a good squeeze of lemon juice in place of the vanilla extract. This pairs well with most fruity toppings.
- Swirl in some fruit. Mix a few tablespoons of fruit preserves or pie filling (strawberry, raspberry, blueberry, etc.) into the cheesecake mixture before spooning it into the jars for a fruity, swirly twist.
- Set up a DIY cheesecake bar. Place various toppings and garnishes in bowls or jars, and let your guests pick their own toppings for a fun, interactive dessert experience.
How to Store
No-bake cheesecake jars can be stored in the refrigerator for up to 3-5 days. Make sure to cover them tightly to prevent them from absorbing any odors from the refrigerator. For the best texture and flavor, enjoy them within the first few days. Keep in mind that if you store them with the toppings, those toppings can seep down into the cheesecakes over time. If possible, wait to add the toppings until you’re ready to serve.
Can These Cheesecakes Be Frozen?
You can freeze your cheesecake jars up to 3 months, but there are some things to keep in mind. First, make sure the jars are freezer-safe. Glass jars may work, but they’re also more likely to crack. Next, take care to cover them tightly, leaving some space between the top of the cheesecake and the lid. Lastly, wait to add the toppings until you’re ready to serve. Thaw the cheesecakes overnight in the refrigerator.
More No-Bake Cheesecakes
No-Bake Cheesecake Jars
These no-bake cheesecake jars are a quick and easy dessert perfect for any occasion. With a creamy filling and customizable toppings, they’re sure to be a hit with everyone!
Ingredients
- 1 cup (100g) graham cracker crumbs
- 3 tablespoons (42g) unsalted butter, melted
- 8 ounces (226g) cream cheese, at room temperature
- 1/2 cup (55g) confectioners’ sugar
- 1 cup (236ml) heavy cream
- 1/2 teaspoon vanilla extract
- your preferred toppings
Instructions
- Combine the cookie crumbs and butter until thoroughly mixed. Divide among six jars with a 6 to 8 ounce capacity.* You'll use just over 2 & 1/2 tablespoons per jar. Press the crust mixture into the bottoms to make an even layer, but don't compact it too much.
- Using an electric mixer on medium speed, beat the cream cheese until smooth and creamy. Add the confectioners’ sugar, and mix until thoroughly combined and smooth.
- In a separate bowl, whip the cream and vanilla to stiff peaks with an electric mixer with a whisk attachment.
- Fold about a quarter of the whipped cream into the cream cheese mixture. Then gently fold in the remaining whipped cream, taking care not to deflate the whipped cream.
- Spoon the cheesecake filling into the jars, and smooth the tops. You'll need roughly just over 1/4 cup of filling per jar. (Be sure to leave space for toppings!)
- Cover and refrigerate for at least 2 hours. Add your desired toppings before serving.
Notes
*The jars pictured here (and linked below) have a capacity of about 7.5 ounces. You can use another size if you prefer.
Recommended Products
Bake or Break is a participant in the Amazon Services LLC Associates Program, an affiliate advertising program designed to provide a means for us to earn fees by linking to Amazon.com and affiliated sites.


Bake or Break is a participant in the Amazon Services LLC Associates Program, an affiliate advertising program designed to provide a means for us to earn fees by linking to Amazon.com and affiliated sites.