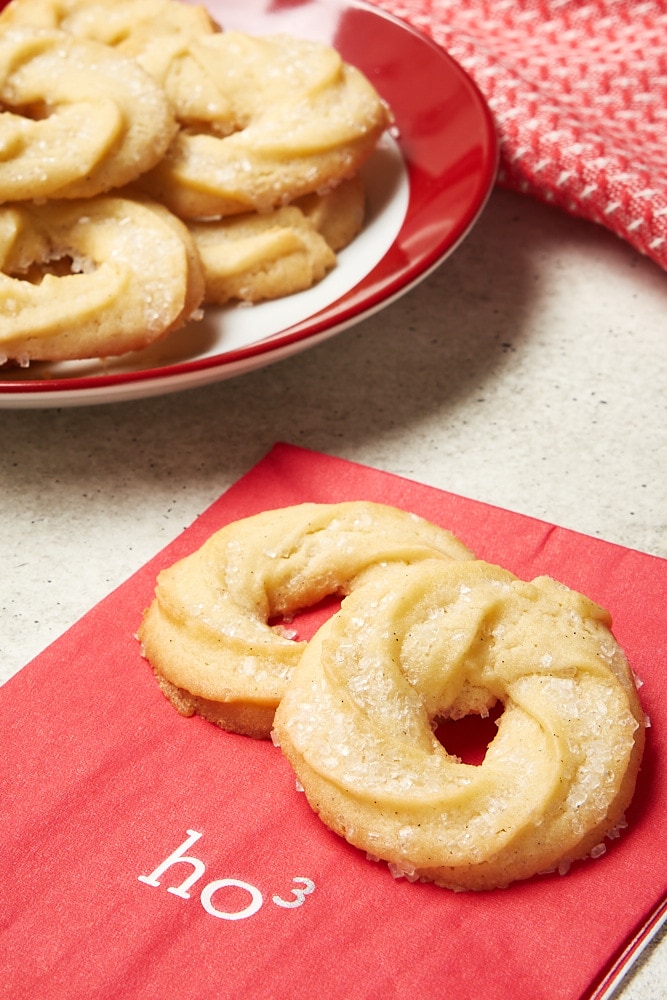
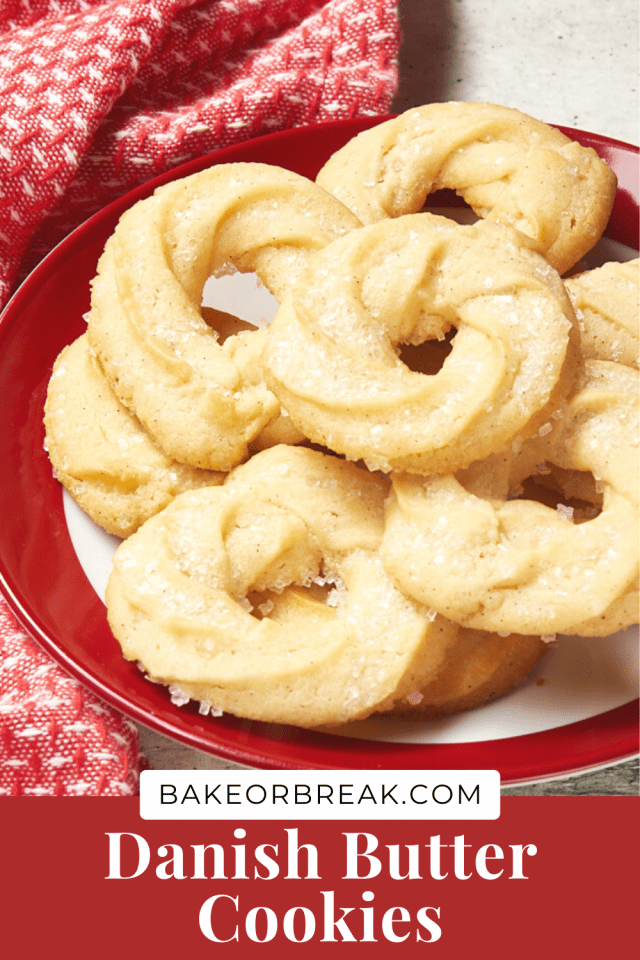
It only takes a short list of ingredients to make these delicious Danish Butter Cookies! A nostalgic favorite perfect for the holidays!
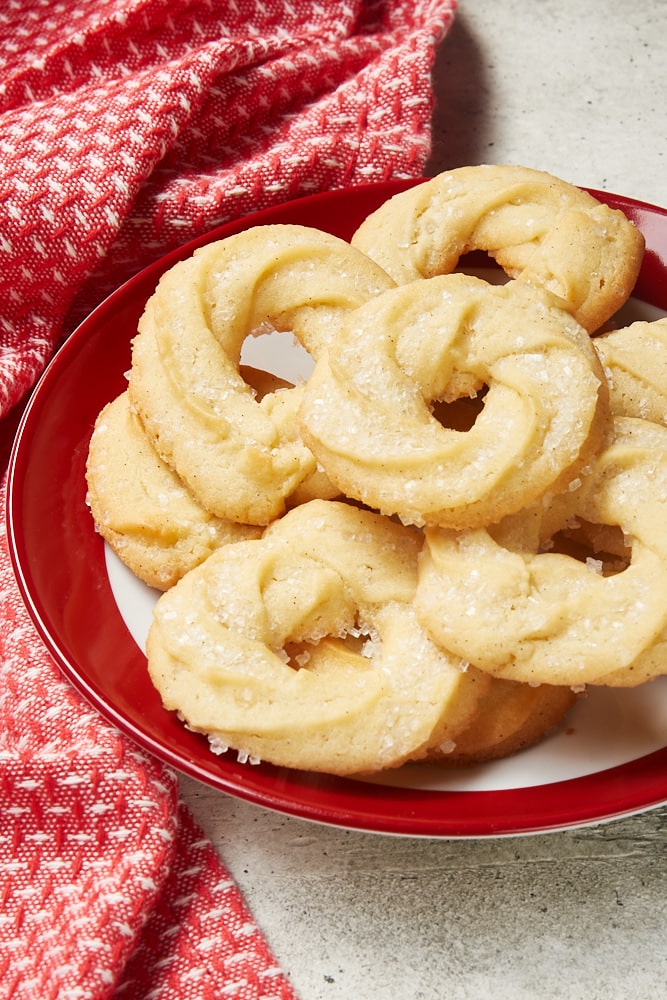
Homemade Danish Butter Cookies
For years, I wanted to make my own Danish Butter Cookies. I’ve had my fair share of the kind in the tins at Christmas time, but I really wanted to try baking them myself.
So, as I tend to do, I did a good bit of reading about different ways to make them. And let me tell you that there are a whole lot of opinions out there, from the type of butter to use to how to shape them and a whole lot in between. This version is my favorite, with a great balance of simplicity and flavor.
I’m a complete convert for these homemade Danish Butter Cookies! They are SO much better than the cookies in the tin. And you’ll love how easy they are to make! This is one cookie recipe I’ll be making for years to come!
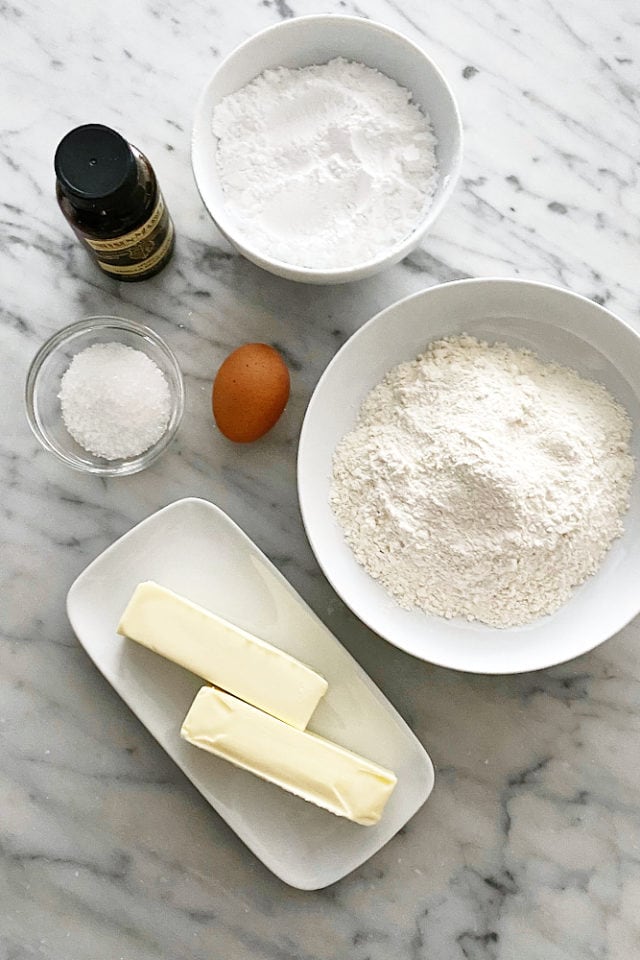
What You’ll Need
These are very simple cookies. A short list of ingredients and a no-fuss method are what make them so good! Of course, quality ingredients are always key, especially when the ingredient list is short.
- Unsalted butter – Some bakers prefer to make these cookies European butter, which has a higher fat content. I generally don’t bake with anything other than standard butter, and I imagine that is what most home bakers use. However, either kind should serve you well for this recipe.
- Confectioners’ sugar – Sift the sugar for the best results.
- Egg – Set out the egg when you set out the butter to soften.
- Vanilla bean paste or vanilla extract – Either is perfectly fine, although I tend to prefer the paste in these cookies.
- All-purpose flour – Measure by weight for the best results. Otherwise, use the spoon and sweep method.
- Granulated sugar or sanding sugar – Either will work for sprinkling onto these cookies. Use a colored coarse sugar for a more festive look.
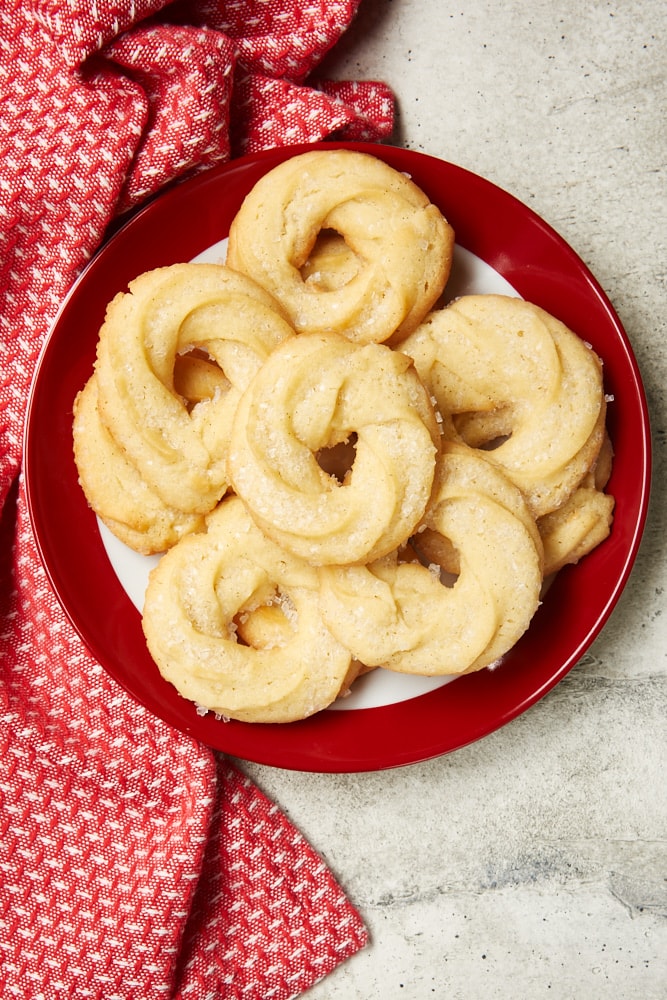
How to Make Danish Butter Cookies
- Prepare for baking. Heat the oven to 375°F. Line baking sheets with parchment paper or silicone liners.
- Mix the wet ingredients. Use a hand or stand mixer on medium speed to beat the butter and confectioners’ sugar until light and fluffy. Mix in the egg and vanilla.
- Add the flour. With the mixer on low speed, gradually add the flour. Don’t over-mix; mix just until combined.
- Pipe the cookies. Transfer the cookie dough to a pastry bag fitted with a large star tip. Pipe the dough into 2-inch circles onto the prepared pans. (You’ll need a large tip for this consistency of dough. I use a Wilton 1M tip.) Leave about 2 inches between the cookies.
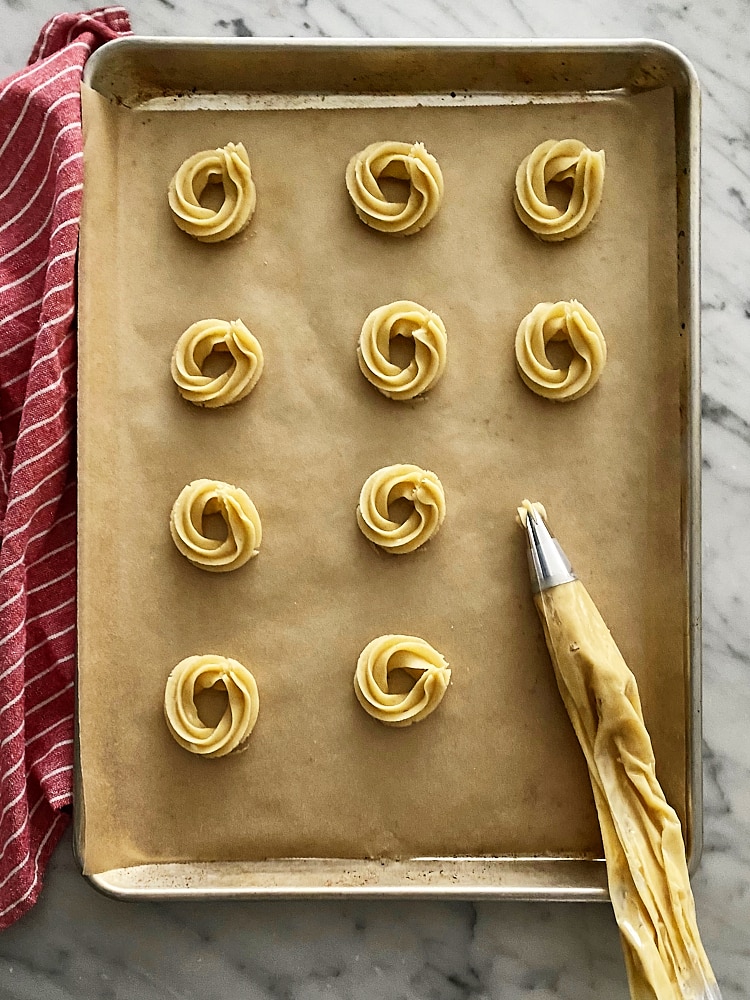
- Add more sugar. Sprinkle granulated or coarse sugar on top of each cookie.
- Chill the cookies. Place the pan in the refrigerator for about 15 minutes to help keep them from over-spreading. Feel free to chill longer if you like (overnight or even an extra day).
- Bake. Bake each pan of cookies 14 to 18 minutes. Don’t over-bake; the edges should just be browned.
- Cool the cookies. Place the pan of cookies on a wire rack to cool for 5 minutes. Then transfer the cookies from the pan to a wire rack to cool completely.
Tips for Success
- Use a large piping tip. When it comes to how to shape the cookies, I like to pipe them in simple circle with a large star tip. I’ll be the first to tell you that my piping skills aren’t great. But this is a simple shape that even I can manage to make. I use a Wilton 1M open star tip, and I highly recommend you not try to use anything smaller than that. The dough is thick but that size tip works fine with a little effort. Experiment with other tips and shapes if you like. Have fun!
- Don’t be shy when sprinkling the cookies with sugar. The cookies themselves aren’t very sweet, so you need that extra sugar for sweetness. You can use granulated sugar, sanding sugar, or a combination of the two. If you’re looking for something more festive, try a colored sanding sugar.
- Want to make ahead? The shaped dough can be stored in the refrigerator for a day or two. Just cover it well while it’s in the refrigerator, and then bake as directed when you like. Also, see below for tips for freezing these cookies.
- Don’t over-bake. It’s very easy to do that. Take the cookies out of the oven just as they’re beginning to brown around the edges.
How to Store Danish Butter Cookies
These cookies generally store well. Place the cooled cookies in an airtight container. They should keep up to a week at room temperature. For longer storage, place the container in the refrigerator.
Can These Cookies Be Frozen?
Yes! Place the cookies in an airtight, freezer-safe container or bag. They should keep up to 2 months. Thaw overnight in the refrigerator or for an hour or so at room temperature.
To freeze the unbaked cookies, place the shaped cookies in a single layer on a baking sheet. Freeze until solid (at least 2 hours, but no longer than 6 to prevent freezer burn). Then place the frozen cookie dough in an airtight, freezer-safe container or bag. When you’re ready to bake the cookies, there’s no need to thaw. Bake as directed, adding a couple more minutes to the baking time.
Danish Butter Cookies
Danish Butter Cookies are made simply and easily with a short list of ingredients!

Ingredients
- 1 cup (226g) unsalted butter, softened
- 1 cup (110g) confectioners' sugar, sifted
- 1 large egg
- 1 tablespoon vanilla bean paste or vanilla extract
- 2 cups (240g) all-purpose flour
- about 2 tablespoons granulated sugar or sanding sugar
Instructions
- Preheat oven to 375°F. Line baking sheets with parchment paper or silicone liner.
- Using an electric mixer on medium speed, beat the butter and confectioners' sugar until light and fluffy.
- Mix in the egg and vanilla.
- Reduce mixer speed to low. Gradually add the flour, mixing just until combined.
- Transfer the dough to a pastry bag fitted with a large star tip.* Pipe the dough into circles about 2 inches in diameter. Leave about 2 inches between cookies.
- Sprinkle each cookie with granulated sugar or sanding sugar.
- Refrigerate the pans of cookies for 15 minutes.
- Bake, one pan at a time, 14 to 18 minutes, or until the edges are just browned.
- Cool on the pan on a wire rack for 5 minutes. Then transfer the cookies to a wire rack to cool completely.
Notes
*The cookies pictured were made with a Wilton 1M tip. Most any tip at least that large should work. If you don't have a pastry bag, you can use a zip-top bag with the corner snipped instead.
Recipe slightly adapted from McCormick.
Recommended Products
Bake or Break is a participant in the Amazon Services LLC Associates Program, an affiliate advertising program designed to provide a means for us to earn fees by linking to Amazon.com and affiliated sites.





16 Comments on “Danish Butter Cookies”
I do not have Wilton tips or anything like that. Do you think I could use the dough as drop dough and slightly flatten them before baking? Or just use as drop dough cookies? Or forget it altogether?
Thanks.
Maybe you could roll them in a small log and make it into a circle? They sound too good for forget. Good luck!
Hi, Nancee. I’ve not tried it, but I think you could scoop them like drop cookies and flatten them. They don’t spread much, so keep that in mind when you shape them.
What about using a cookie press? Would this dough work in one?
Hi, Kate. I think the dough would work in a cookie press. If you try it, let me know how it works.
I thought Danish butter cookies have coconut in them?
Hi, Sue. Some do have coconut, but I have found many variations of this recipe out in the world!
These sound great and I can’t wait to try them. How do you suggest we could modify the recipe if we wanted the coconut too? I assume it would be a simple substitution of some coconut flour in place of a percentage of the regular flour? Your thoughts? Thanks!
Hi, Peter. Coconut flour isn’t usually a 1:1 substitution for wheat flour, so I can’t really say with any certainty without some experimenting. If I were going to add coconut, I might just try some very finely chopped unsweetened coconut to the dough to keep things simple.
For anyone that doesn’t have a pastry bag, try a disposable ziplock bag, cutting off a bottom corner.
Am I missing something?? Is there no baking powder or soda in this recipe??
No, you won’t need any leavening agents for this recipe.
Can I just butter the pan? Would that work okay?
Hi, Adalia. Lining pans will give you a more consistent result, but you can use butter if you like. Just be sure not to use too much, or that can cause the cookies to spread too much.
Love the idea of freezing them raw! That would be so useful for making big batches; just make ahead and freeze and then you can bake up a whole bunch fresh!
Yes, it’s such a help to do that this time of year!