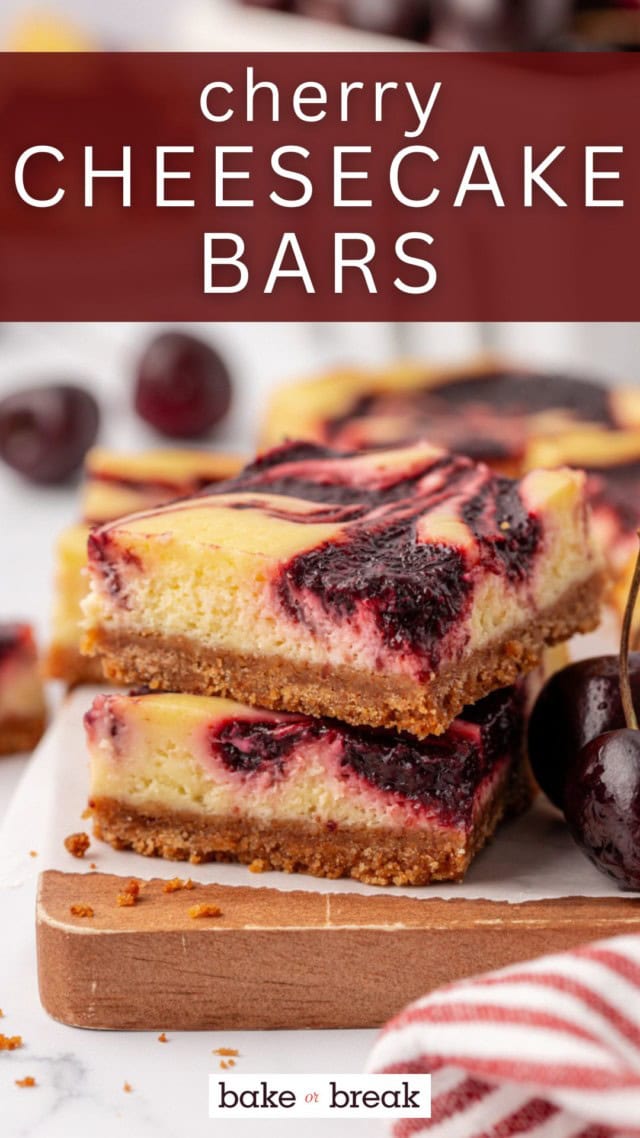
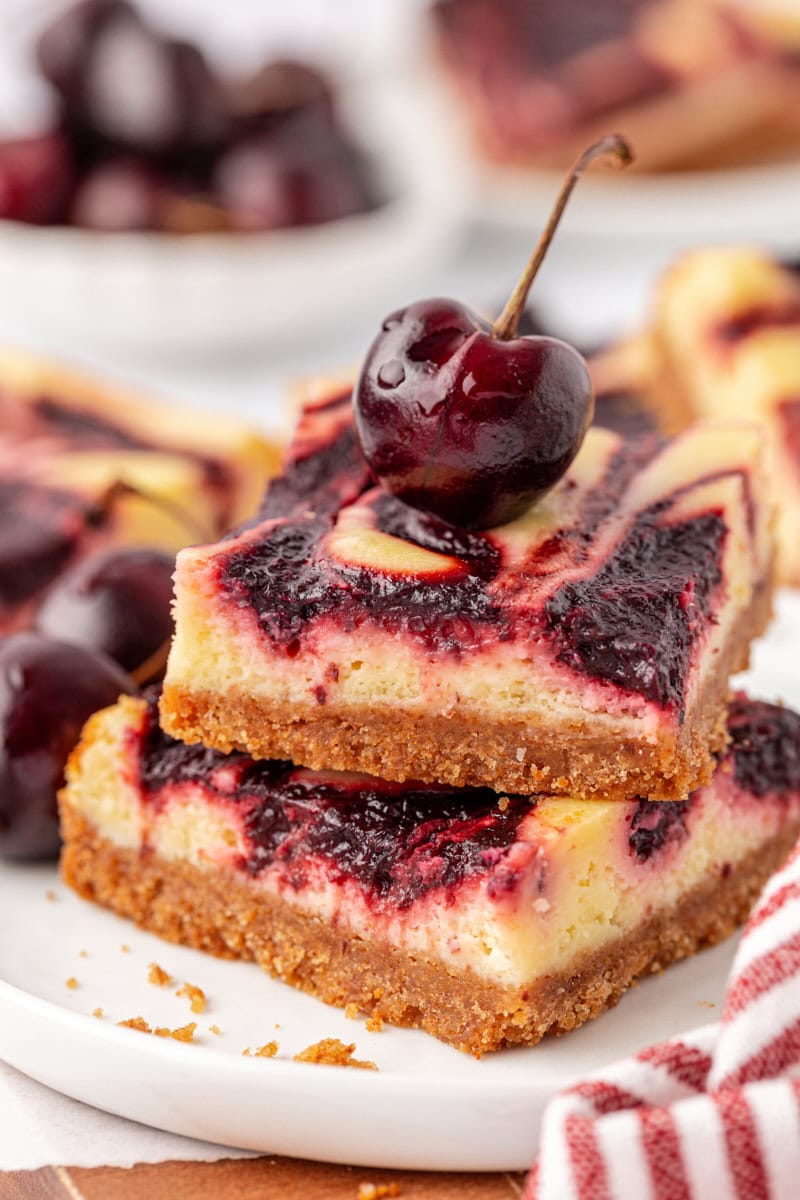
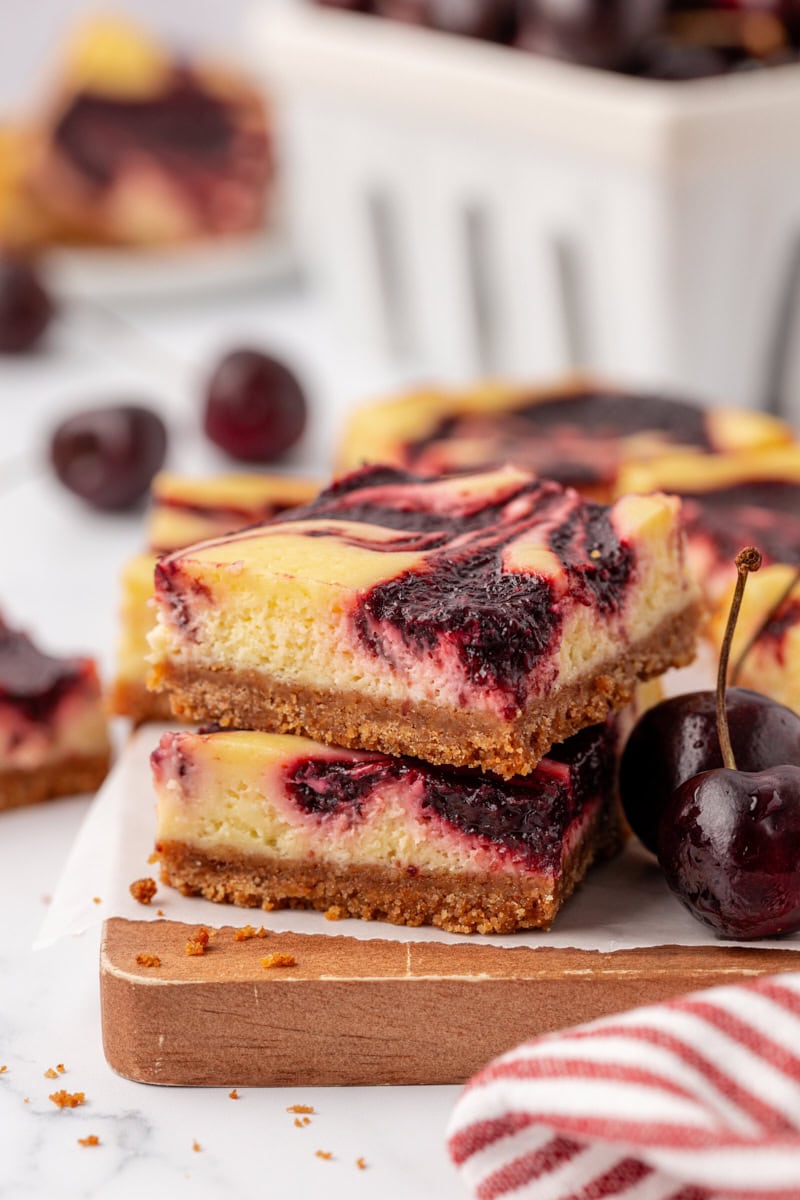
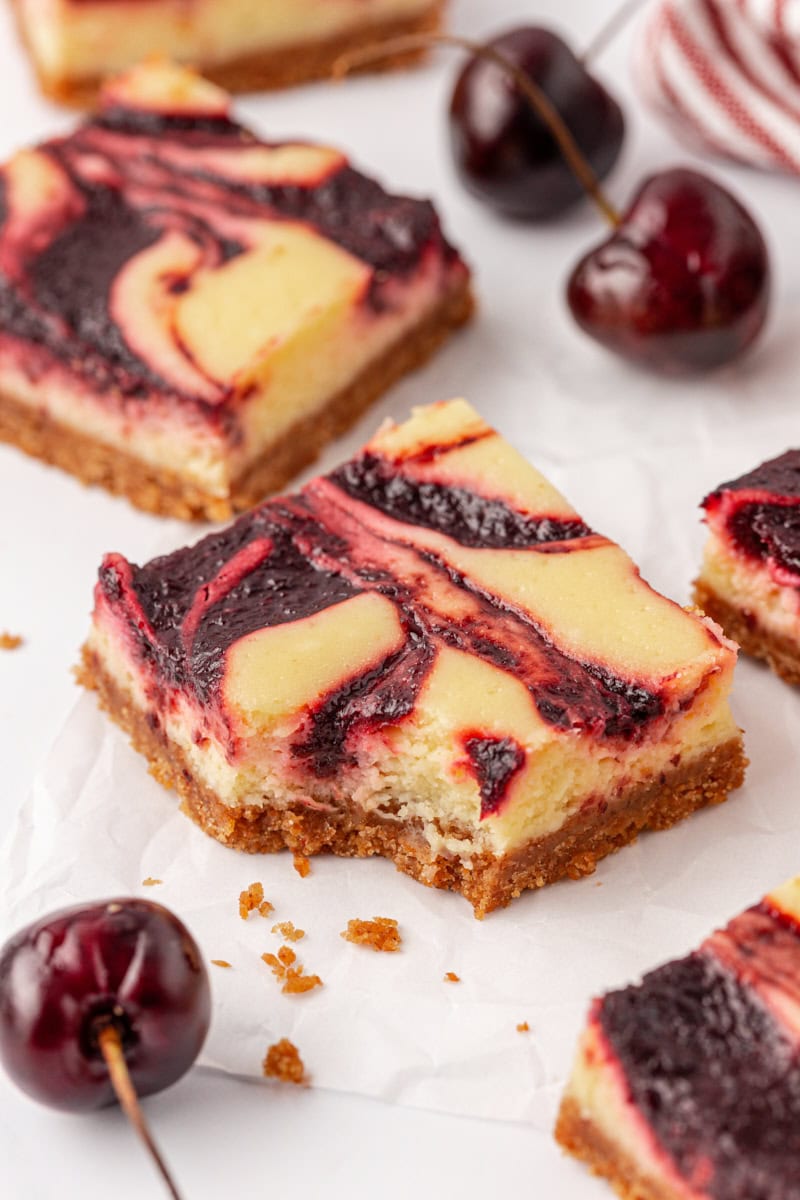
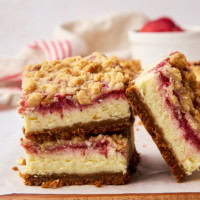
Swirls of sweet cherry and creamy cheesecake come together in these easy-to-make, crowd-pleasing cherry cheesecake bars. They’re a fresh twist on a nostalgic favorite!
I grew up loving those no-bake cheesecake mixes with canned cherry topping—the kind that made you feel like a dessert pro with just a few packets and a can opener. But once I started making real cheesecake from scratch, I never looked back.
These cherry cheesecake bars are my nostalgic nod to that classic, but with a serious upgrade. A buttery graham cracker crust, rich and creamy cheesecake filling, and a fresh cherry swirl baked right in. They’re simple, beautiful, and packed with flavor in every bite.
Why You’ll Love This Cherry Cheesecake Bars Recipe
- Fresh cherry swirl – No canned filling here! Just real cherries cooked down into a thick, sweet-tart swirl.
- Faster than a full cheesecake – Bars bake more quickly and chill faster, making them perfect for when you want cheesecake without the wait.
- Portable and sharable – Great for potlucks, picnics, or any time you need a crowd-pleasing treat.
- Customizable crust and flavors – Start with graham crackers, or switch it up with vanilla, almond, or lemon cookies.
Key Ingredients
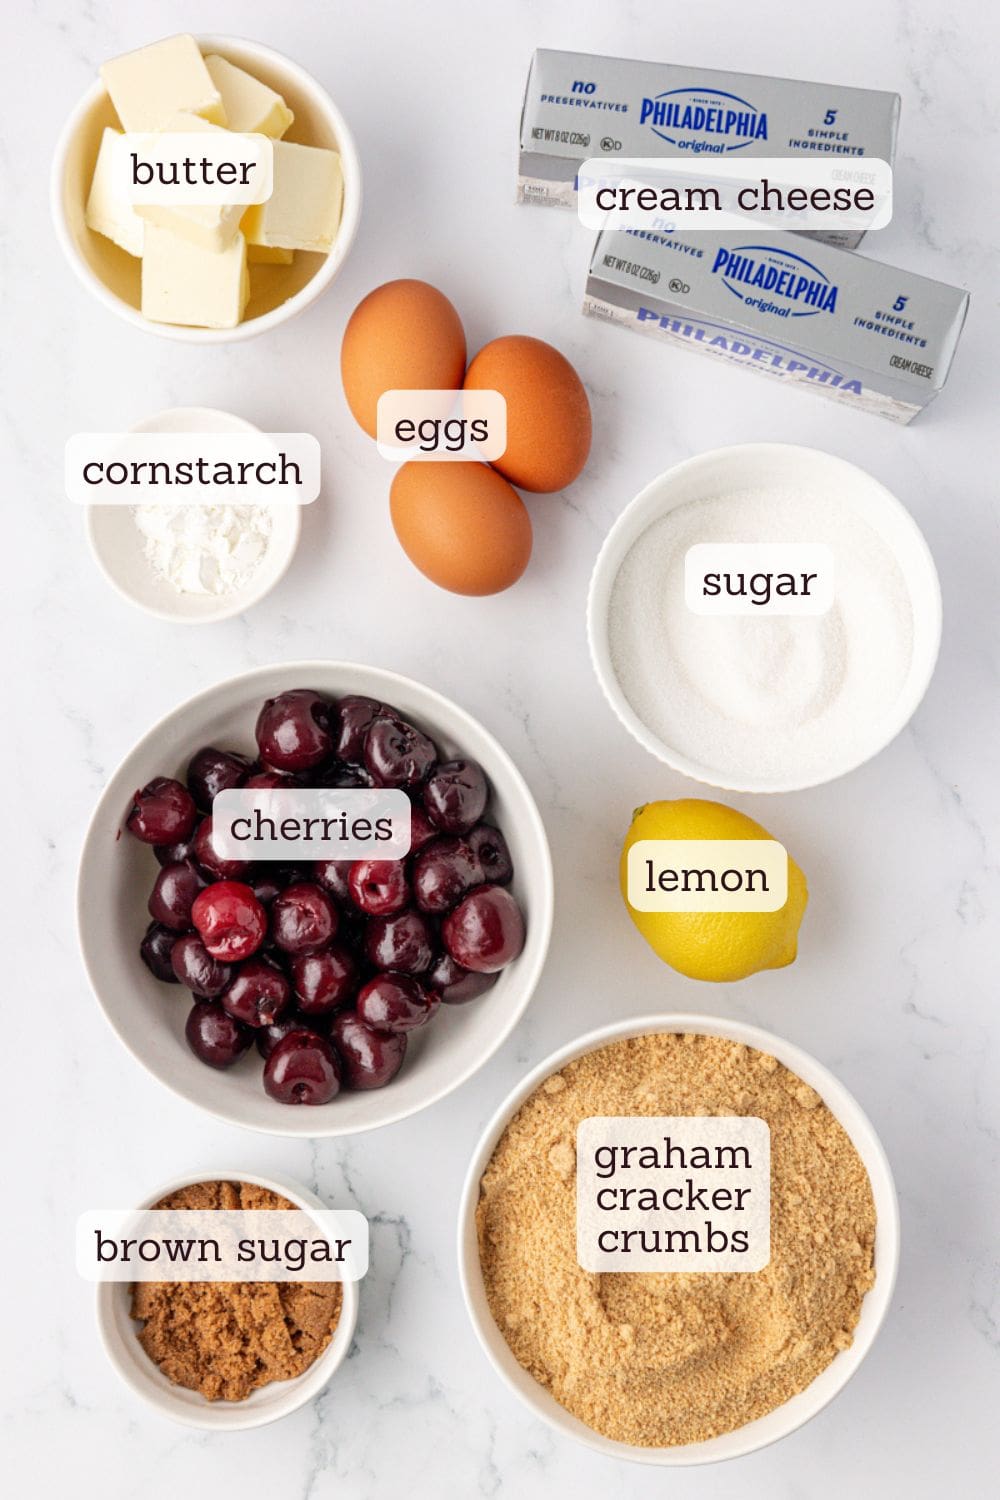
Let’s take a look at the ingredients that make these cherry cheesecake bars shine. For the full recipe, including ingredient quantities and full instructions, see the recipe card below.
- Cherries – Fresh or thawed frozen cherries both work. If using frozen, thaw and drain them first. You’ll cook them down with sugar, lemon juice, and a bit of cornstarch for thickening.
- Cream cheese – Full-fat cream cheese makes the filling rich and smooth. Let it come to room temperature for easier mixing.
- Graham cracker crust – A classic base that pairs perfectly with the creamy filling and fruity swirl.
- Lemon juice – A splash brightens both the filling and the cherry mixture. Vanilla extract also works well if you prefer a mellower flavor.
How to Make Cherry Cheesecake Bars
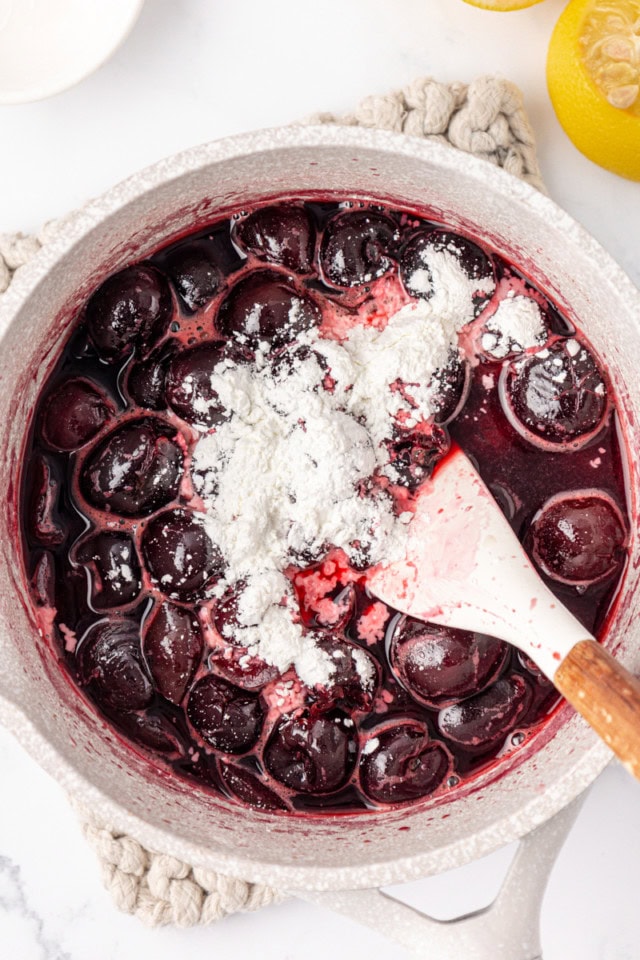
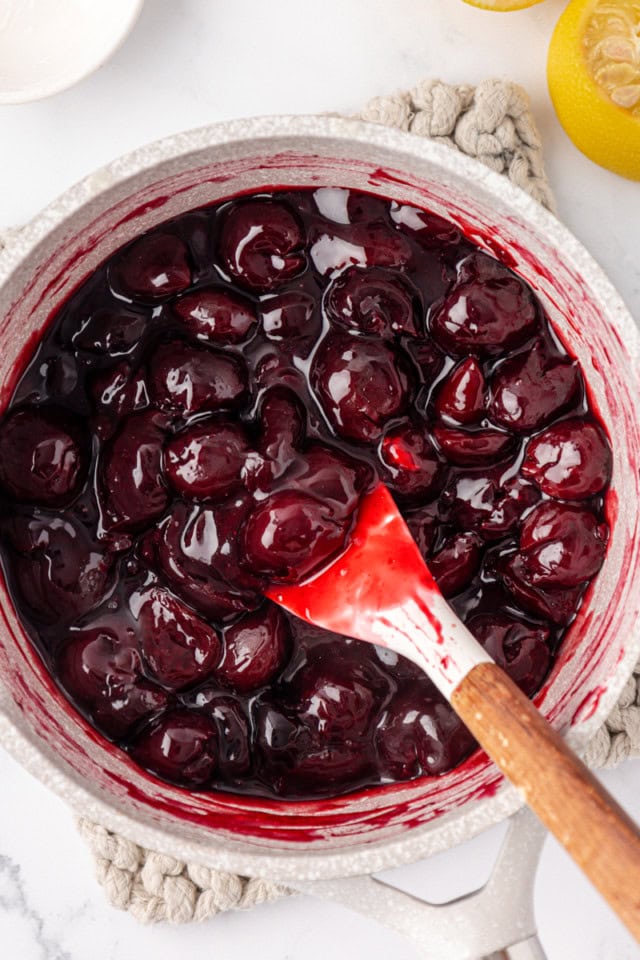
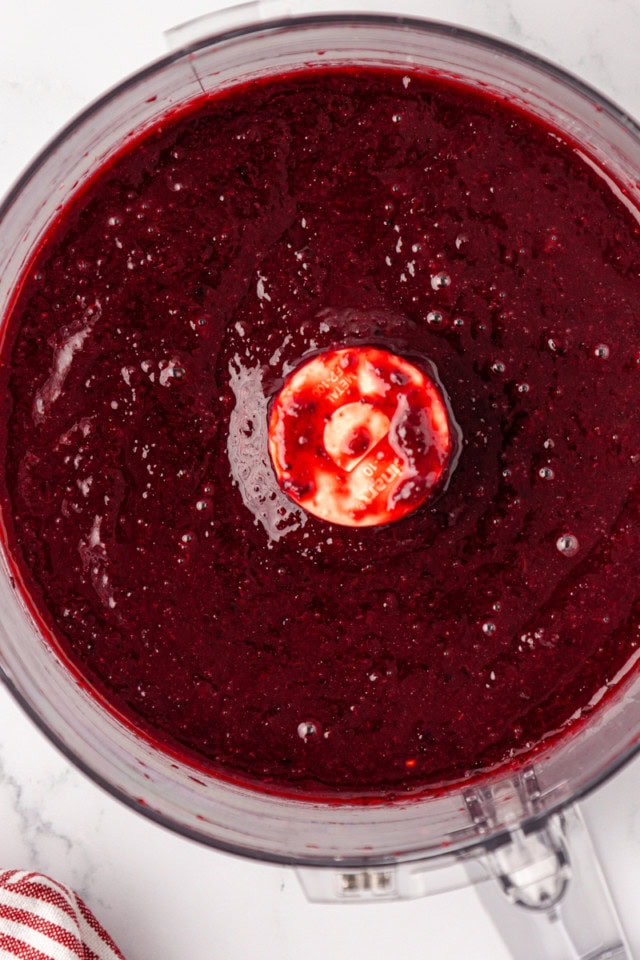
- Make the cherry swirl. Cook the cherries with sugar, lemon juice, and cornstarch until thickened. This not only sweetens and balances the cherries’ tartness but also concentrates the flavor and keeps the swirl from being too runny. Cool the mixture, then blend until smooth so it spreads and swirls easily into the cheesecake layer.
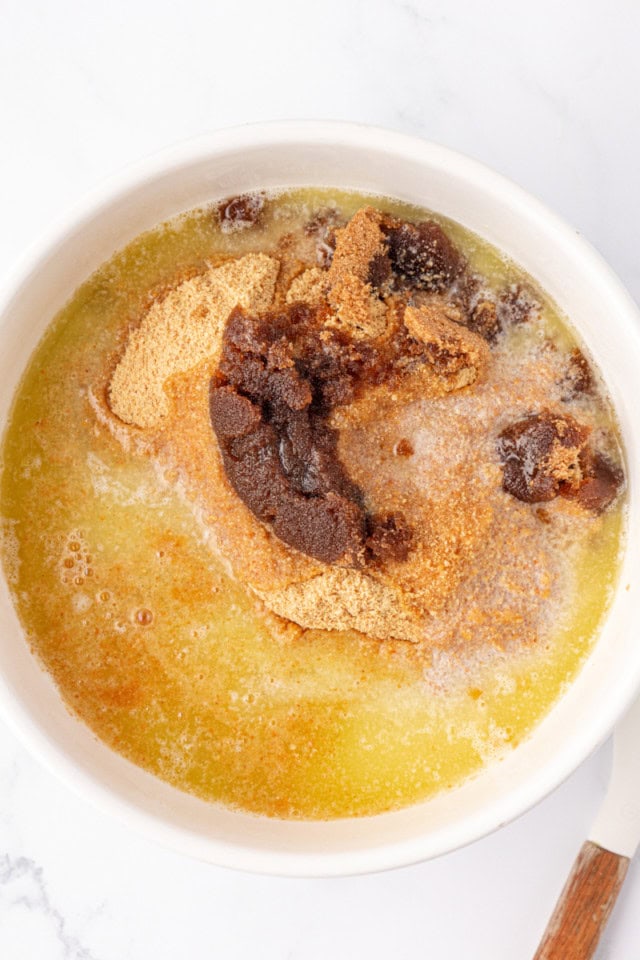
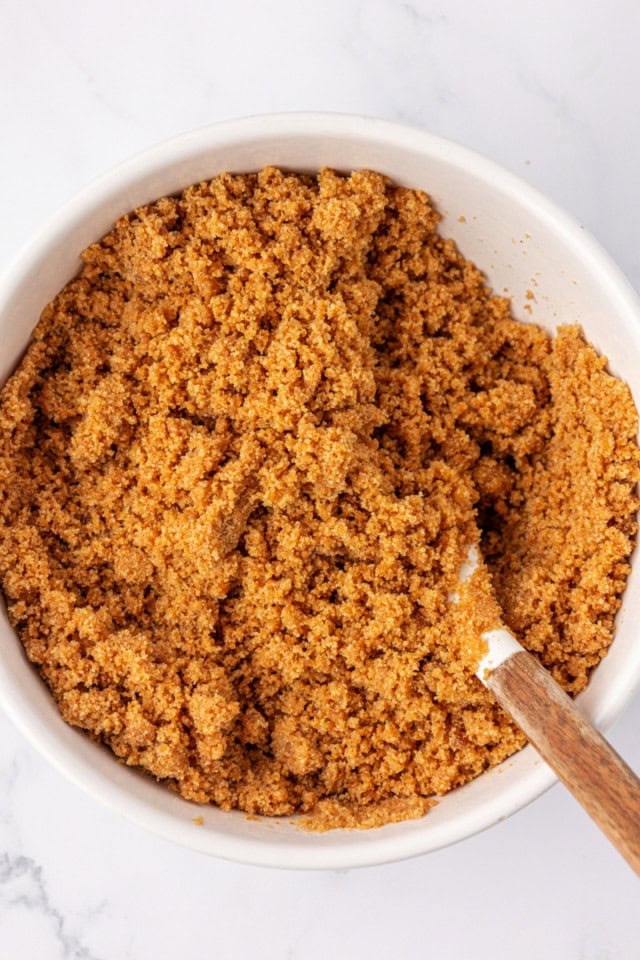
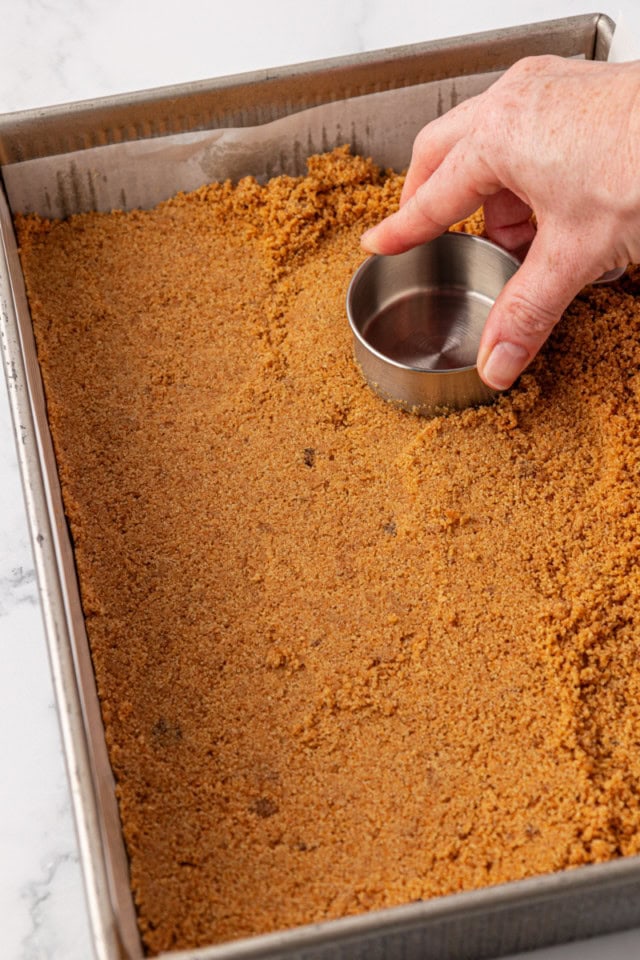
- Prepare the crust. Stir together graham cracker crumbs, brown sugar, and melted butter. The brown sugar adds a little richness and chew, while the butter binds everything together. Press the crust firmly into your pan and bake for 10 minutes. This sets the crust so it stays crisp under the creamy filling.
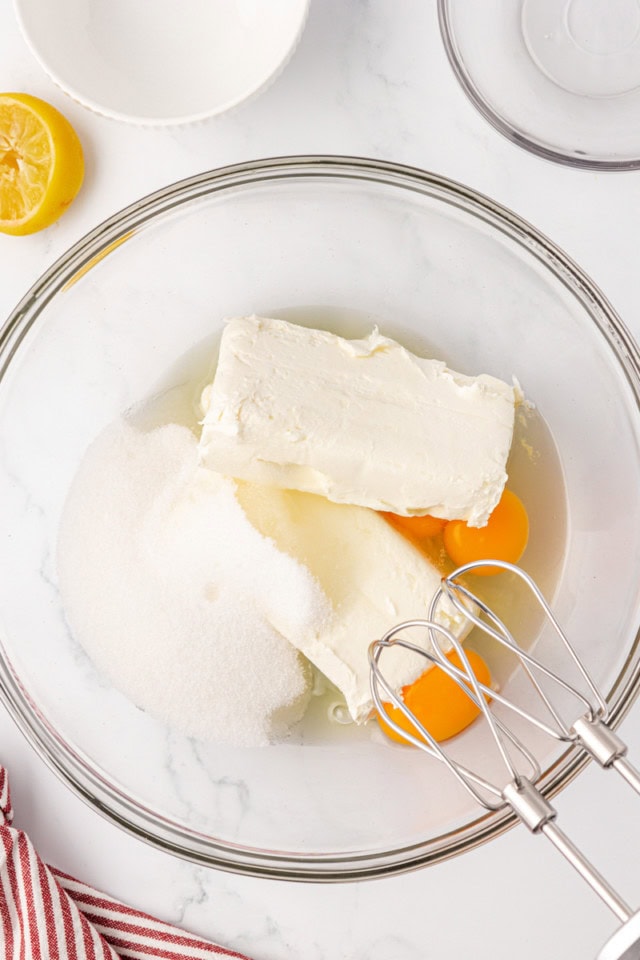
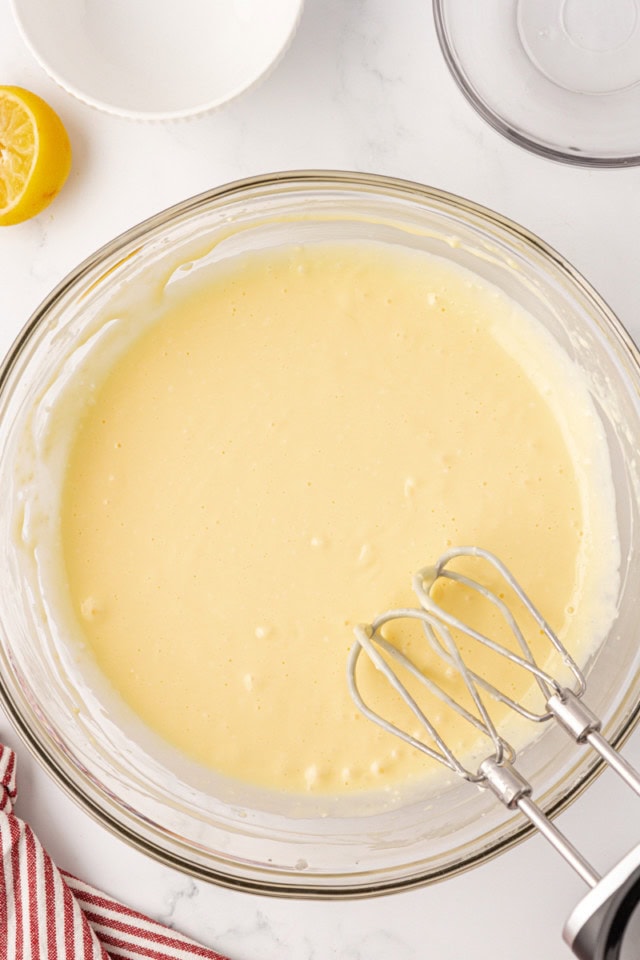
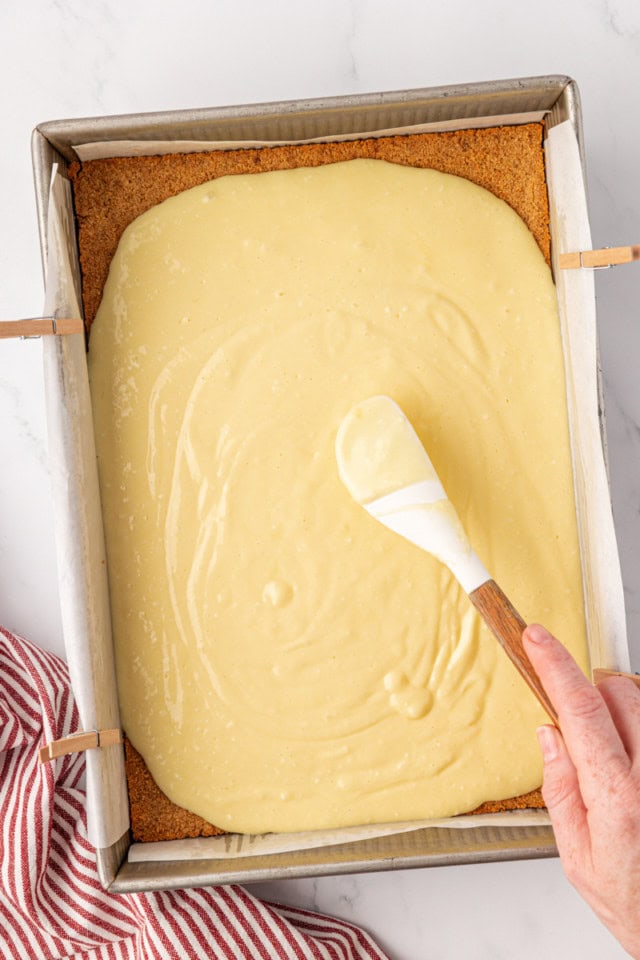
- Mix the filling. Beat softened cream cheese with sugar, eggs, and lemon juice until smooth, then spread over the crust. Mixing on medium speed helps avoid incorporating too much air, which can lead to cracks. The lemon adds brightness and complements the cherry swirl.
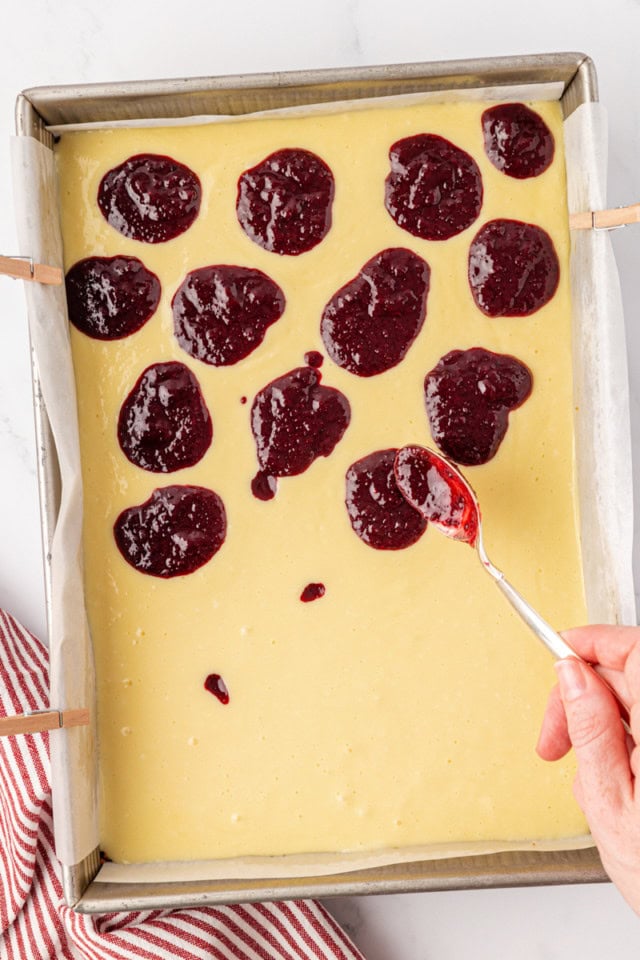
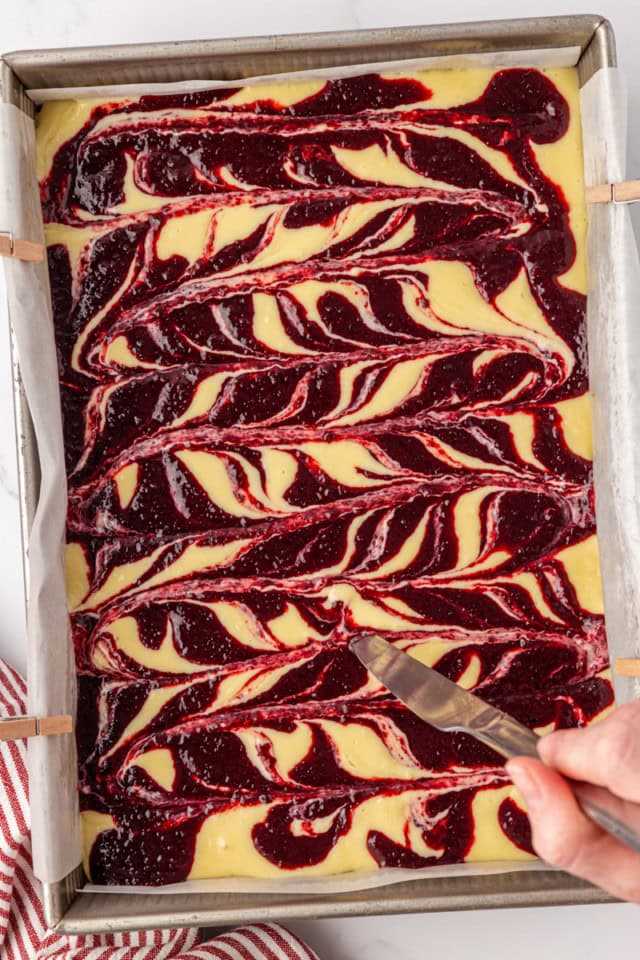
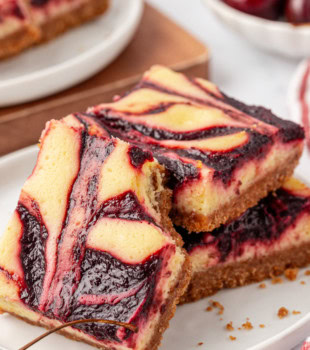
- Add the cherry swirl. Drop spoonfuls of the blended cherry mixture over the cheesecake layer and gently swirl with a thin knife. A light touch is best, as too much swirling can muddy the look.
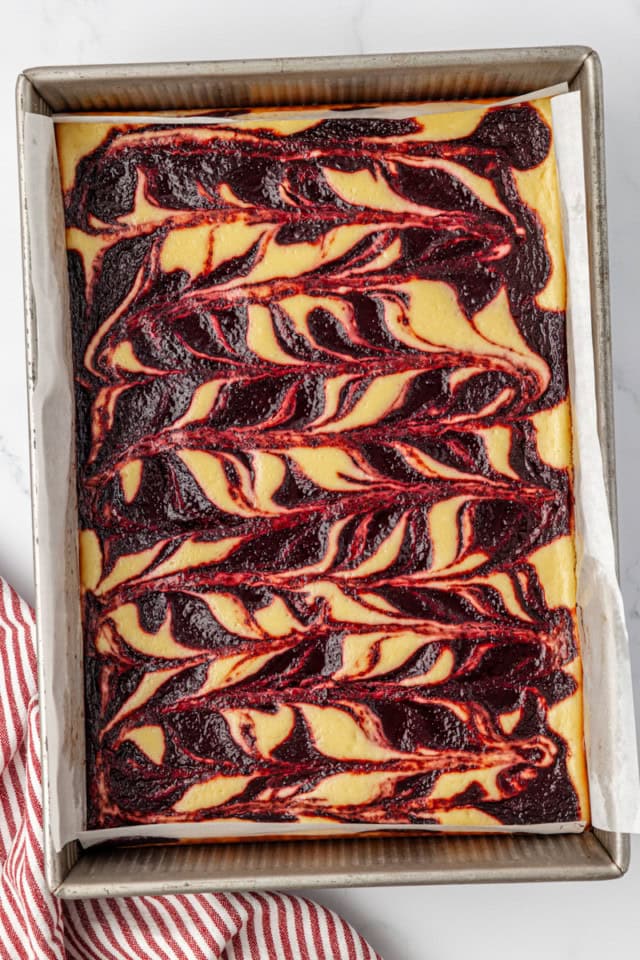
- Bake and chill. Bake just until the filling is set and a toothpick comes out clean. Let the bars cool to room temperature before refrigerating for at least 6 hours. Chilling helps the texture fully set and makes slicing much easier.
Tips for Success
- Line the pan if you like. If you prefer lifting the whole batch out before slicing, line your pan with parchment paper with an overhang on two sides.
- Use a light hand with the swirl. For a pretty marbled look, don’t overdo it. Just a few passes with the knife will do.
- Don’t skip the chill time. It helps the bars set fully and gives the flavors time to develop.
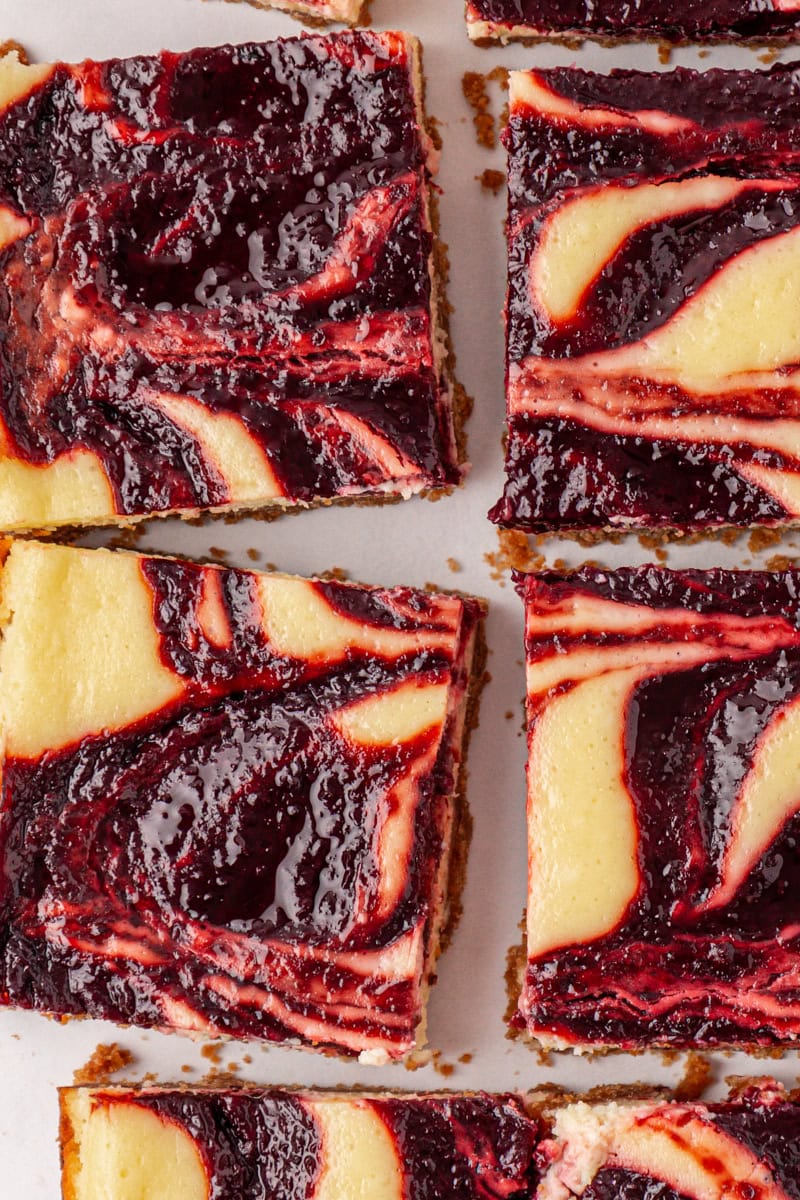
- Use a sharp knife for clean slices. Wipe the knife between cuts for neat edges.
- Make ahead friendly. The necessary chill time makes these bars a great dessert to make in advance.
Variations
- Vanilla twist – Swap the lemon juice for vanilla extract in the filling and cherry swirl.
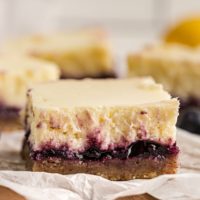
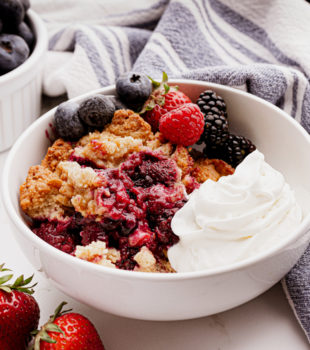
- Different fruit – Try the same technique with raspberries, blueberries, or a mix of berries.
- Cookie crust swap – Use vanilla wafers, almond cookies, or lemon shortbread for a fun crust variation.
How to Store
- Refrigerate: Store the bars tightly covered in the refrigerator for up to 5 days. For best texture, wait to slice until fully chilled.
- Freeze: Wrap individual bars or the whole batch tightly and freeze for up to 2 months. Thaw overnight in the refrigerator before serving.
Whether you grew up loving cherry cheesecake or you’re just discovering it now, these cherry cheesecake bars offer all the creamy, fruity goodness in a simple, bar-friendly format. They’re just the thing for summer gatherings, celebrations, or whenever you’re craving a nostalgic treat with a homemade touch.
Have a favorite cheesecake twist? Let me know in the comments—I’m always up for trying something new!
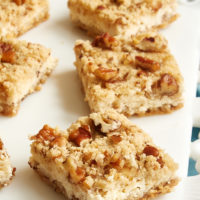
More Cheesecake Bar Recipes
Cherry Cheesecake Bars
Ingredients
For the cherry swirl:
- 2 cups cherries, pitted
- 2 tablespoons granulated sugar
- 2 teaspoons cornstarch
- juice of 1/2 medium lemon
For the crust:
- 10.5 ounces (298 g) graham cracker crumbs
- 10 tablespoons (141 g) unsalted butter, melted
- 2 tablespoons (25 g) firmly packed light or dark brown sugar
For the filling:
- 16 ounces (454 g) cream cheese, at room temperature
- ¾ cup (150 g) granulated sugar
- 3 large eggs
- juice of 1/2 medium lemon
Recommended Products
Instructions
To make the cherry swirl:
- Combine the cherries and sugar in a medium saucepan. Bring to a boil, stirring frequently. Then decrease heat and allow to simmer for 5 minutes. Stir in the cornstarch and lemon juice. Cook for 2 or 3 minutes, or until thickened.
- Set aside to cool.
- Once cooled, transfer to a blender or food processor. Process until there are no large pieces of cherries remaining. The mixture should be pourable.
To make the crust:
- Preheat oven to 350°F (175°C). Grease a 9" x 13" x 2" baking pan.
- Combine the cookie crumbs, butter, and brown sugar until thoroughly combined. Press the mixture firmly and evenly into the bottom of the prepared pan.
- Bake 10 minutes. Set aside to cool slightly.
To make the filling:
- Using an electric mixer on medium speed, beat the cream cheese, sugar, eggs, and lemon juice until thoroughly combined and smooth. Pour onto the partially baked crust, and spread evenly.
- Spoon the cherry mixture over the top of the filling. You'll want to cover it well with small spoonfuls of the mixture.
- Use a thin knife to swirl the cherry mixture into the filling.
- Bake 30 to 35 minutes, or until the bars are set and a pick inserted into the center comes out clean.
- Cool to room temperature. Then cover and refrigerate at least 6 hours before serving.
Notes
- Store tightly covered in the refrigerator up to 5 days.


13 Comments on “Cherry Cheesecake Bars”
Just baked these using sour cherries(or Morello cherries) which we have in abundance and they came out fruity and delicious. Thank you for another easy, great recipe!
Those sound awesome! Perfect use for fresh cherries 🙂
Wow – these look so delicious! And scatter some blueberries over top and on the platter and you’ve got your red, white and blue 😉
Congratulations on your book! It looks wonderful – can’t wait!
Thank you, Marla! 🙂
Yes! These are the perfect size for summer. Light and easy!
That looks great! Thanks for sharing!
Greats
NJ
I made these yesterday, very good.😙
Hi Jennifer
Do you think frozen cherries would work in this recipe. I love all your recipes! Not 1 has failed me and believe me I have tried quite a few of yours.
Keep ‘me coming!
Hi, Paula. I don’t often use frozen fruits, but I think that could work. I would rinse and dry them before using.
I’m confused. The directions say: “Combine the cherries and sugar in a medium saucepan. Bring to a boil, stirring frequently. Then decrease heat and allow to simmer for 5 minutes.” There is no liquid to boil — did you leave out a step or ingredient?
The sugar will melt as it heats, creating some liquid.
I made these, and my filling turned out more like a custard instead of a thicker cheesecake. I also had to bake 20 minutes longer than the recipe called for because it was so jiggly. I double checked measurements and my egg size and made sure my cream cheese was room temperature also. I think the cream cheese and the sugar should have been creamed first instead of mixing everything at once. Is this what I did wrong or can someone suggest anything? I really wanted these to turn out because I like the cherry swirl instead of the topping. Help!!
I’m sorry you had troubles, Wendy! I’ve not had that issue when I’ve made these, so I don’t know what’s different. That much of a difference in texture is concerning. If you didn’t change anything at all about the recipe, then it has to be ingredients, temperature, or mixing. Full-fat brick (not whipped) cream cheese works best. Eggs shouldn’t be straight from the refrigerator, especially if your cream cheese is at room temperature. Also, your oven temperature could be off because you mentioned it taking longer to bake. You can check that with an oven thermometer. Too much mixing can change the texture, too, although I wouldn’t expect the extreme you described. I hope that helps!