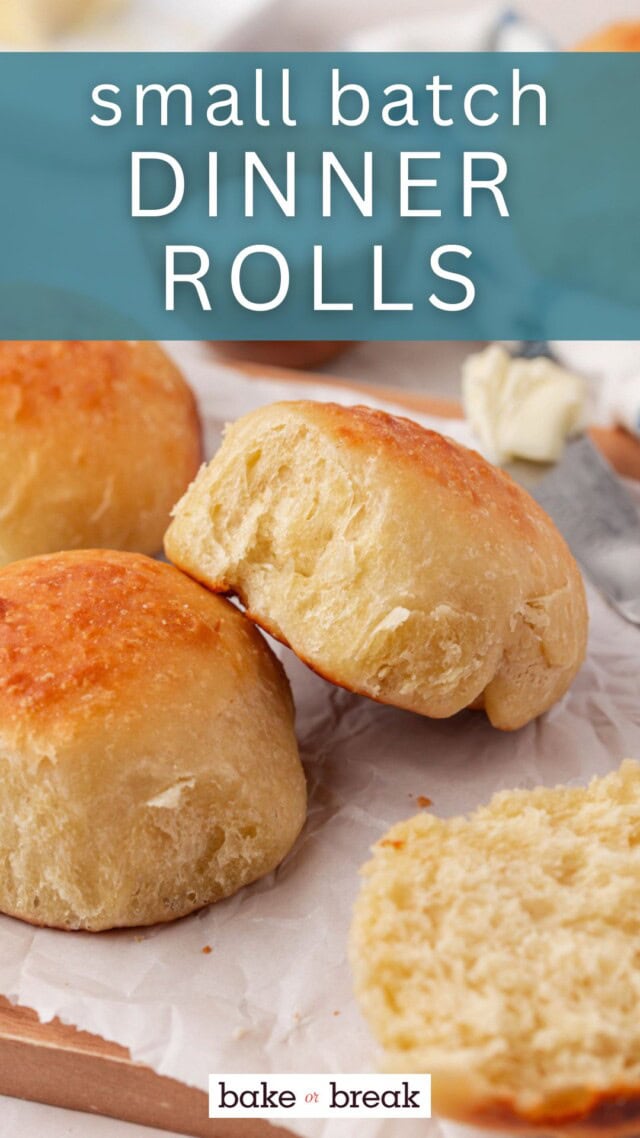
Soft, fluffy dinner rolls made from scratch in a small batch. Perfect when you want fresh bread without a big commitment.
There’s something about warm, homemade dinner rolls that just makes a meal feel special — even if it’s a simple weeknight dinner.
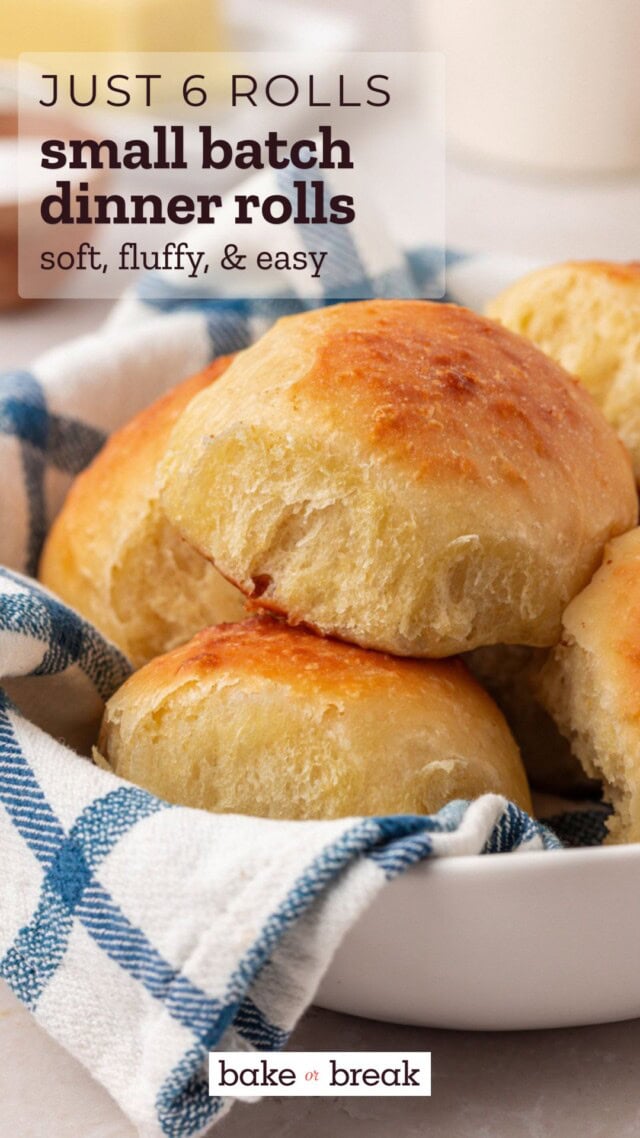
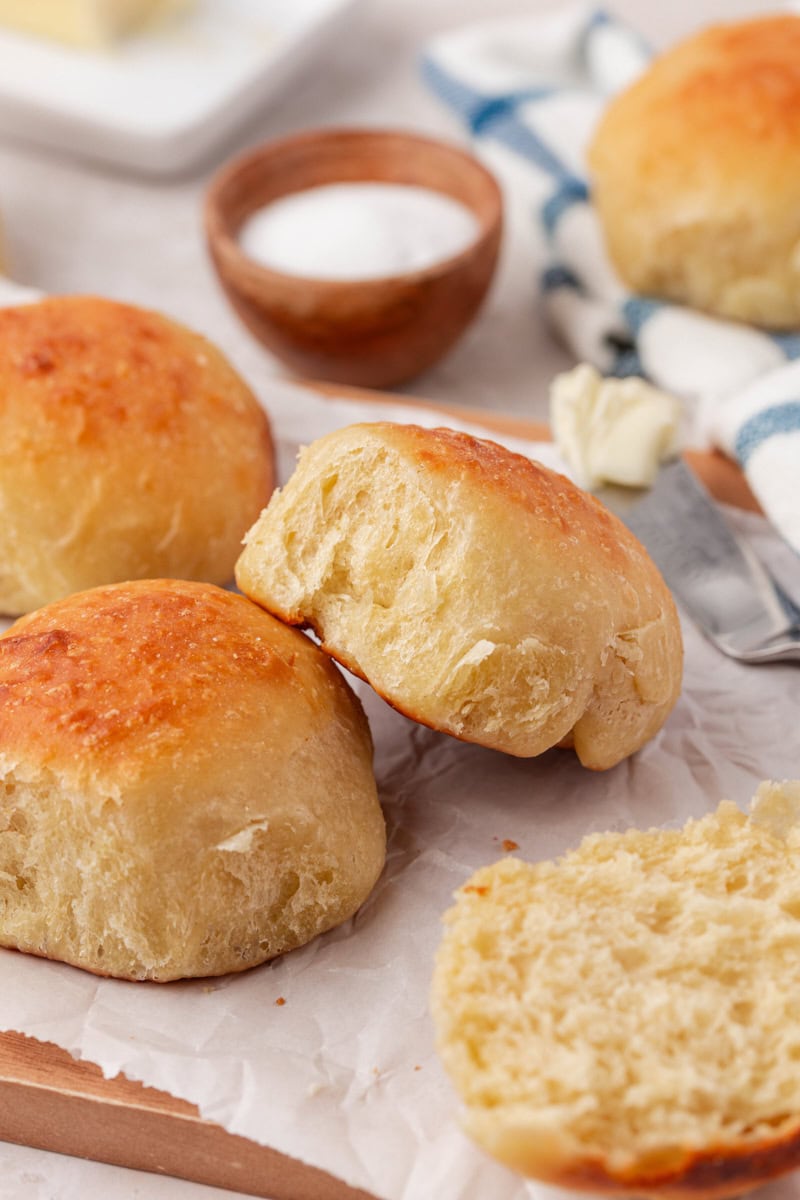
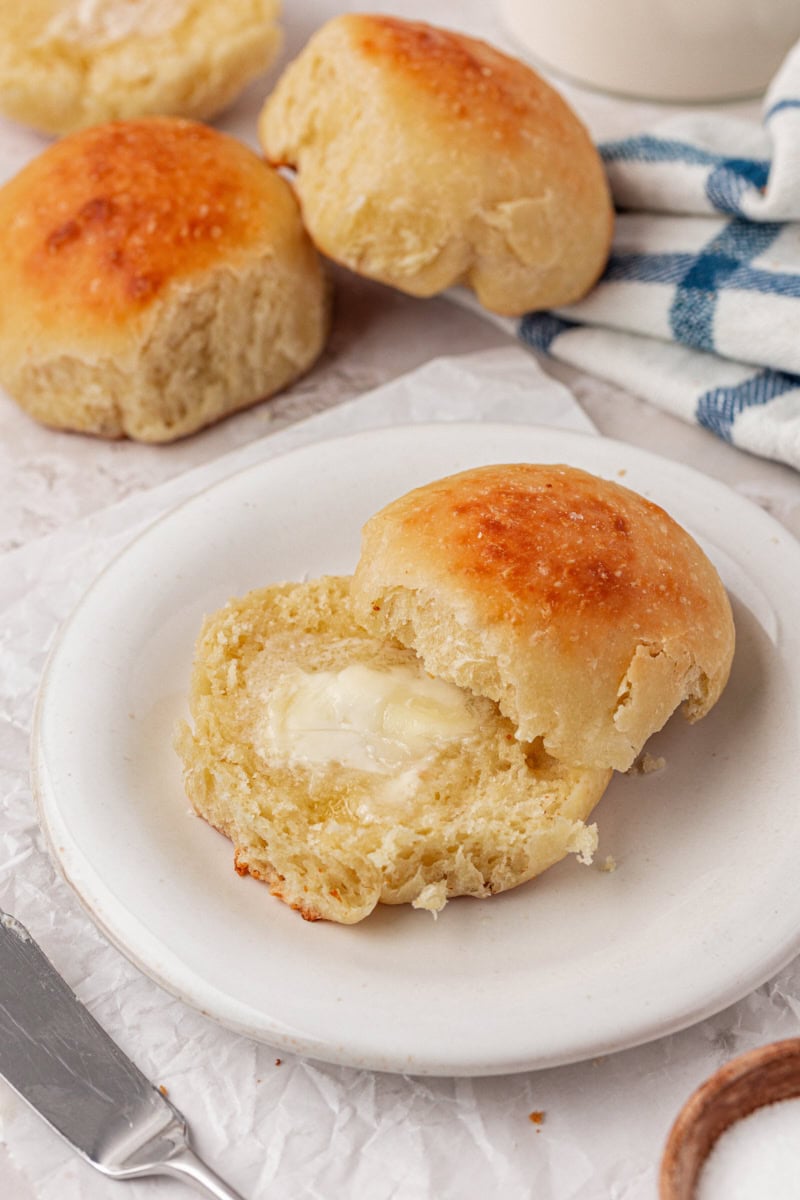
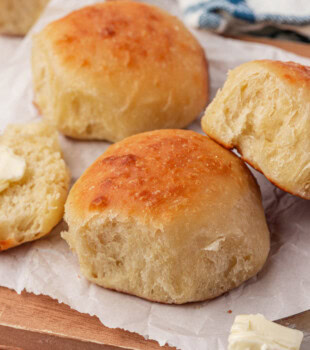
These small batch dinner rolls are my answer to wanting that cozy, fresh-baked bread moment without ending up with a dozen leftovers. You get six soft, fluffy rolls with that classic pull-apart texture and lightly golden tops — all made with simple ingredients and a straightforward process.
They’re rich enough to feel a little indulgent (thanks to butter, egg, and milk), but still easy enough to make without overthinking it. If you’re newer to yeast baking, don’t worry — this recipe focuses on simple steps and visual cues so you can feel confident every step of the way.
Why You’ll Love These Small Batch Dinner Rolls
- Small batch, no leftovers. This recipe makes just six rolls — perfect for a small dinner, a holiday for two, or anytime you want fresh bread without extras hanging around.
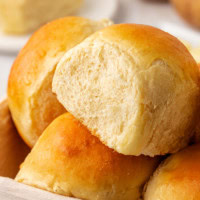
- Soft, fluffy, and just rich enough. A mix of butter, egg, and milk gives these rolls a tender crumb and that classic soft texture you want in a dinner roll.
- Simple, flexible dough. The dough is designed to be forgiving — slightly tacky, easy to handle, and adaptable depending on how much flour your kitchen needs that day.
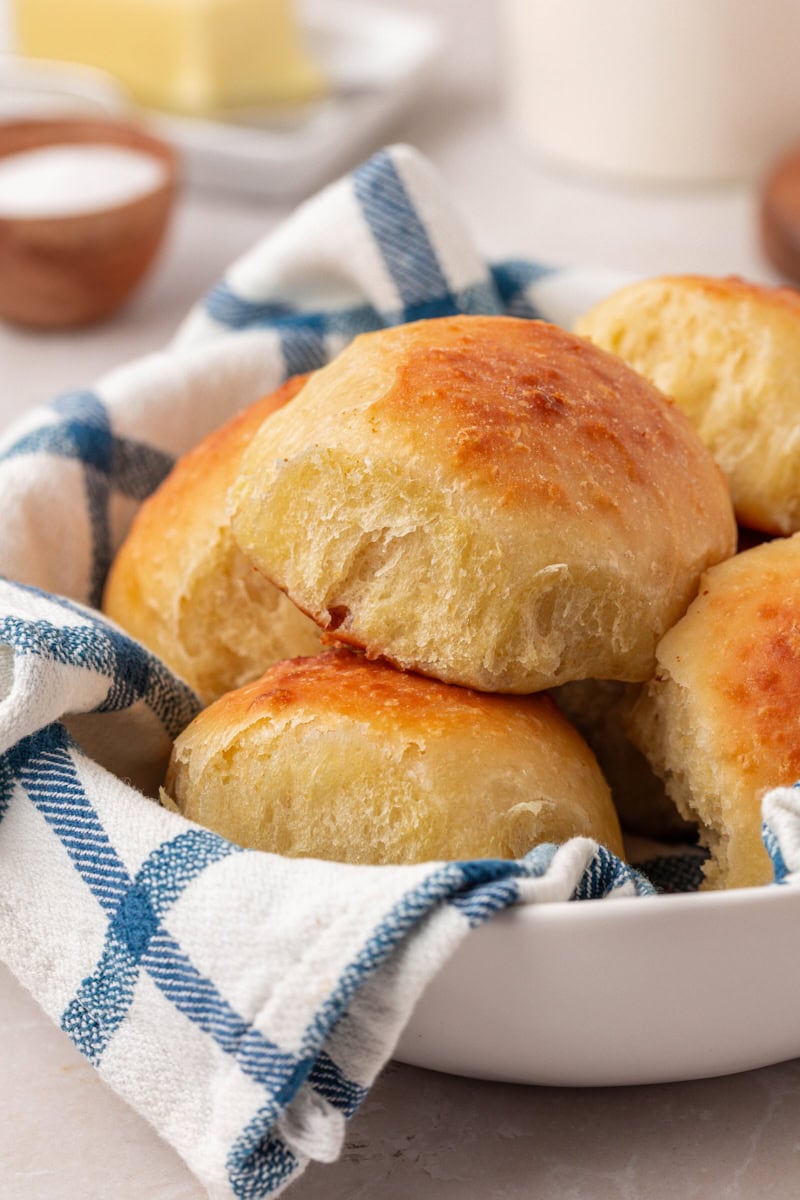
- That classic pull-apart look. Baked together in a small pan, the rolls rise into each other for soft sides and those irresistible fluffy seams.
- Manageable introduction to yeast baking. If you don’t bake with yeast often, this is a great place to start. It’s straightforward, scaled down, and focused on visual cues instead of rigid rules.
Key Ingredients
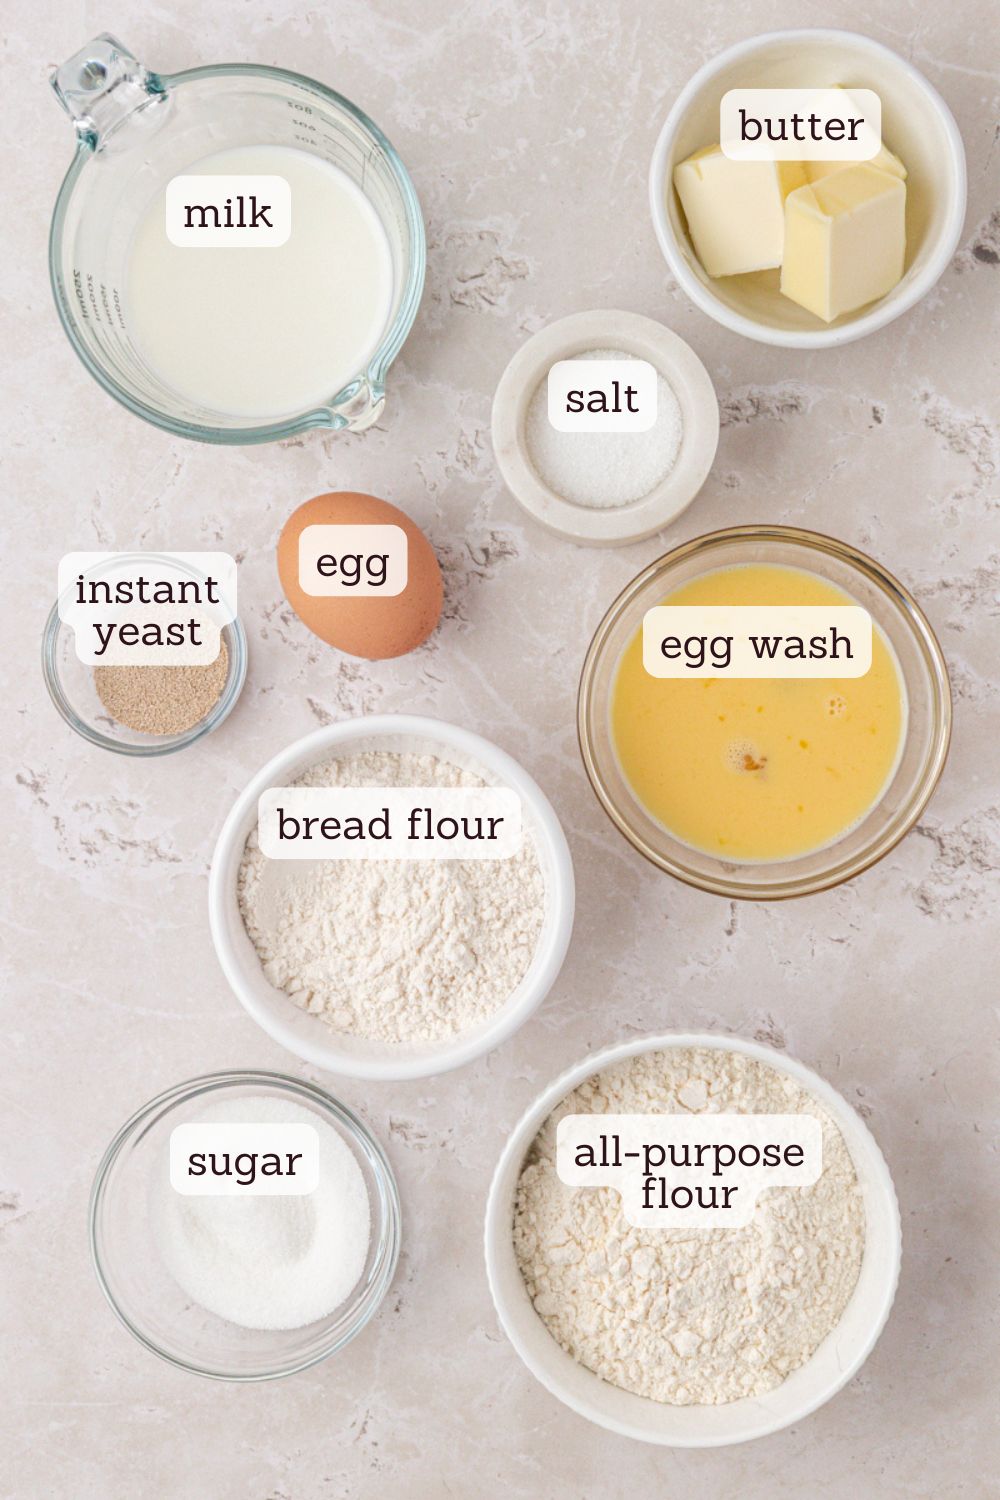
- All-purpose flour + bread flour – This combination gives you the best of both worlds — softness from the all-purpose flour and a bit of extra structure from the bread flour. That’s what helps the rolls stay light and fluffy while still holding their shape.
- Instant yeast – Keeps things simple and reliable. You can mix it right in with the dry ingredients (no proofing step needed) which makes this recipe especially approachable if you don’t bake with yeast often.
- Milk – Warm milk adds richness and helps create a soft, tender crumb. It also gives the dough a little boost for a good rise.
- Butter – Adds flavor and softness. The melted butter blends easily into the dough and gives the finished rolls that classic rich taste.
- Egg – This is what makes these rolls feel a little more special than a basic bread roll. It adds structure, richness, and contributes to that soft, fluffy interior.
- Sugar – Just enough to lightly sweeten the dough and help feed the yeast. These aren’t sweet rolls, but that small amount makes a big difference in flavor.
How to Make Small Batch Dinner Rolls
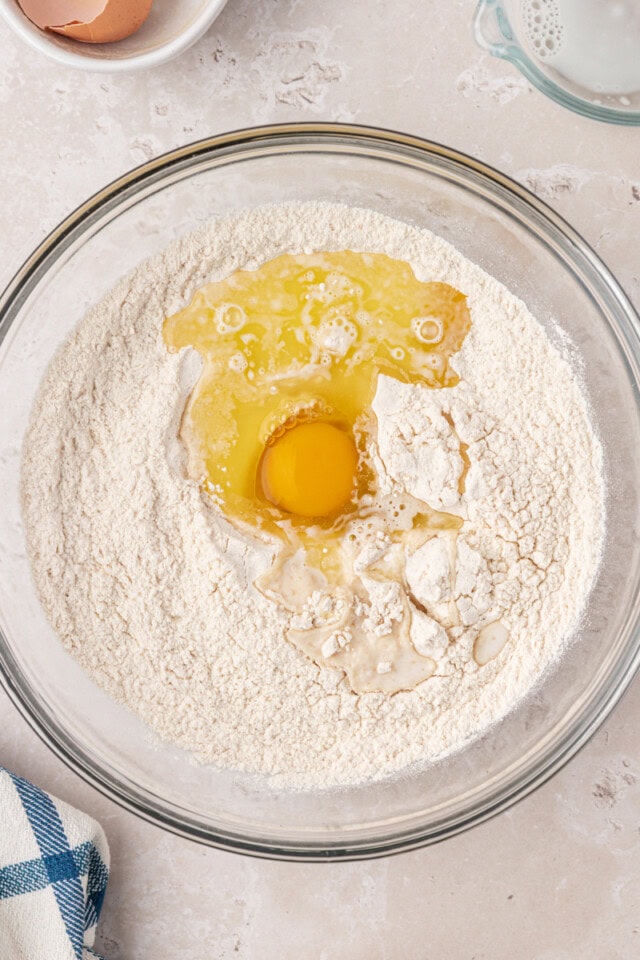
Mix the dry ingredients.
Whisk together the all-purpose flour, bread flour, sugar, salt, and instant yeast in a large bowl. Starting with a smaller amount of bread flour gives you better control over the dough texture later.
Add the wet ingredients.
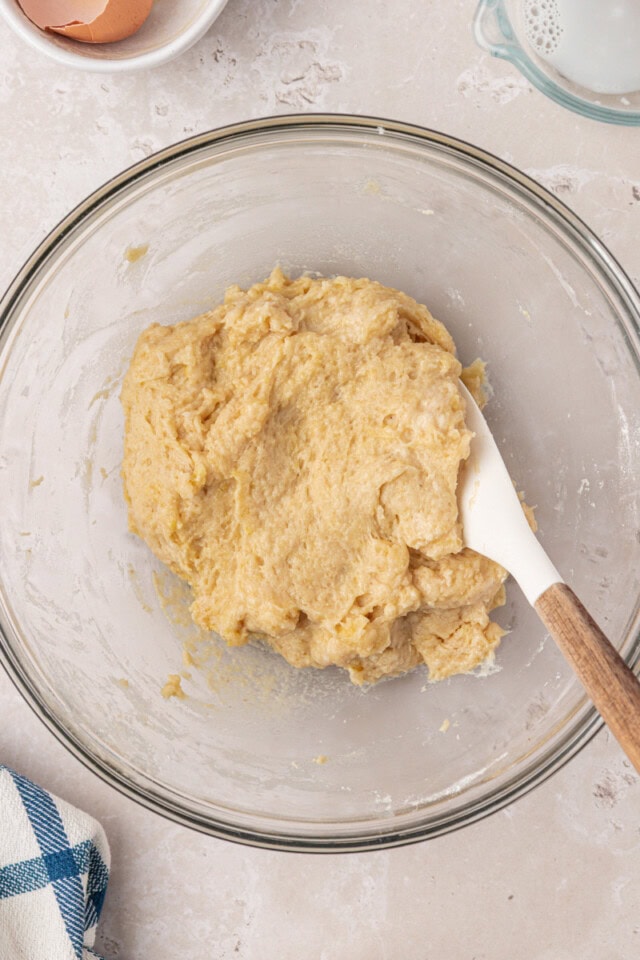
Add the melted butter, egg, and warm milk. Stir with a spatula until a shaggy dough forms. It may look a little rough at this stage — that’s exactly what you want.
Adjust the dough as needed.
Add more bread flour a little at a time until the dough is soft and slightly tacky, but not sticky. It should pull away from the sides of the bowl while still feeling supple.
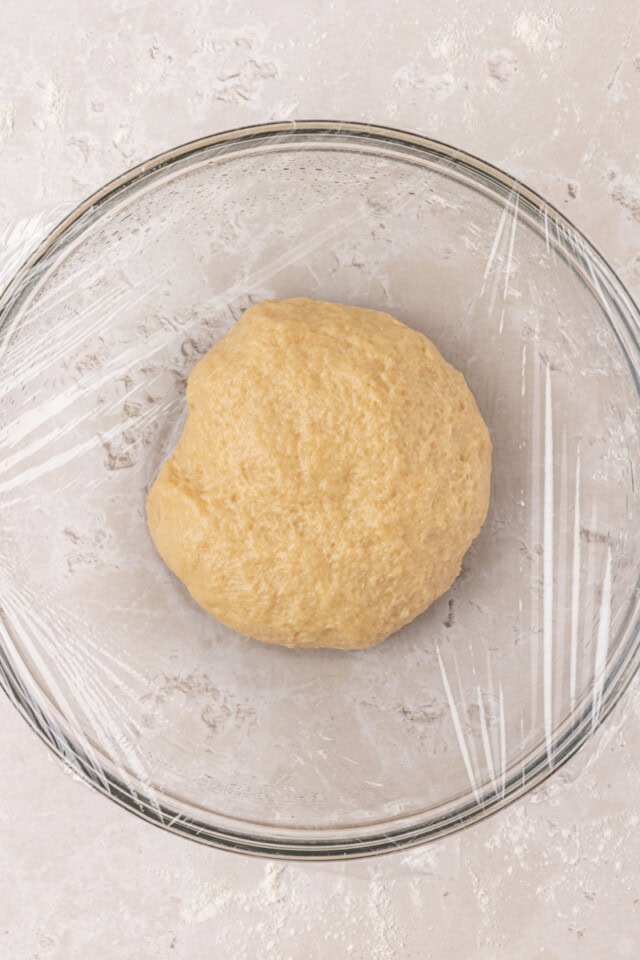
Knead until smooth and elastic.
Turn the dough onto a lightly floured surface and knead for about 4 to 6 minutes, or use a mixer with a dough hook for about 4 minutes on low speed. The dough should become smooth, elastic, and just slightly tacky. When you gently press it, it should slowly spring back.
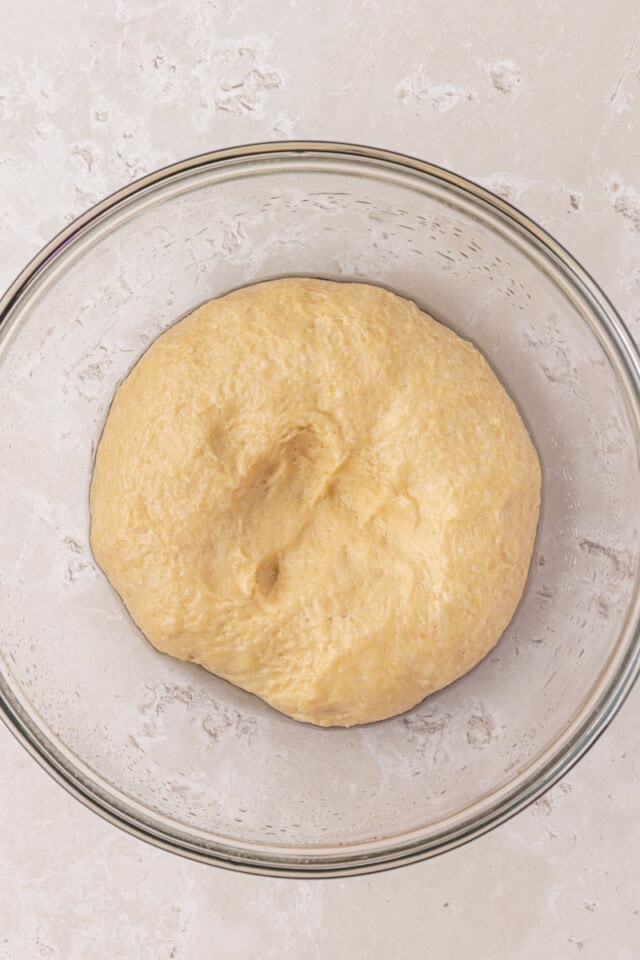
Let the dough rise.
Place the dough in a lightly greased bowl, cover, and let it rise until doubled in size. This usually takes about 1½ to 2 hours, depending on the warmth of your kitchen. Look for a visibly puffy dough that holds a slight indentation when pressed.
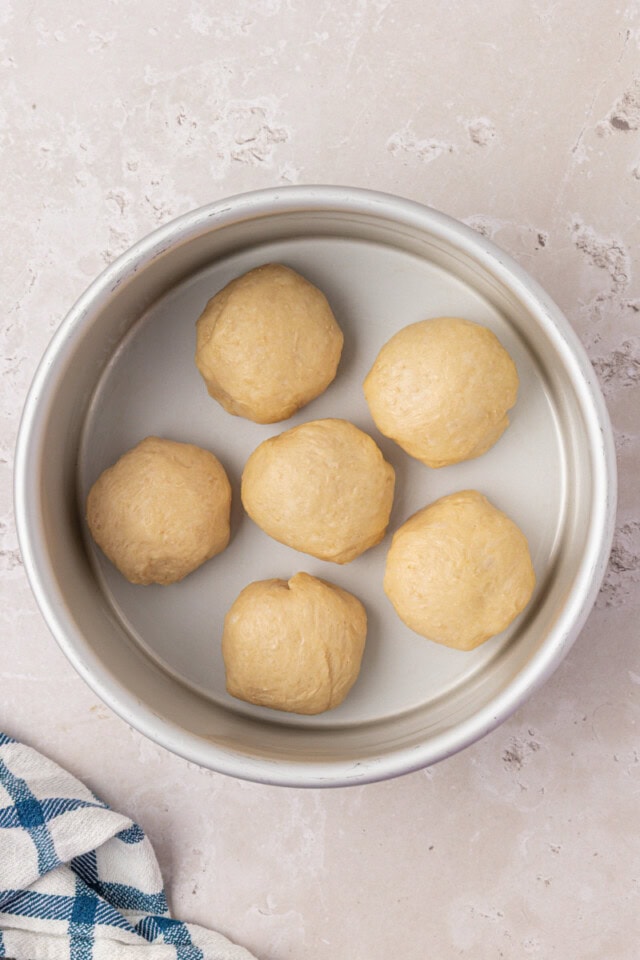
Shape the rolls.
Divide the dough into 6 equal pieces (a kitchen scale is helpful here), then gently tuck and roll each piece into a smooth ball. Arrange them in a greased 8-inch round pan or small baking dish.
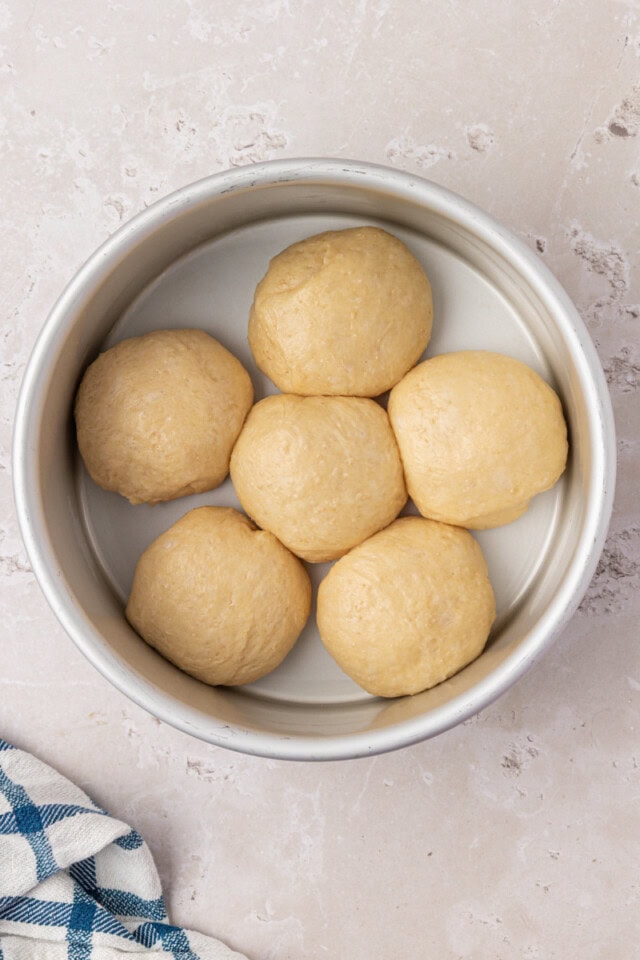
Let them rise again.
Cover and let the rolls rise until puffy and touching, about 1 hour. They should look soft and pillowy, and barely jiggle if you gently move the pan.
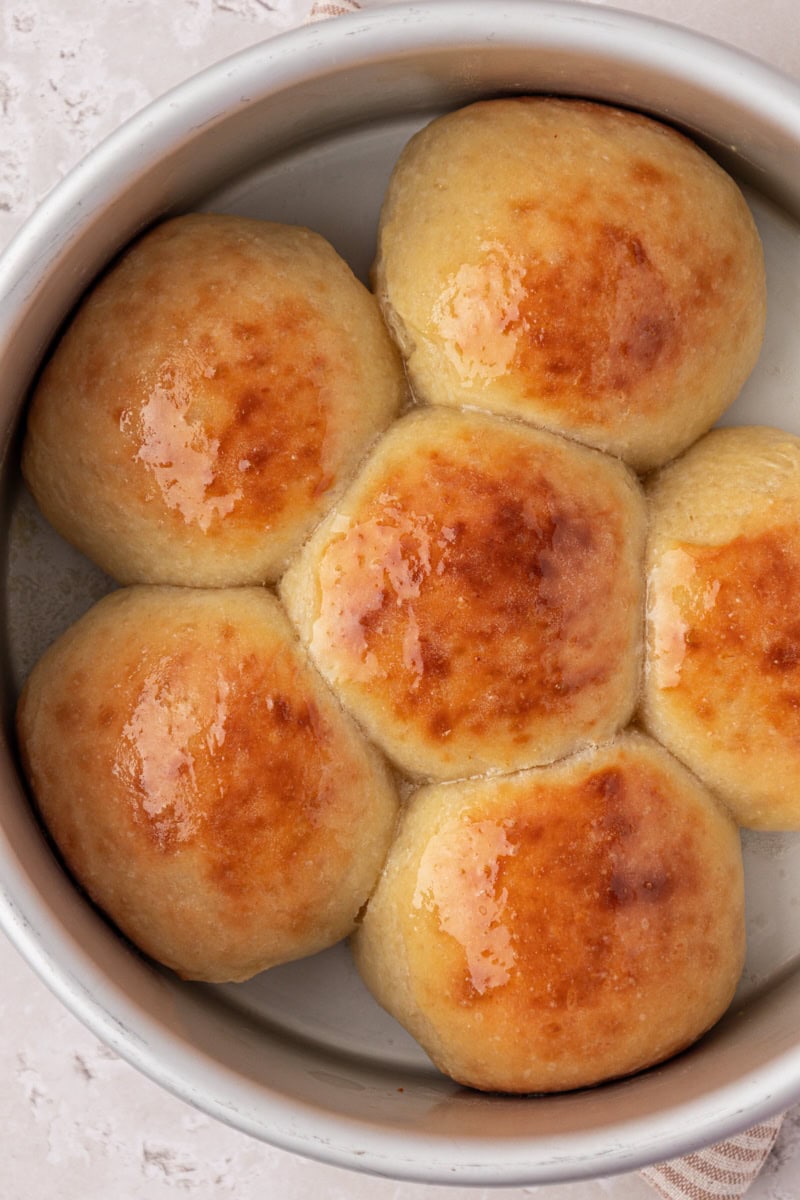
Bake until golden.
Brush the tops lightly with egg wash, then bake at 375°F until golden brown, about 12 to 15 minutes.
Finish with butter.
Brush the warm rolls with melted butter right after baking for extra flavor and a soft, glossy finish.
Tips for Success
- Focus on how the dough feels, not just the measurements. Start with the lower amount of bread flour, then add more a little at a time as needed. You’re aiming for a dough that’s soft and slightly tacky — not sticky and not dry. Too much flour will make the rolls dense instead of light and fluffy.
- A shaggy dough is a good start. Right after mixing, the dough will look a bit rough and uneven. That’s exactly what you want. Kneading will smooth it out.
- Look for elasticity when kneading. The dough is ready when it’s smooth, stretchy, and springs back slowly when pressed. If it feels stiff, it likely has too much flour.
- Give the dough a cozy place to rise. Aim for a warm (not hot) spot — around 75–90°F is ideal. If your kitchen runs cool, the rise will just take a bit longer.
- Use visual cues instead of the clock. For the first rise, the dough should double in size and look puffy, with an indentation that slowly fills in when pressed. For the second rise, the shaped rolls should be touching and look soft and pillowy. If they don’t look ready yet, give them more time — even if the timer says otherwise.
- Shape for smooth, even rolls. Tuck the seams underneath each piece of dough so the tops stay smooth and rounded. If you have a kitchen scale, weighing each portion helps the rolls bake evenly.
- Don’t skip the egg wash and butter finish. The egg wash gives the rolls that beautiful golden color, and brushing with butter right after baking keeps them soft and adds extra flavor.
- How do you know they’re done? The tops should be golden, and the rolls should sound slightly hollow when tapped. If you like to check, the internal temperature should be around 190–200°F.

Serving Ideas and Variations
- Serve them warm with butter (or better yet, compound butter). These rolls are at their best fresh from the oven with a swipe of softened butter. If you want to dress them up a bit, try a flavored butter like honey cinnamon, garlic herb, or even a little flaky salt and honey.
- Make them a little sweeter. If you like a slightly sweeter roll, you can increase the sugar by a tablespoon or brush the warm rolls with a little honey butter after baking.
- Add a savory finish. Skip the egg wash and brush the tops with melted butter before baking, then sprinkle with flaky salt or herbs for a more savory vibe.
- Turn them into slider buns. These are just the right size for small sandwiches. Slice and fill with ham, turkey, or roasted vegetables for an easy meal.
- Bake in a different pan. An 8-inch round pan gives you that classic pull-apart look, but you can also bake them in a small square pan or space them out on a sheet pan for more defined edges.
How to Store
At room temperature: Store the rolls in an airtight container at room temperature for up to 2 days. Warm them briefly before serving to bring back that soft, fresh-baked texture.
In the refrigerator: You can refrigerate them for up to 4 days, but they may dry out a bit. If you do store them this way, reheat gently to soften them.
To freeze: Let the rolls cool completely, then place them in an airtight container or freezer bag and freeze for up to 2 months. Thaw at room temperature, then warm in a low oven (about 300°F) until heated through.
To freeze before baking (optional): After shaping, place the rolls in the pan and freeze until solid. Wrap well and freeze up to 1 month for best results. When ready to bake, thaw in the refrigerator overnight, then let rise at room temperature until puffy before baking as directed.
A Small Batch Worth Baking Again and Again
There’s something especially satisfying about a recipe like this — simple, reliable, and just the right size.
These small batch dinner rolls are perfect for those moments when you want something homemade without turning it into a big project. Whether you’re making a weeknight dinner feel a little more special or adding something fresh and warm to the table for a holiday meal, these rolls fit right in.
Once you get a feel for the dough and those visual cues, it’s the kind of recipe you’ll come back to often — and maybe even start making without needing to look at the recipe at all.
More Yeast Bread Recipes

Small Batch Dinner Rolls
Ingredients
- 1 cup (120 g) all-purpose flour
- ½ to ¾ cup (60 to 90 g) bread flour*
- 2 tablespoons (25 g) granulated sugar
- ½ teaspoon salt
- 1 teaspoon instant yeast
- 3 tablespoons (42 g) unsalted butter, melted and slightly cooled , plus more for brushing after baking
- 1 large egg, at room temperature
- ¼ cup + 2 to 3 tablespoons (60 + 30 to 45 ml) warm milk, 100-110°F
- egg wash: 1 egg + 1 tablespoon milk, for brushing over rolls before baking
Recommended Products
Instructions
- Whisk together the all-purpose flour, ½ cup bread flour, sugar, salt, and yeast in a medium bowl.
- Add the melted butter, egg, and ¼ cup warm milk. Stir with a spatula until it forms a shaggy dough.
- Add more bread flour a tablespoon or two at a time as needed. You’re looking for a soft, slightly tacky dough that pulls away from the sides of the bowl but still feels supple to the touch. Too much flour will make the rolls dense instead of fluffy. Add additional milk one tablespoon at a time only if the dough is too dry.
- Turn out onto a lightly floured surface and knead about 4–6 minutes until smooth and elastic. You want a soft, slightly tacky dough, not sticky. The surface should look mostly smooth and spring back when gently pressed. (Or do this with a mixer + dough hook on low for 4 minutes.)
- Place in a lightly greased bowl, cover, and let rise until doubled (about 1½ to 2 hours depending on warmth). The dough should look visibly puffy and leave a slow-filling indent when gently pressed.
- Divide into 6 equal pieces (about 60–65g each). Round and tuck into balls. Arrange in a lightly greased 8-inch round cake pan or small baking dish.
- Cover and let rise until puffy and touching, about an hour.
- Preheat oven to 375°F (190°C).
- Brush the rolls lightly with egg wash. Bake for 12–15 minutes, until golden brown.
- Brush with melted butter immediately after baking.
Video
Notes
- Start with less flour. Begin with the lower amount of bread flour and add more as needed. The dough should be soft and slightly tacky, not dry or stiff.
- Watch the dough, not the clock. Rising times can vary depending on temperature. Look for dough that has doubled and looks puffy, and rolls that are soft and pillowy before baking.
- Use warm (not hot) milk. Aim for about 100–110°F. Too hot can damage the yeast, while cooler milk will slow the rise.
- Check for doneness. The rolls should be golden brown on top. If you like to check, the internal temperature should be about 190–200°F.
- Pan options. An 8-inch round pan gives a classic pull-apart shape, but any small baking dish will work.
- Make-ahead option. You can shape the rolls and refrigerate them overnight. Let them come to room temperature and finish their second rise before baking.


2 Comments on “Small Batch Dinner Rolls”
I will try the dinner rolls I have never been very good at making biscuits but this looks a little easier
Hi, Patricia! I hope you enjoy the rolls. If you’re looking for an easy biscuit recipe, take a look at cream biscuits or butter swim biscuits.