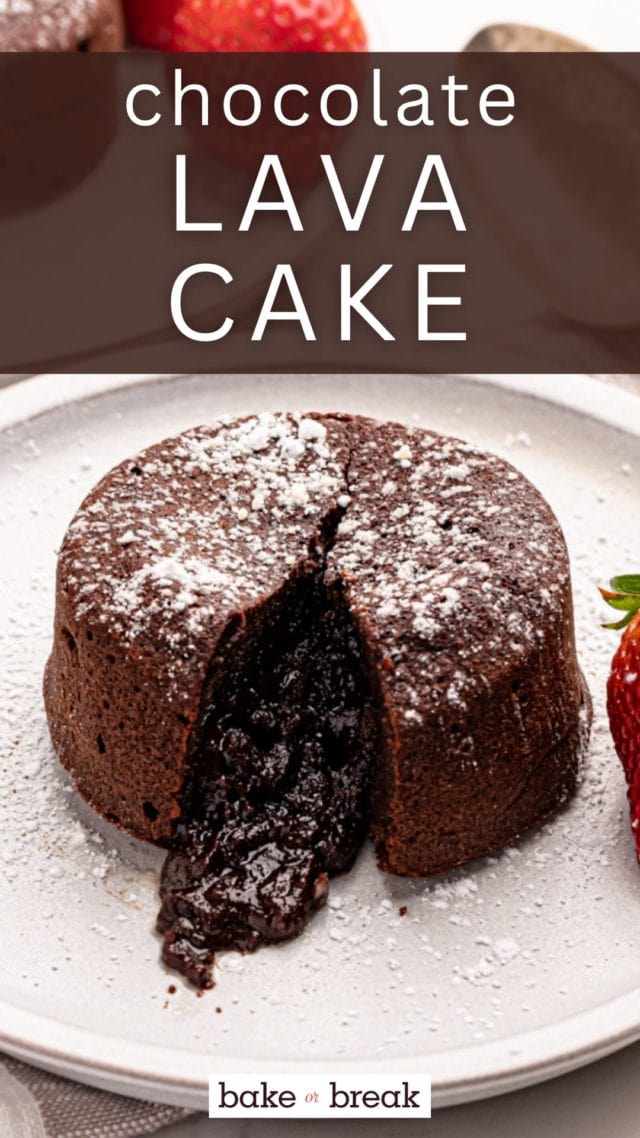
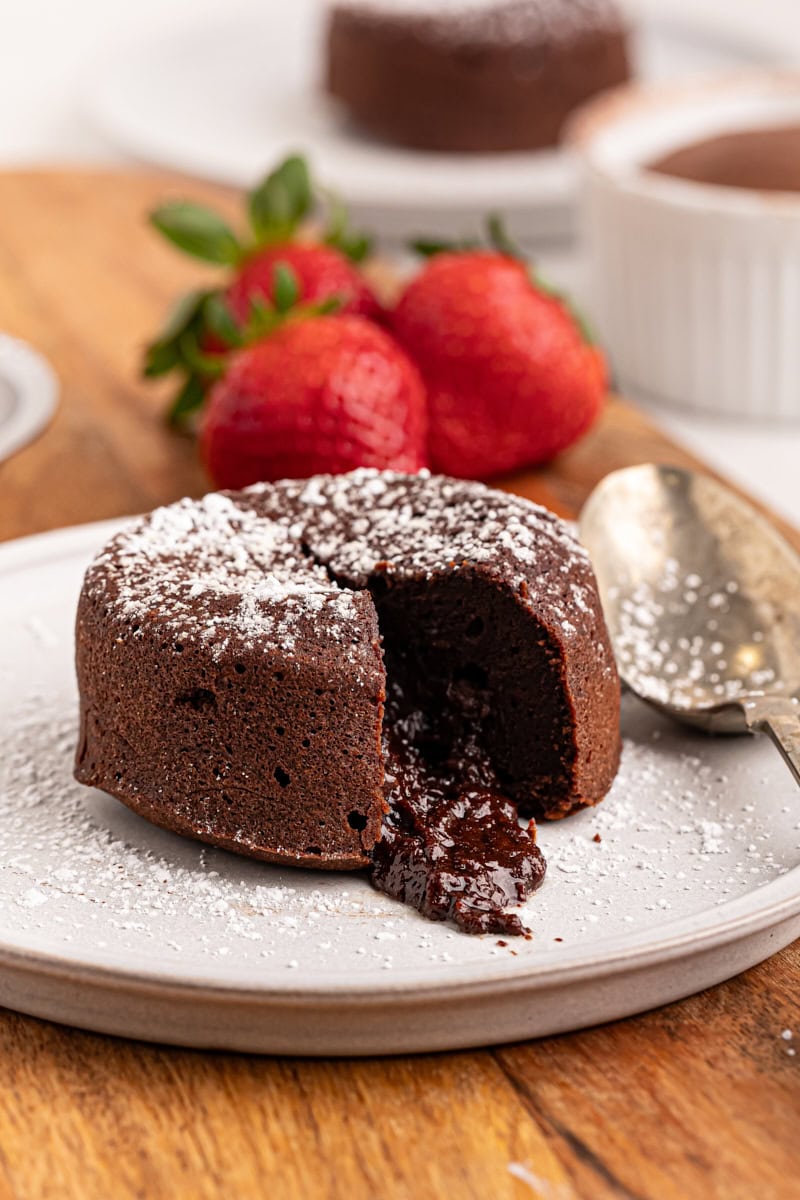
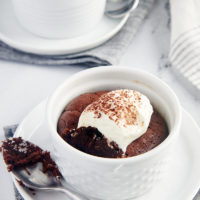
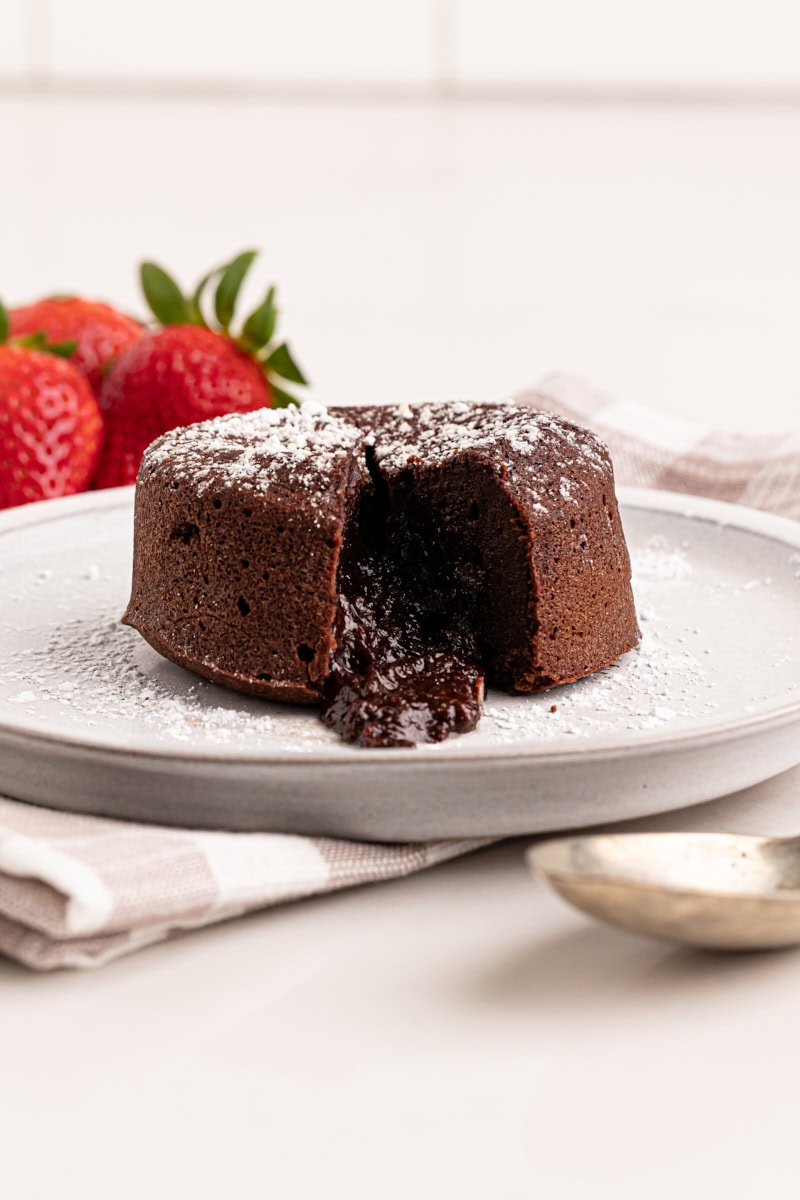
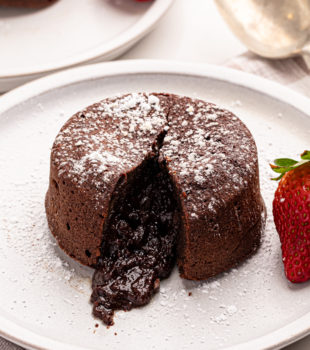
There’s nothing quite like cutting into a warm chocolate lava cake and watching the rich, molten center spill out. This indulgent dessert is surprisingly easy to make at home, with just a handful of ingredients and a few simple steps. Perfect for date nights, special occasions, or whenever you crave a little chocolate decadence!
Chocolate lava cake is a restaurant-style dessert that’s simpler than it looks. With a perfectly soft cake exterior and a gooey, molten chocolate center, it’s pure bliss in every bite. This recipe is easy enough for beginners yet impressive enough for entertaining. Plus, it comes together in under 30 minutes!
Why You’ll Love This Chocolate Lava Cake Recipe
- Rich & decadent. A fudgy, melt-in-your-mouth treat.
- Quick & easy. Ready in about 25 minutes with simple ingredients.
- No special equipment needed. Just a few ramekins and a whisk!
- Perfect for special occasions. Elegant yet effortless.

What You’ll Need
For ingredient quantities and full instructions, see the recipe card below.
- Cocoa powder: For dusting the ramekins to prevent sticking.
- High-quality dark chocolate: The key to a deep, rich chocolate flavor. Use chocolate with at least 60-70% cocoa for the best balance of bitterness and sweetness.
- Unsalted butter: Adds richness and helps create the molten center.
- Eggs & egg yolks: Provide structure while keeping the cake tender. Let them come to room temperature for mixing. They’re easier to separate when they’re cold, so do that first.
- Granulated sugar: Balances the chocolate’s bitterness.
- Salt: Enhances the chocolate’s depth of flavor.
- All-purpose flour: Just a touch to help the cake set properly.
- Vanilla extract: Adds warmth and enhances the chocolate flavor.
How to Make Chocolate Lava Cake

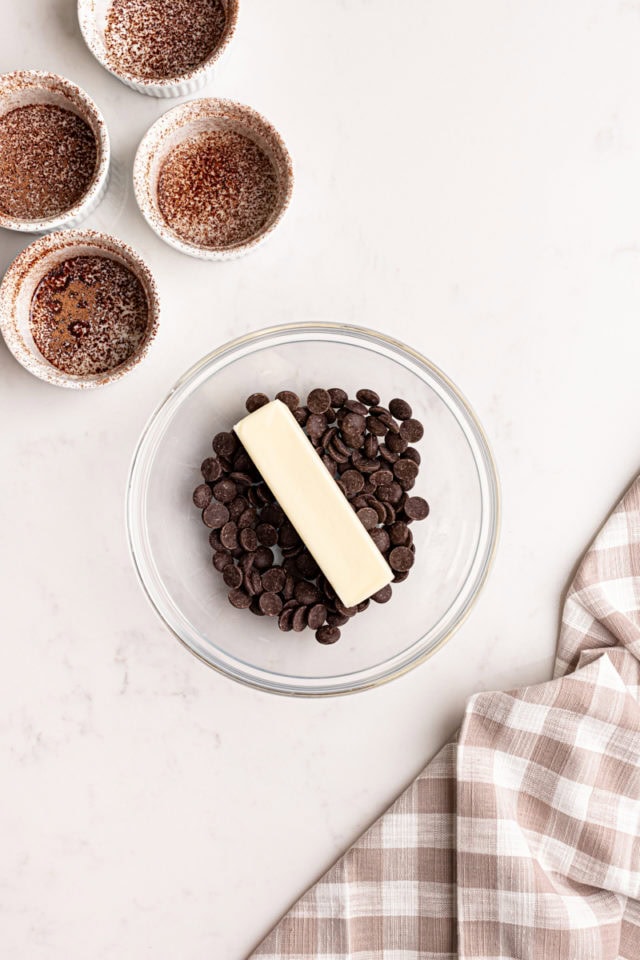
- Prepare the ramekins. Preheat the oven to 425°F. Grease four 6-ounce ramekins with butter and dust lightly with cocoa powder. Set aside.
- Melt the chocolate and butter. In a microwave-safe bowl, melt the chocolate and butter in 20-30 second increments, stirring until smooth. Allow to cool slightly so the eggs won’t scramble when added.
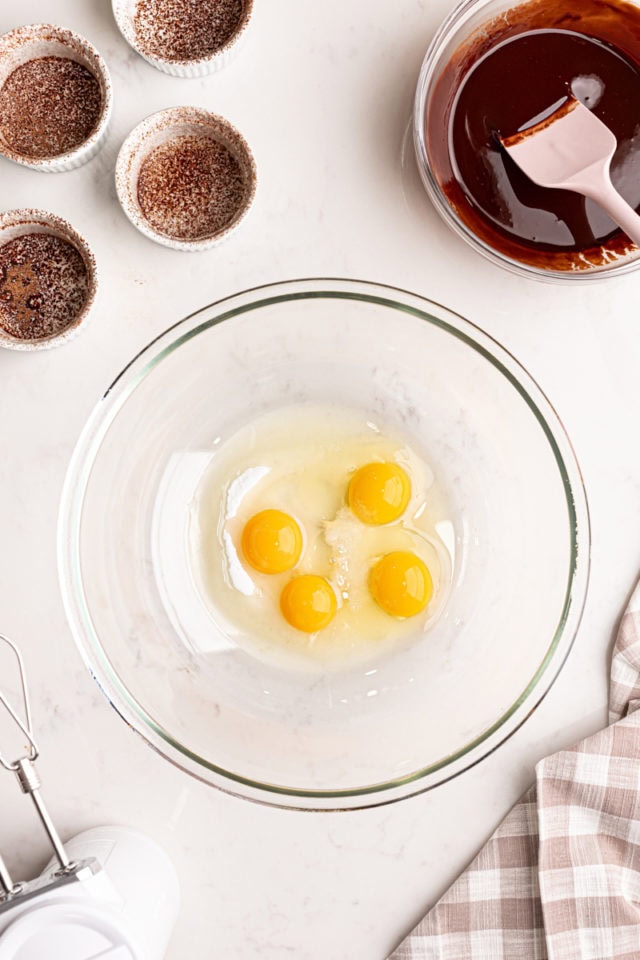
- Whisk the eggs & sugar. In a mixing bowl, whisk together the eggs, egg yolks, sugar, and salt until light and frothy (about 2-3 minutes).
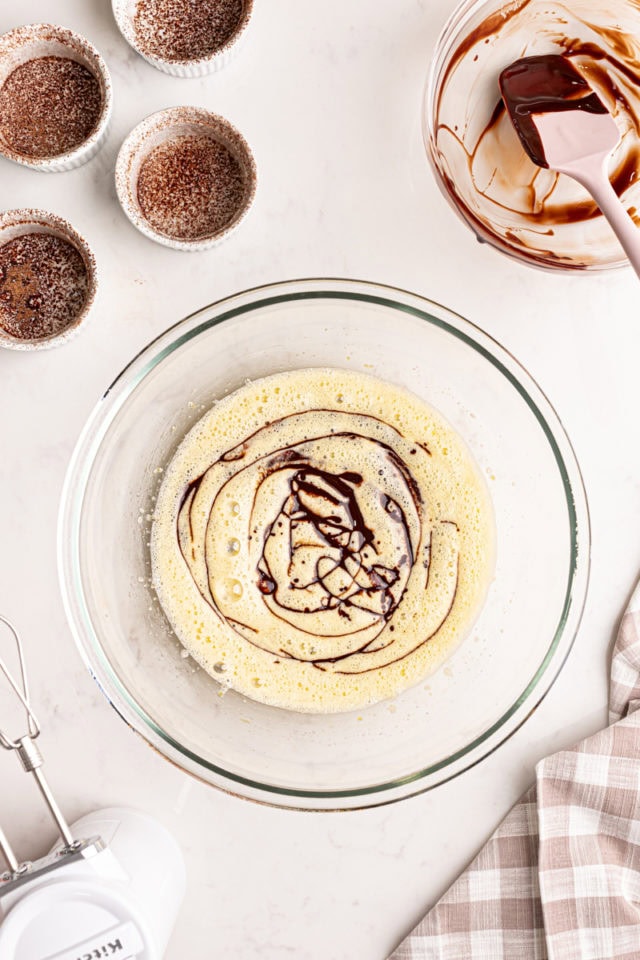
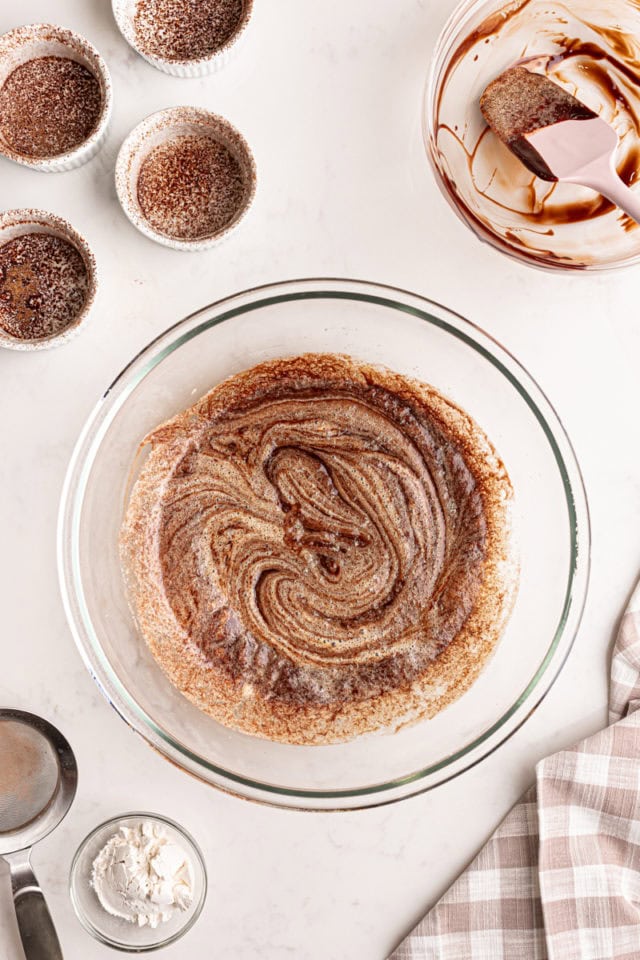
- Combine. Gently fold the melted chocolate mixture into the egg mixture.
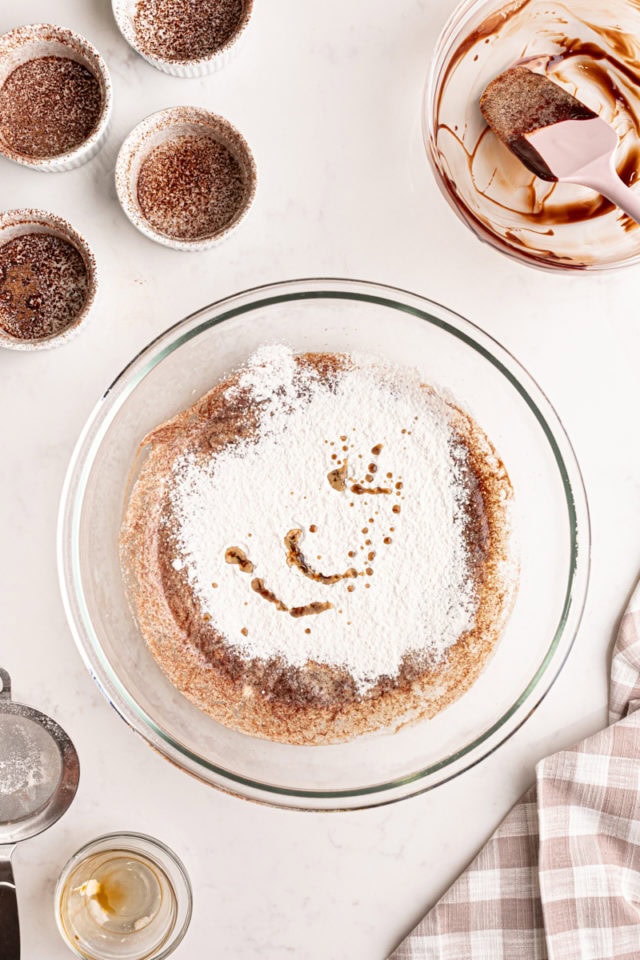
- Add the flour and vanilla. Sift in the flour, add vanilla extract, and mix until just combined.
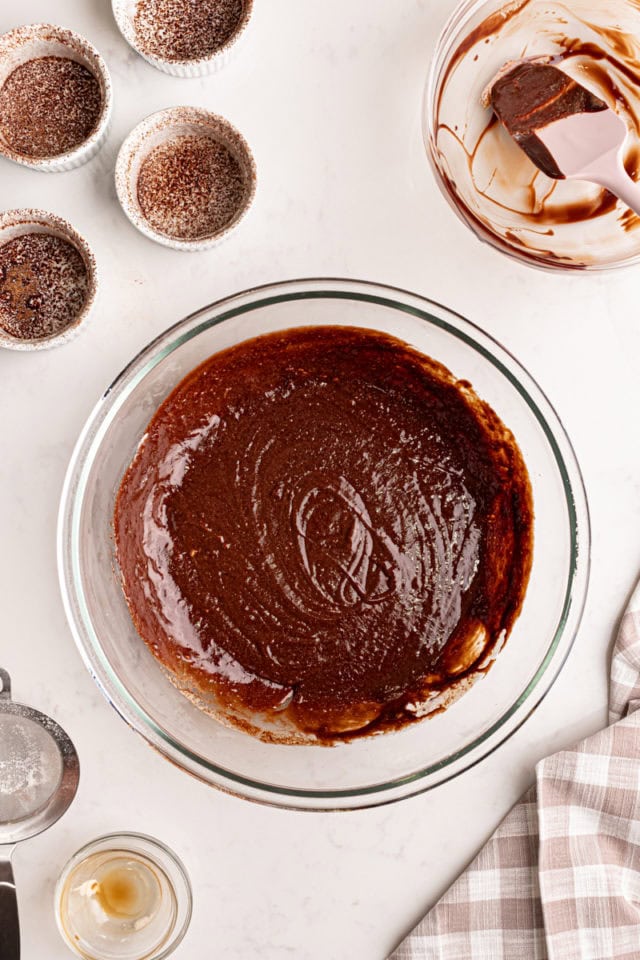
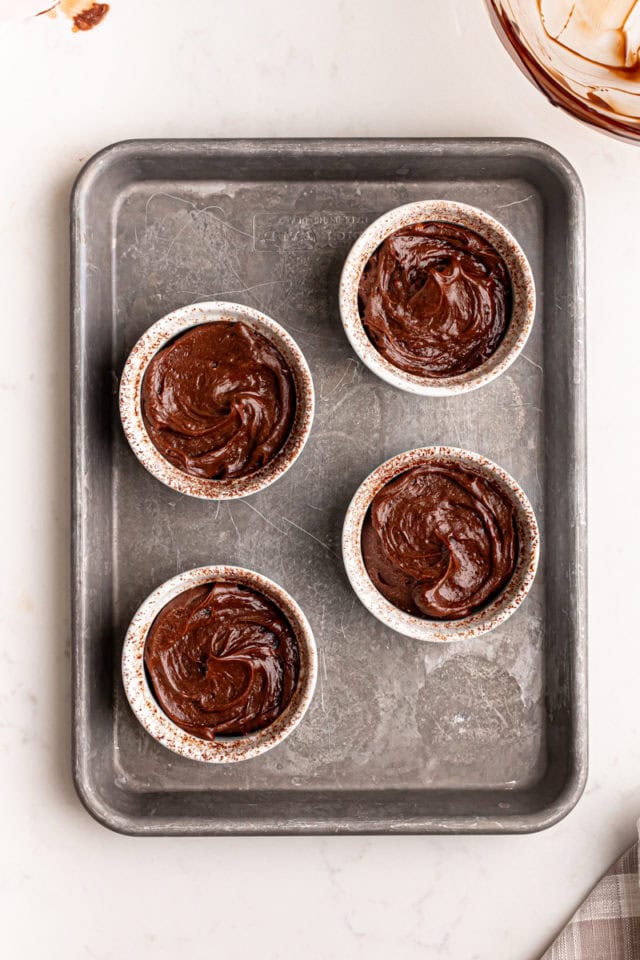
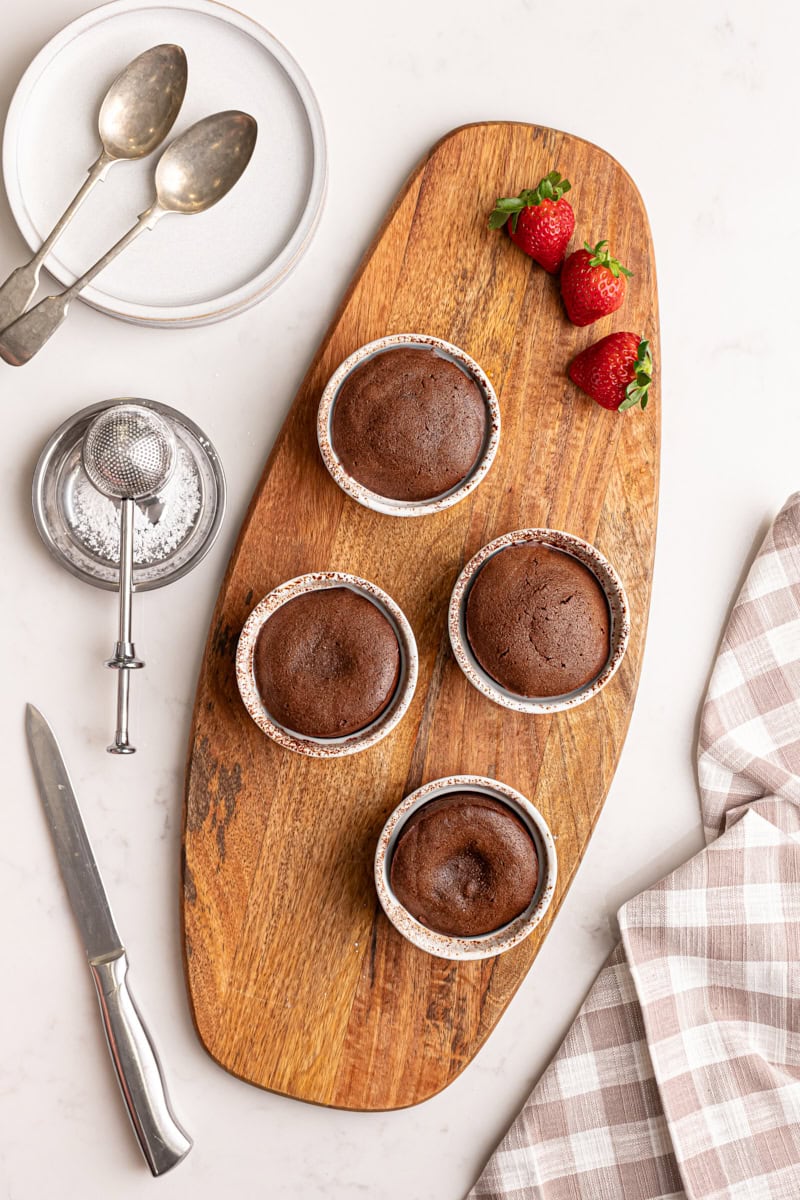
- Bake. Divide the batter evenly among the prepared ramekins, filling each about 3/4 full. Bake for 12 minutes, until the edges are set but the centers remain soft.
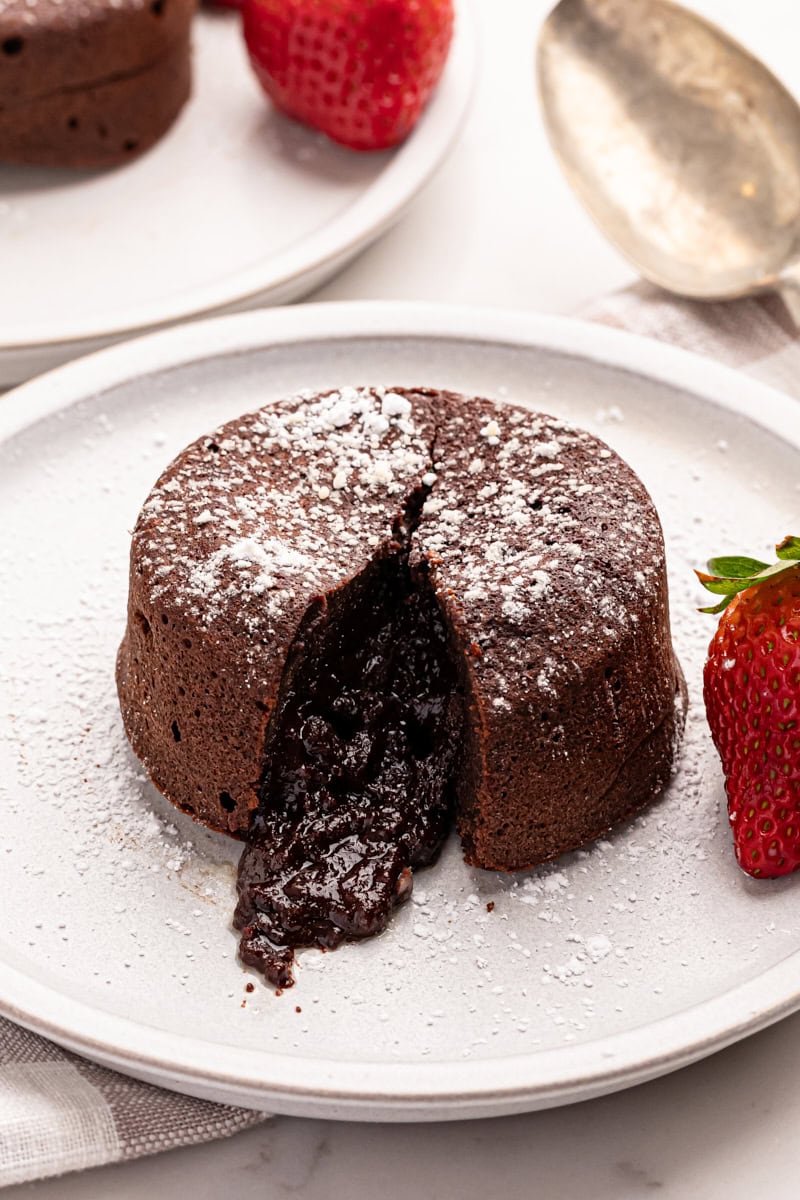
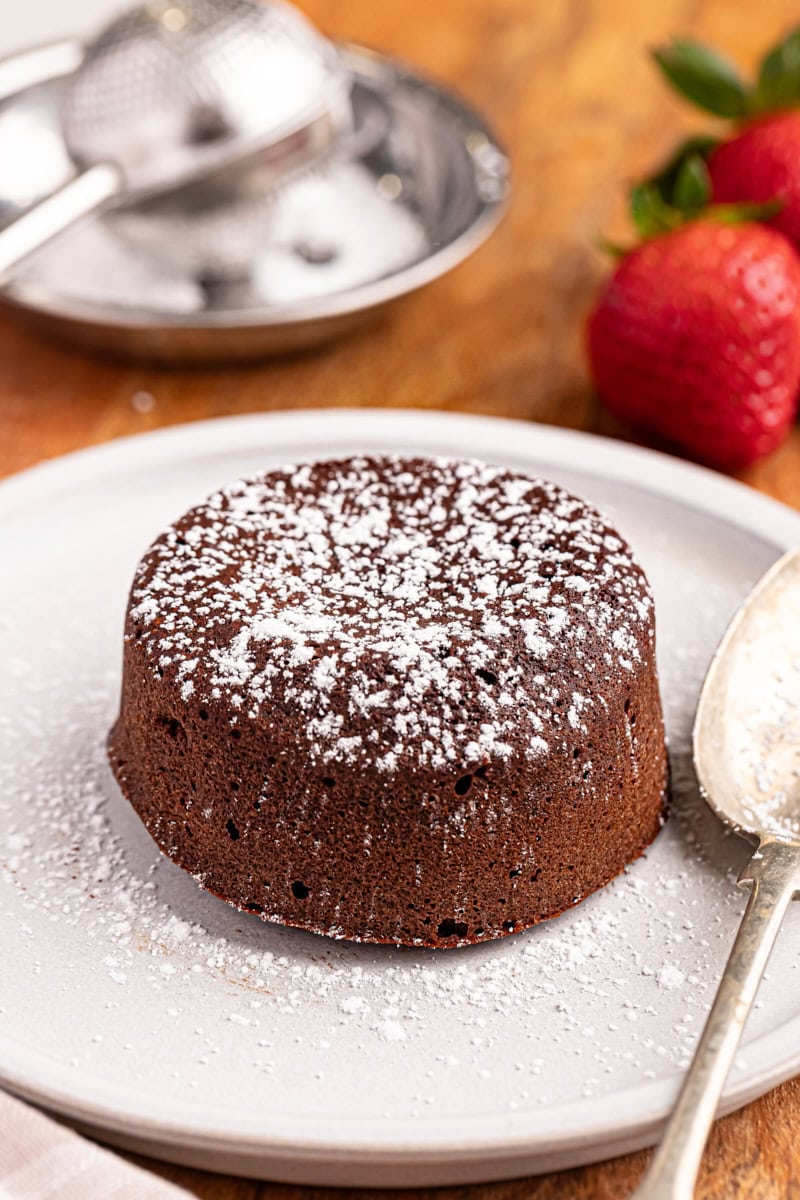
- Serve. Let the cakes rest for 1 minute, then run a knife around the edges and carefully invert onto serving plates. Serve immediately with powdered sugar, ice cream, or fresh berries.
Tips for Success
- Use high-quality chocolate. Since chocolate is the star of these molten lava cakes, opt for a high-quality dark chocolate (at least 60% cocoa).
- Grease well. Thoroughly butter the ramekins and dust with cocoa to ensure easy release.
- Let the melted chocolate cool slightly. This prevents it from cooking the eggs when mixed.
- Use room temperature eggs. They incorporate more easily and create a better texture. Remember that they’ll separate more easily when they’re cold. (If you need a use for the egg whites, try a batch of coconut macaroons or financiers.)
- Don’t over-bake. The centers should still be soft when you take them out of the oven. Baking times can vary slightly depending on your oven, so you may want to check for doneness a minute or so early the first time you make them. Gently tap the ramekin—if the edges look set but the center jiggles slightly, it’s ready.
- Work quickly. Once baked, lava cakes should be served immediately to maintain their molten center.
- Test one first. If you’re unsure about baking time, bake one cake first to get the timing just right.
Variations and Serving Suggestions
- Add a flavor twist. Try adding a splash of espresso, a pinch of cinnamon, or a bit of orange zest.
- Different chocolate. Swap dark chocolate for milk or white chocolate for a different take.
- Toppings. Serve with a scoop of vanilla ice cream, fresh strawberries or raspberries, or a drizzle of caramel sauce. I also recommend a fruit coulis (like my raspberry coulis) for a bright, tangy contrast to the rich chocolate.
- Presentation tip. Lightly dust the plate with cocoa powder before inverting the cake for an elegant touch.
How to Store
- Make ahead: You can prepare the batter ahead and refrigerate for up to 24 hours. Divide into ramekins first, and cover tightly with plastic wrap. Bring to room temperature before baking.
- Leftovers: While best served fresh, you can store baked lava cakes in the refrigerator for up to 2 days. Cover them tightly with plastic wrap or place them in an airtight container to maintain freshness. Reheat in the microwave for about 10 seconds before serving.
- Freeze for later: Unbaked batter can be stored in the ramekins and frozen for up to one month. Before freezing, cover each ramekin tightly with plastic wrap or aluminum foil to prevent freezer burn. For extra protection, place the covered ramekins in an airtight container. When ready to bake, remove the plastic wrap, place the ramekins on a baking sheet, and bake directly from frozen, adding 1-2 minutes to the bake time.
More Chocolate Cake Recipes
Get the Recipe:
Chocolate Lava Cake
These homemade chocolate lava cakes are rich, gooey, and surprisingly easy to make. With just a few ingredients and minimal effort, you can enjoy this indulgent treat in under 30 minutes!
Ingredients
- 2 teaspoons unsweetened cocoa powder
- ½ cup (113 g) unsalted butter, plus extra for greasing
- 4 ounces (113 g) high-quality dark chocolate, 60-70% cacao
- 2 large eggs, at room temperature
- 2 large egg yolks, at room temperature
- ¼ cup (50 g) granulated sugar
- ⅛ teaspoon salt
- 2 tablespoons (15 g) all-purpose flour
- ½ teaspoon vanilla extract
- confectioners’ sugar, for serving
Recommended Products
Instructions
- Preheat the oven to 425°F (220°C). Grease four 6-ounce ramekins with butter and dust lightly with cocoa powder. Set aside.
- In a microwave-safe bowl, melt the chocolate and butter in 20-30 second increments, stirring until smooth. (Alternatively, use a double boiler.) Allow the mixture to cool slightly to prevent the eggs from scrambling when added.
- In a medium mixing bowl, whisk the eggs, egg yolks, sugar, and salt until light and frothy, about 2-3 minutes. Use a hand whisk or an electric mixer on low speed.
- Gently fold the cooled chocolate mixture into the egg mixture. Sift the flour into the batter and add the vanilla extract. Mix until just combined. Do not over-mix.
- Divide the batter evenly among the prepared ramekins, filling each about 3/4 full.
- Place the ramekins on a baking sheet and bake for 10 to 12 minutes. The edges should be set, but the centers will remain soft. Do not over-bake. (If unsure, gently tap the ramekin—if the edges are firm but the center jiggles slightly, it’s ready.)
- Allow the cakes to rest for 1 minute. Gently run a knife around the edges to loosen and carefully invert each ramekin onto a serving plate. Dust with confectioners' sugar and serve immediately with your favorite toppings.
Notes
- Store leftovers tightly covered in the refrigerator up to 2 days. Reheat in the microwave for about 10 seconds.
- For tips, step-by-step photos, and extra details, be sure to read the full post above before starting. It’s packed with helpful info to answer common questions!
Show off your baking masterpiece!Snap a pic, tag @bakeorbreak, and use #bakeorbreak on Instagram. Can’t wait to see your creation!


