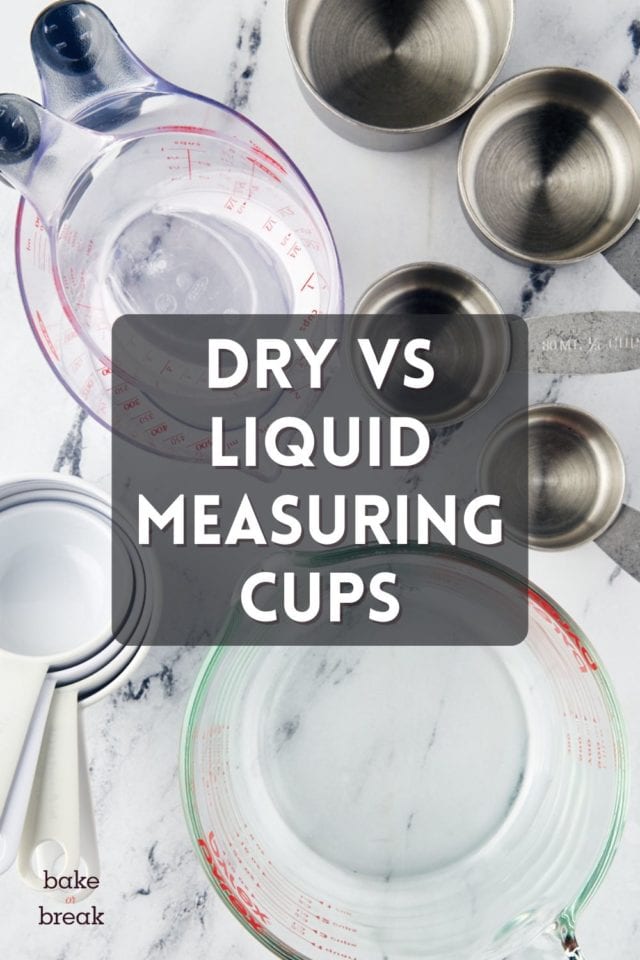
Successful baking begins with accurate measurements, and understanding how to use your dry and liquid measuring cups properly is an easy way to help you improve your baking.

If you’ve ever wondered if you really need separate sets of measuring cups for liquid and dry ingredients, the simple answer is yes. While they might seem interchangeable, each type is specifically designed to measure different ingredients accurately. Let’s take the guesswork out of your measuring process and help ensure baking success!
The Importance of Accurate Measurements in Baking
This is likely not news to you, but baking is a science. That means precision is key to success! And that starts with measuring your ingredients accurately. With properly measured ingredients, your baked goods will be consistently better. When someone asks me how to become a better baker, this is my number one response.
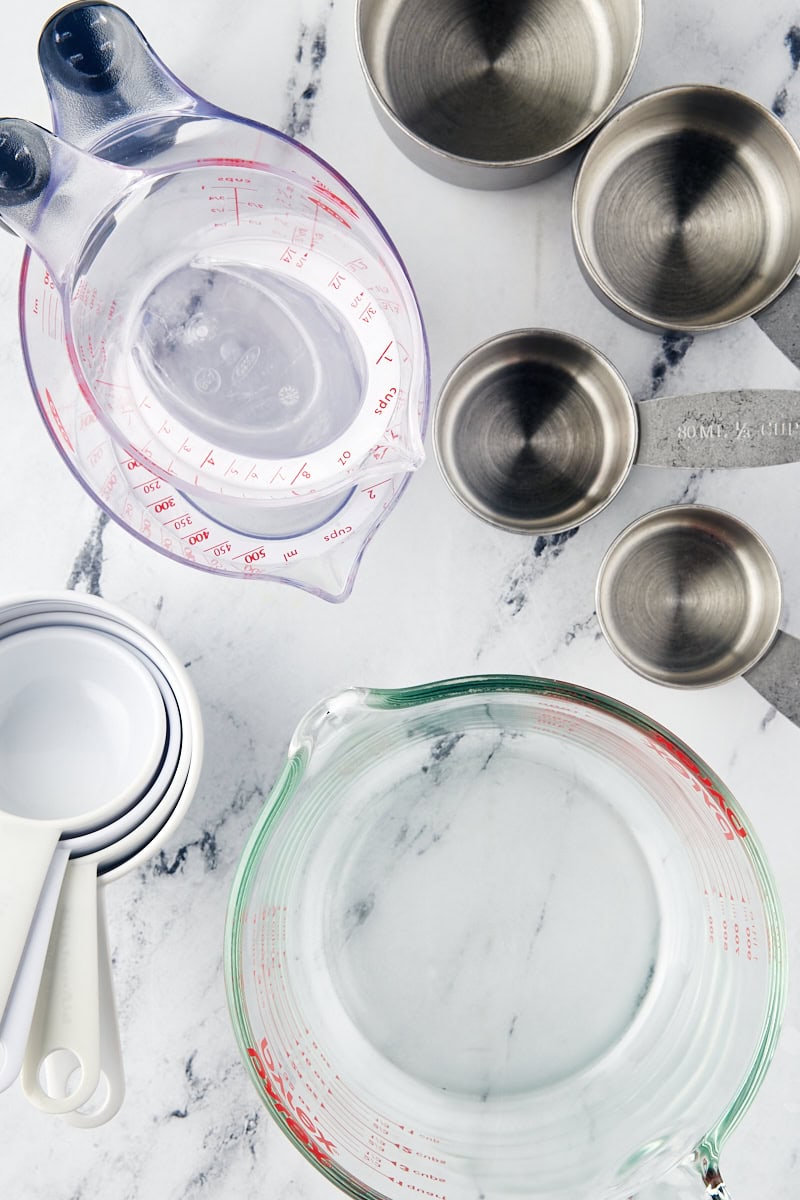
Differences Between Liquid and Dry Measuring Cups
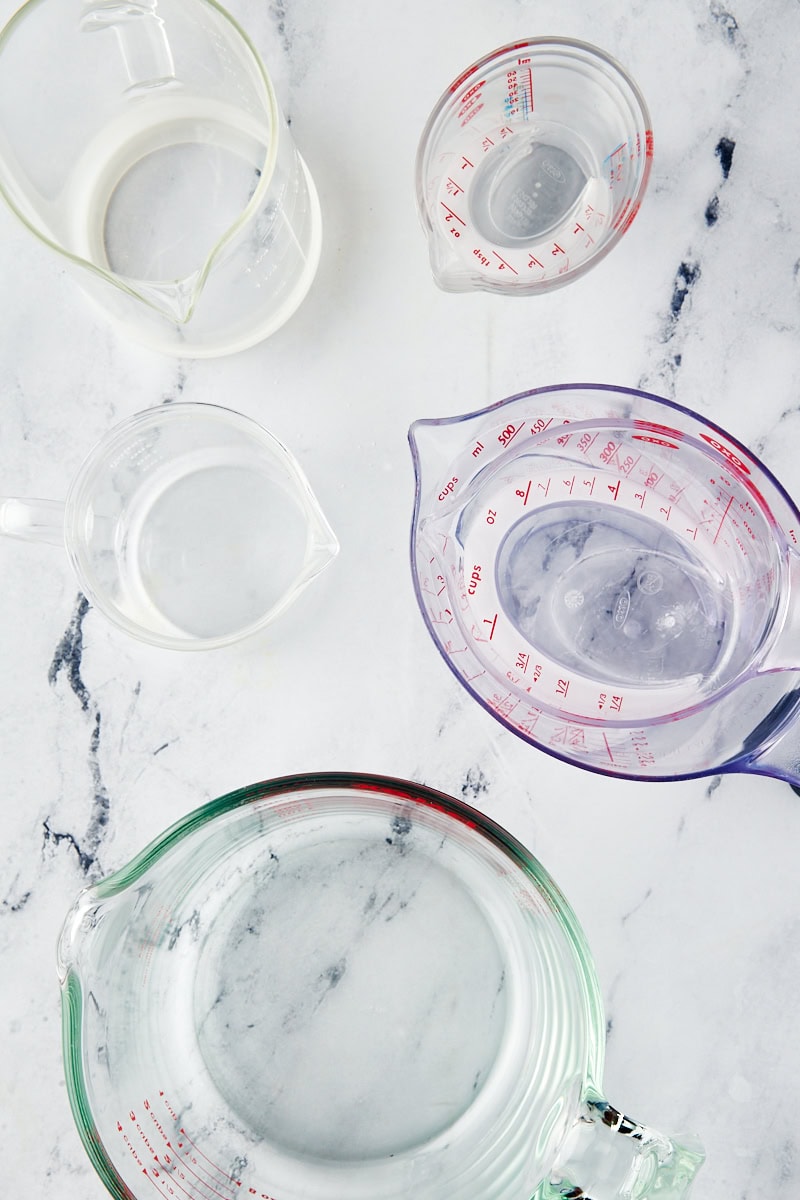
As the names imply, liquid measuring cups (also known as wet measuring cups) are for liquid ingredients (also called wet ingredients) like water, milk, and oil, while dry measuring cups are for dry ingredients like sugar, cocoa powder, and flour. They are designed differently to ensure accurate measurements for different types of ingredients. Here’s a closer look at these design differences and why they matter.
Liquid Measuring Cups
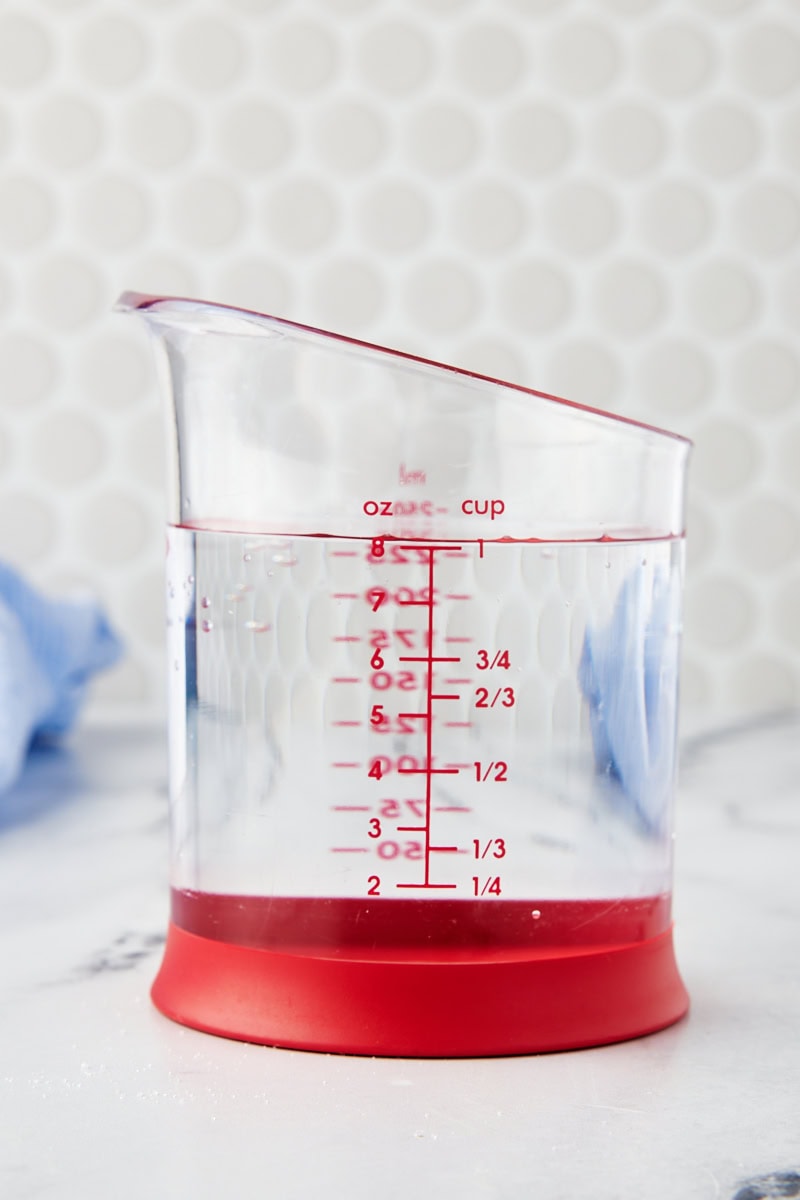
- Design and structure: Liquid measuring cups are usually clear, and come with a handle and a spout for easy pouring. They are typically marked with measurements on the side, allowing you to see the quantity of liquid inside. Angled measuring cups will also have those markings on an angled surface inside the cup.
- Material: These measuring cups are commonly made of glass and plastic. Glass is heat-resistant, making it suitable for both hot and cold liquids, while plastic is lightweight and less prone to breaking.
- Functionality: The spout on a liquid measuring cup makes pouring liquids easy and helps prevent spills. The measurements marked on the side are designed to be read at eye level, which is crucial for getting an accurate reading.
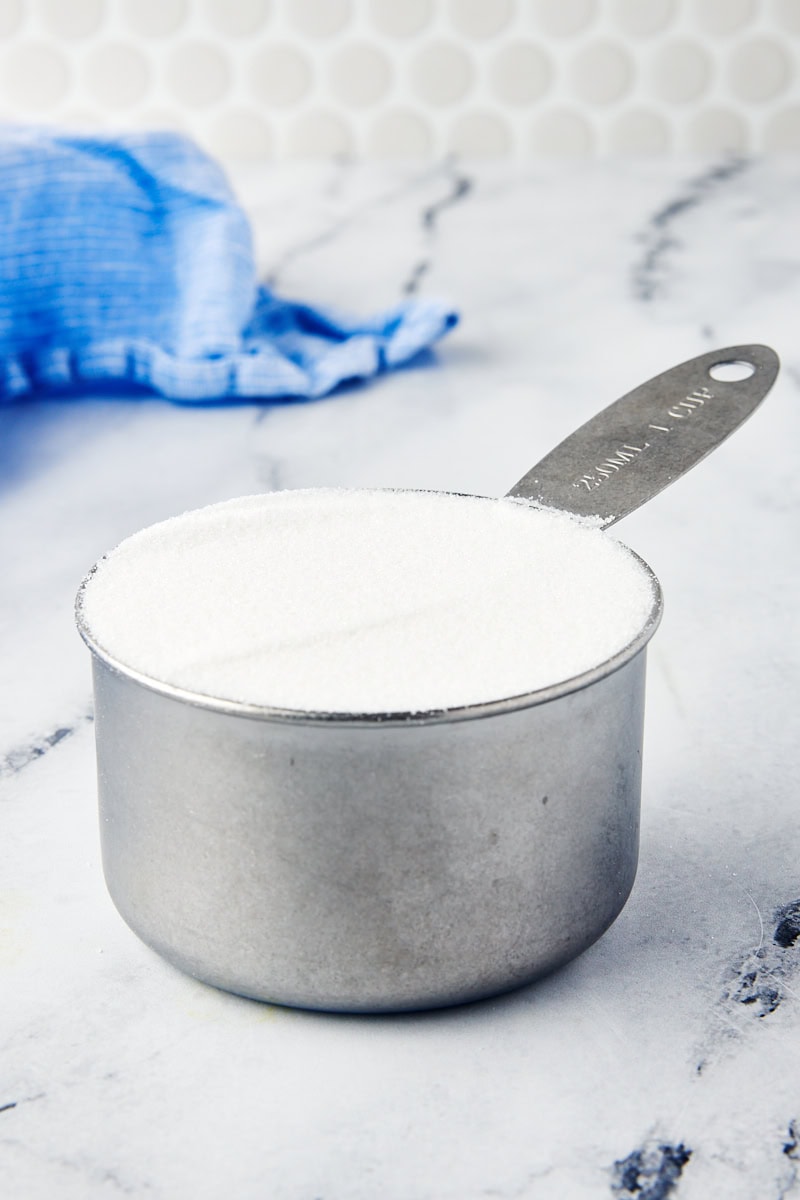
Dry Measuring Cups
- Design and structure: Dry measuring cups are designed with a flat top and a smooth brim. They come in various sizes, typically ranging from 1/4 cup to 1 cup, and are often sold in nested sets.
- Material: They are usually made of metal, plastic, or silicone. Metal cups are durable and resistant to staining, while plastic and silicone cups are lightweight and often dishwasher-safe.
- Functionality: The flat top of a dry measuring cup allows you to fill it to the brim and then level it off using a straight edge, such as a knife or a spatula. This ensures that you have the exact amount needed for your recipe, without any excess.

What Makes an Ingredient Dry or Liquid?
When it comes to ingredients, it’s usually straightforward to distinguish liquid and dry ingredients. Water, milk, and oil are liquids. They flow and take the shape of the measuring cup. Flour, sugar, cocoa powder, oats, chocolate chips, and spices are dry. They can be scooped and leveled off easily. However, there are some ingredient that are in a bit of a gray area.
- Peanut butter: This is considered a semi-solid. It’s best measured in a dry measuring cup (or by weight). For easier measurement and transfer, you can first lightly grease the measuring cup.
- Honey, molasses, and syrups: These are thick liquid ingredients, and you’ll find some people suggest liquid measuring cups while other recommend dry ones. Dry measuring cups offer precision and are often recommended for their accuracy, but these sticky ingredients tend to cling to the sides, making it difficult to transfer into your mixing bowl. Liquid measuring cups, on the other hand, provide ease of transfer with their spouts and are usually easier to scrape out any ingredient clinging to the sides. However, they can be less accurate. I most often use measure these as liquids, but measuring as dry works, too. In either case, you can lightly grease the cup to help it pour more easily.
- Yogurt and sour cream: These are semi-solids that should be measured as dry ingredients. Fill the cup and level the top.
- Applesauce and mashed banana: These wet, thick ingredients are partially liquid, but should be measured in dry measuring cups.
How to Use Liquid Measuring Cups
Using liquid measuring cups is fairly straightforward, but there are a few things to keep in mind for the best accuracy.
- Use the smallest measuring cup possible. This minimizes the risk of over- or under-measuring. If you need a cup of liquid, than a 1-cup measuring cup will be more accurate and easier to use than a larger measuring cup.
- Place on a level surface. Your measuring cup should be on a flat surface so that you can read the measurement well. For best results, set it on your countertop with nothing underneath it.
- Read measurements at eye level. Bend down so that your eyes are at the same level as the markings on the side of the cup. You’ll notice a small curve at the top of the liquid level. This is called the meniscus. Ensure that your measurement line is at the bottom of the meniscus for the most accurate reading, especially for smaller quantities.
- Use a measuring spoon for small amounts. For very small quantities of liquid, use a measuring spoon instead of a cup. This ensures greater precision for ingredients like extracts.
Angled Measuring Cups
Angled measuring cups are an exception to reading at eye level. These types of measuring cups feature a unique design where the measurement markings are printed on an angled surface inside the cup. This allows you to look down into the cup and read the measurements from above, rather than bending down to eye level.
How to Use Dry Measuring Cups
When measuring dry ingredients, I highly recommend using a digital kitchen scale if possible. (You can read more about this in How to Measure Flour.) However, dry measuring cups can still be useful if used correctly. Here are some things to consider.
- Use the correct size measuring cup. Dry measuring cups are designed to be filled to the top, so it’s important to choose the appropriate size. You’ll find that most recipes use common measurement sizes that correlate with standard measuring cup sizes.
- Don’t scoop into the container. This can compact the ingredient and give you an inaccurate measurement. Instead, spoon the ingredient into the measuring cup.
- Avoid packing ingredients unless directed. Unless the recipe specifically calls for it (like with brown sugar), avoid packing ingredients into the measuring cup. Lightly fill the cup and level it off for most dry ingredients.
- Level off the top. After filling the measuring cup, use a straight edge, like the back of a knife or a spatula, to sweep across the top of the cup to level the top.
- Check for clumps. For ingredients that tend to clump together, like brown sugar or powdered sugar, break up any clumps before measuring to ensure an accurate amount.
- Sift when necessary. If a recipe lists a sifted ingredient (e.g. sifted flour), sift before measuring. If instead it lists an ingredient followed by sifted (e.g. flour, sifted), then measure before sifting.
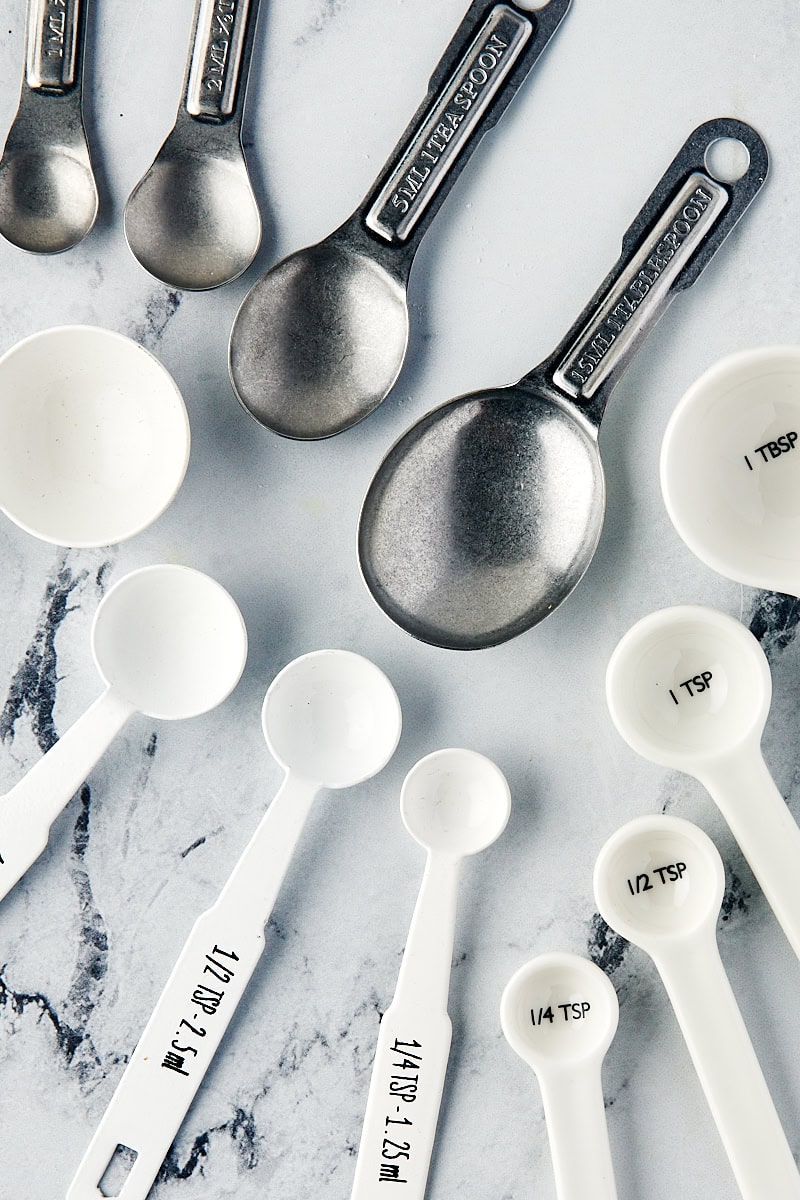
Measuring Spoons
The multi-use measuring tools in baking are measuring spoons. These little wonders are essential for measuring small amounts of both liquid and dry ingredients.
- Use the correct size. Always use the measuring spoon that matches the required measurement.
- Measure as dry or liquid. If you’re measuring dry ingredients, treat them as such by spooning into the spoon and leveling off the top. For liquid ingredients, pour into the spoon, filling it to the top. If you’re measuring sticky ingredients, you can lightly grease the measuring spoon before filling or use a small spatula to help transfer your ingredient to the mixing bowl.
- Combine measurements for odd sizes. If the recipe lists a measurement that’s not in your measuring spoon set, simply combine them. For instance, if you need 3/4 teaspoon, measure 1/2 teaspoon and 1/4 teaspoon individually to make the total amount.
- Don’t measure over the mixing bowl. This is one of the first things I remember from when I first learned to bake! Don’t hold the measuring spoon over the mixing bowl, but rather hold it away or over a separate bowl so any potential spills don’t wreck your recipe.
Choosing Tools for Measuring
There’s a lot to consider when choosing new measuring cups and measuring spoons. You can see the products I recommend in my Amazon storefront. If you’re looking to add new measuring tools to your kitchen, here are some things to keep in mind so you can get the ones that best suit your needs:
- Material: Metal is durable, resistant to staining, and often dishwasher safe, but it can be heavier and more expensive than other options. Plastic is lightweight, more affordable, and usually dishwasher safe, but it can stain and potentially warp over time. Liquid measuring cups are often made of glass, which is heat-resistant, clear for easier reading, and won’t stain, but it’s heavy and can break more easily.
- Design: Dry measuring cups should have a flat rim for easy leveling. Liquid measuring cups should have easy-to-read markings and a pour spout.
- Accuracy: Ensure the measurement marking are clearly marked and won’t wear off over time. In my experience, I avoid decorative measuring cup sets and adjustable measurers, as they are more likely to be less accurate. Go with a trusted brand for best results.
- Ease of use: Look for handles that are comfortable to hold and use. Your measuring tools should also have a balanced weight so they won’t tip over.
- Sizes: At a minimum, you’ll need measuring cups and spoons in standard sizes. For a more complete set, add some odd sizes, especially if you find yourself needing those regularly. If you bake frequently, you’ll likely find it convenient to have multiple sets.
- Storage: If you’re short on space, look for measuring sets that nest or stack well. They’ll take up less space and stay together for better organization.