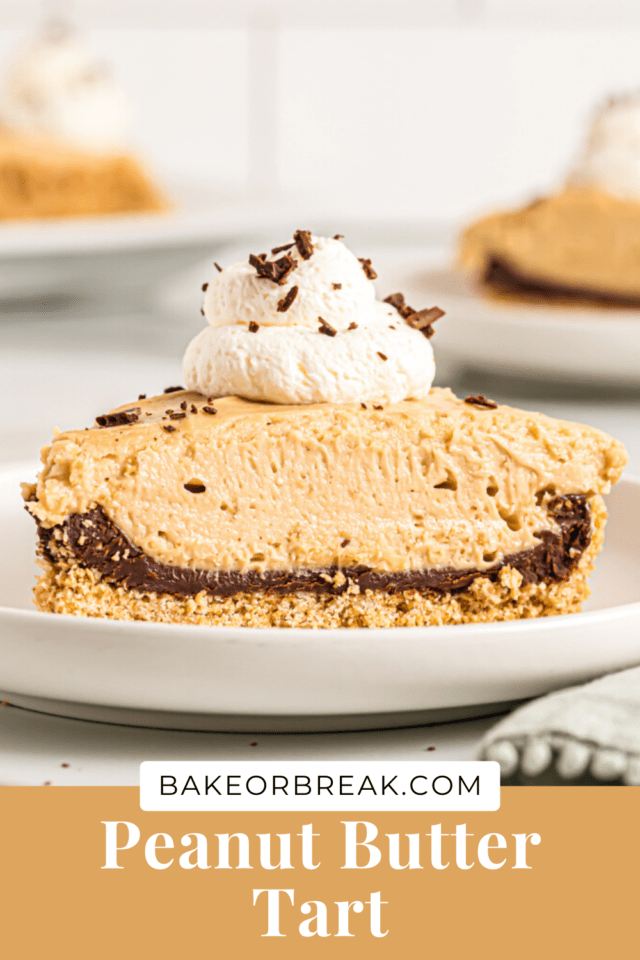
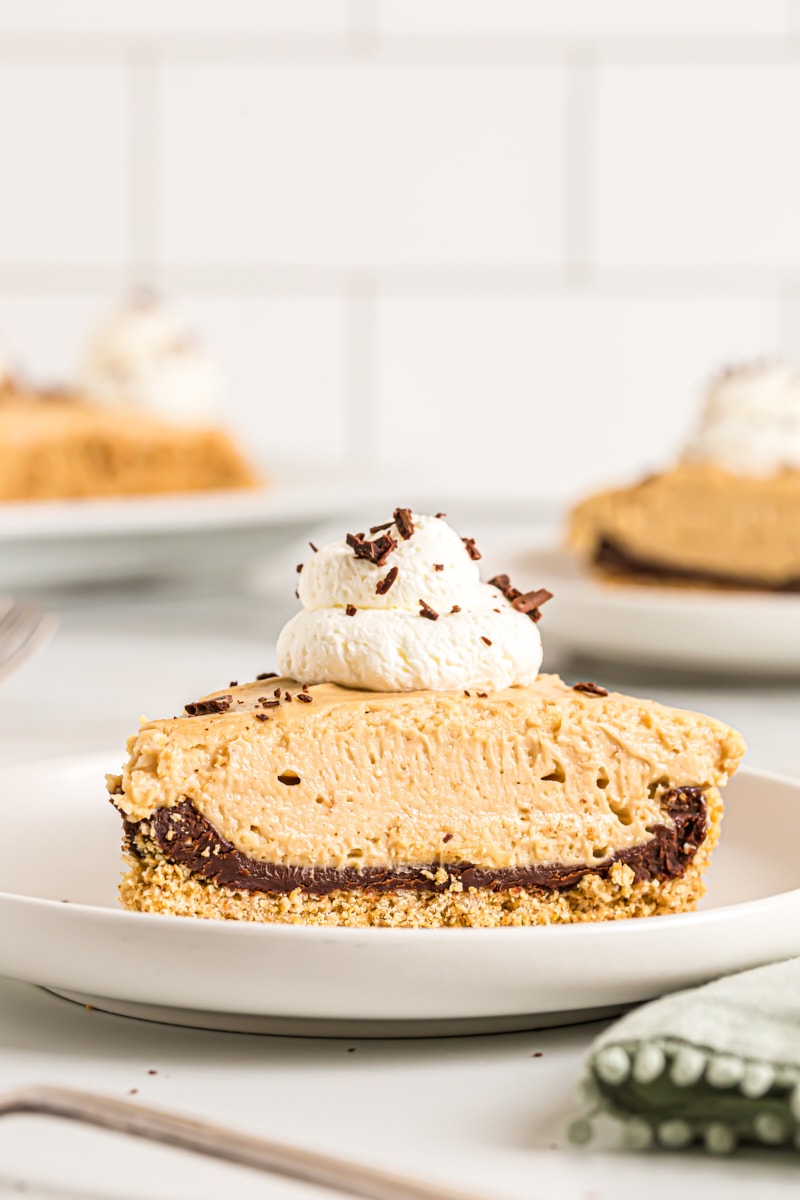
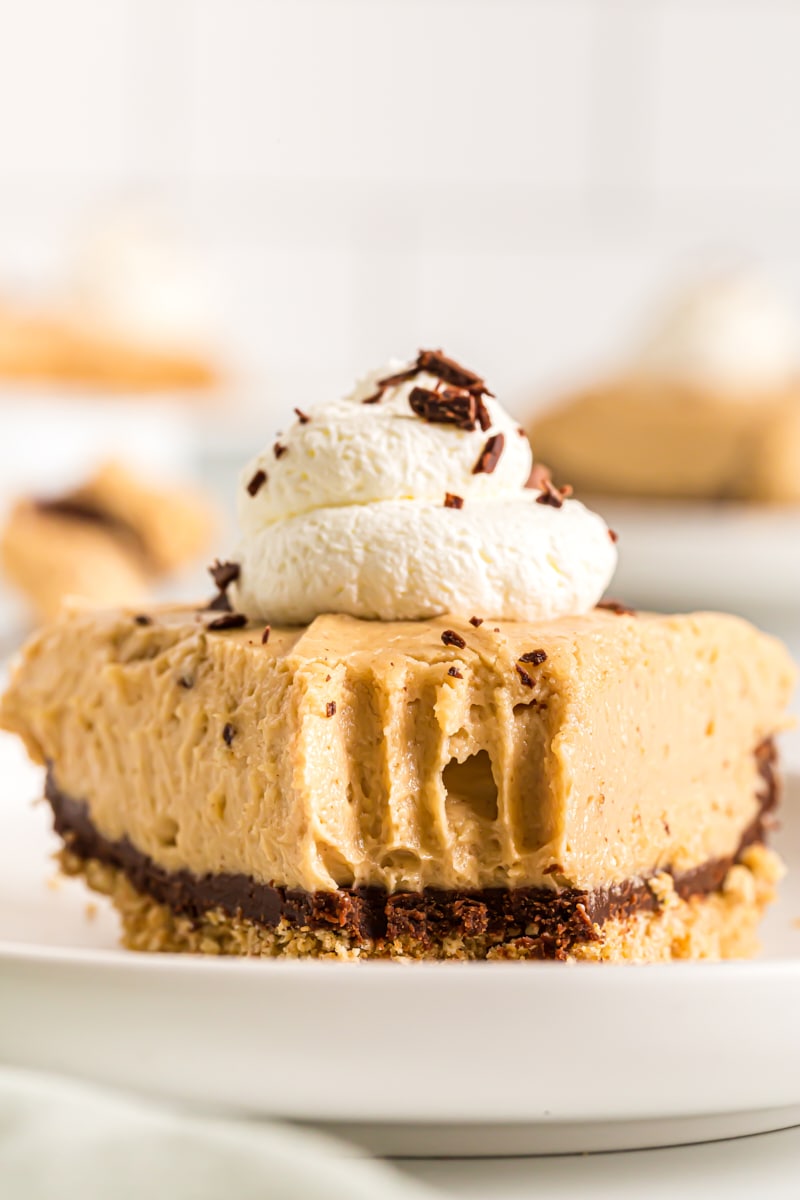
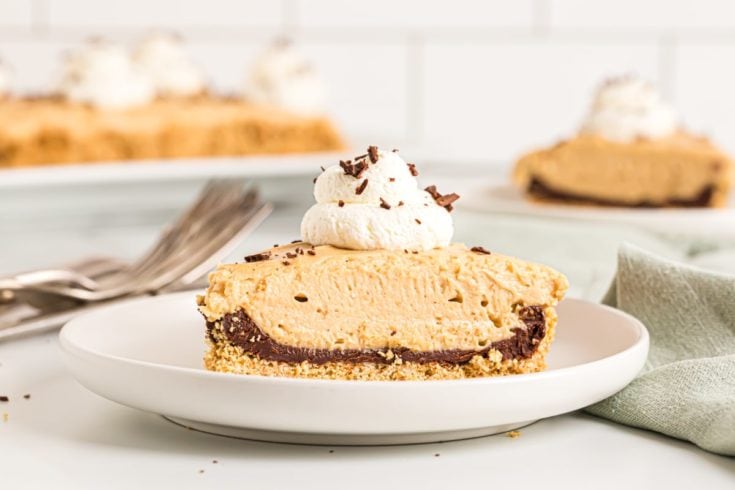
This Peanut Butter Tart layers a homemade graham cracker crust with rich chocolate ganache and a fluffy peanut butter cream cheese filling. So decadent!
Decadent Chocolate Peanut Butter Tart
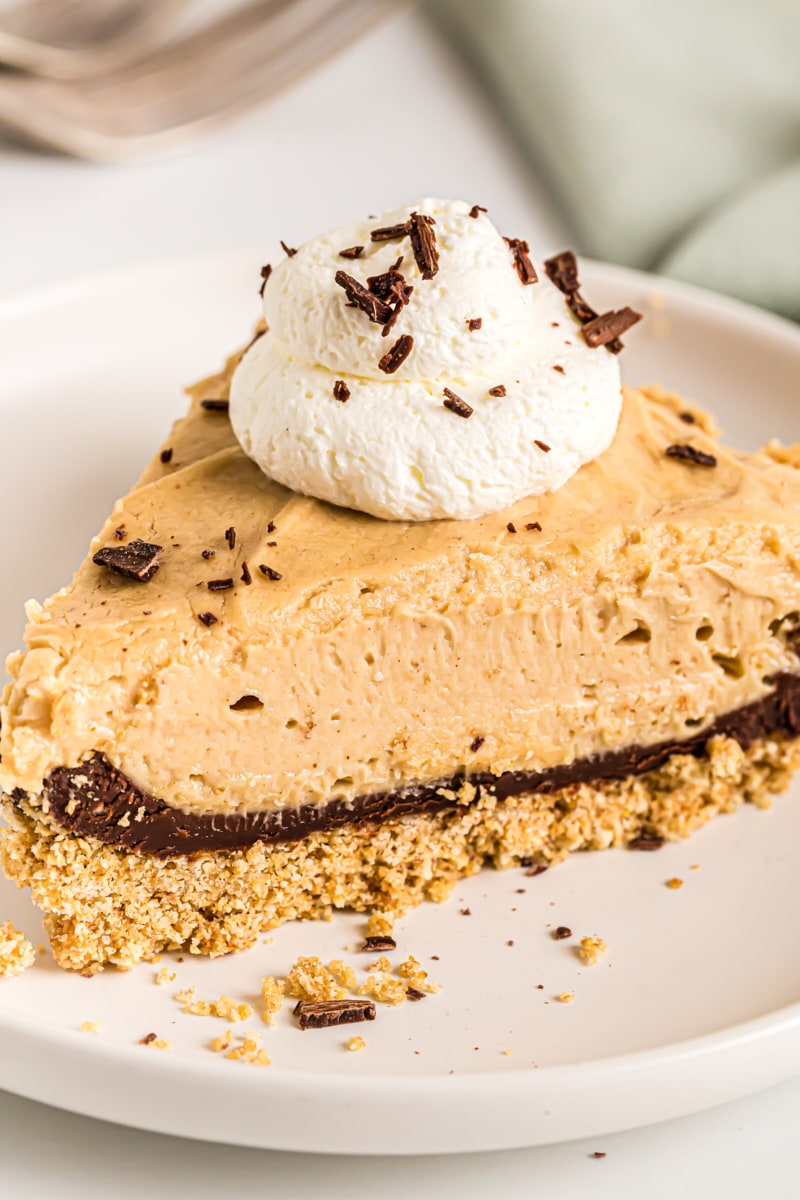
I adapted this Peanut Butter Tart recipe from Martha Stewart, but it’s more accurately described as a Chocolate Peanut Butter Tart because there’s a layer of fudgy ganache spread over the crust. Peanut butter is always good, but we all know that peanut butter and chocolate is even better!
Atop that layer of ganache is the creamiest, dreamiest layer of peanut butter filling you’ll ever taste. It’s made with peanut butter and cream cheese, so it’s a little bit reminiscent of no-bake cheesecake, but smoother and more airy because the filling is combined with whipped cream.
If, like me, you have a weakness for that classic combination of chocolate and peanut butter, this Peanut Butter Tart is a must-try recipe. (And then make sure you also try my Chocolate Peanut Butter Swirl Cookies and Chocolate Peanut Butter Icebox Cake!)
What You’ll Need
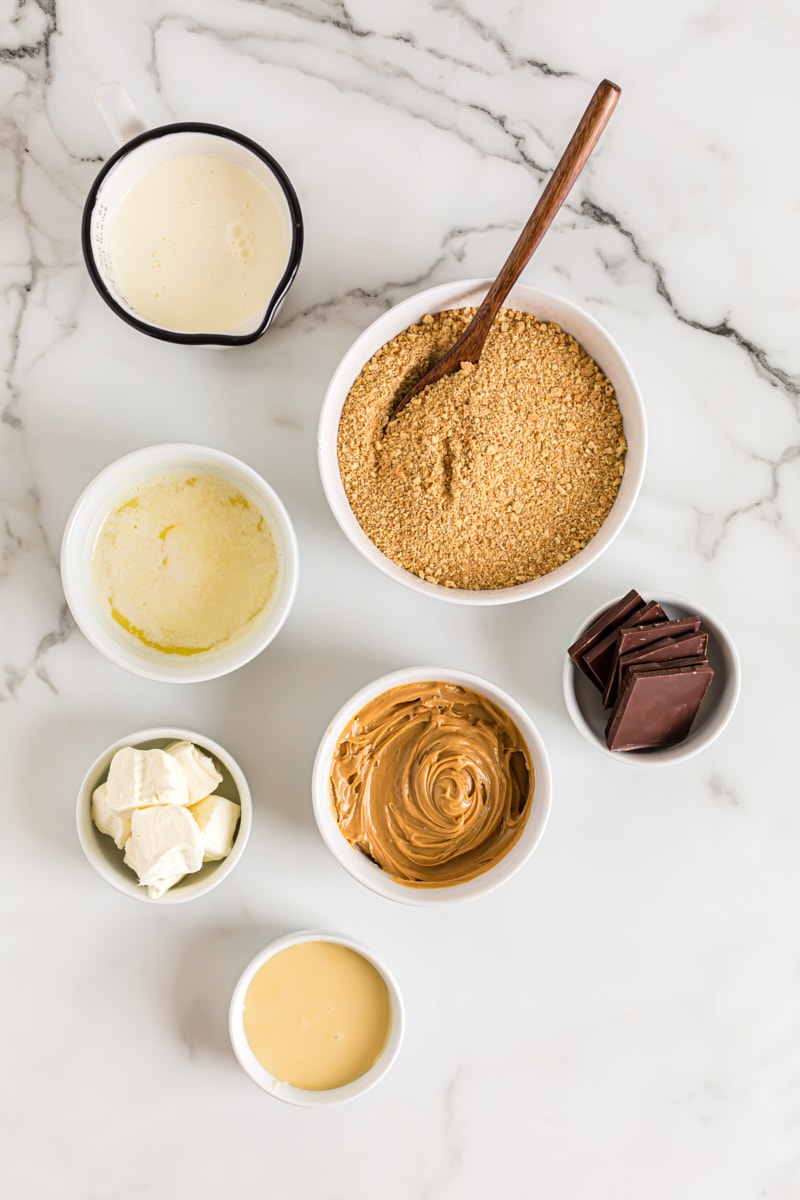
The ingredient list for this recipe is surprisingly short! Here’s what you’ll need.
For the crust:
- Graham cracker crumbs – You can purchase these or make your own by pulsing graham crackers in your food processor.
- Unsalted butter
For the filling:
- Milk chocolate – You can substitute dark chocolate, but I like the way milk chocolate complements the peanut butter without dominating it.
- Heavy cream
- Creamy peanut butter
- Cream cheese – Use a full-fat variety that comes in a bar, not the whipped kind in a tub.
- Sweetened condensed milk – This isn’t the same as evaporated milk!
How to Make a Peanut Butter Tart
When planning for this recipe, remember to allow time for the tart to chill in the fridge for 2 hours before serving!
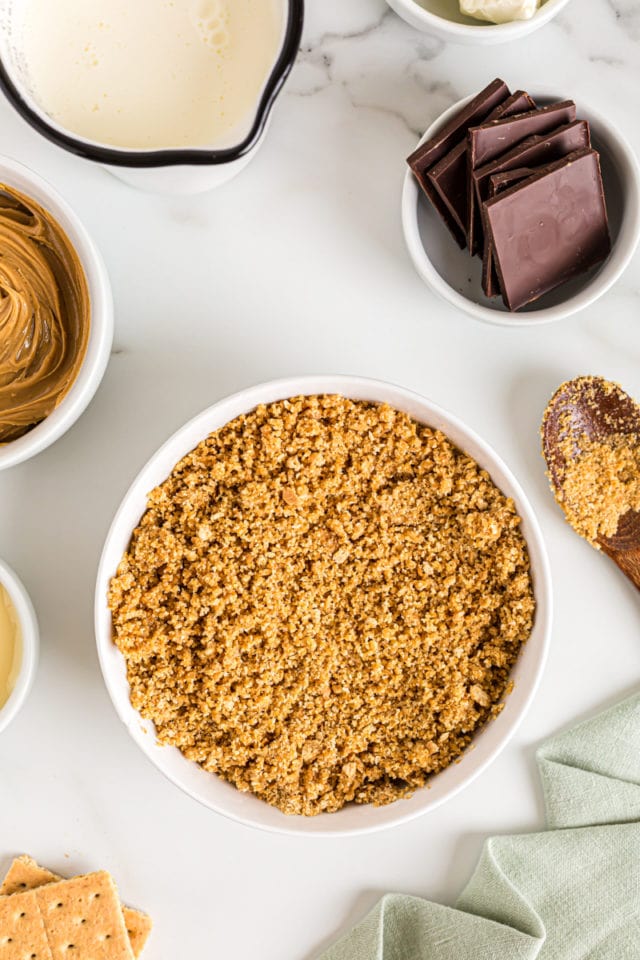

Make the crust. Combine the graham crackers and butter in a small bowl and stir to combine. Press the crumb mixture into the bottom and up the sides of a rectangular tart pan with a removable bottom. Place this in the refrigerator. (See my note in the tips section for using a different pan.)

Prepare. Fill a large bowl with ice cubes and water, then chop the chocolate and place it in a medium glass or metal bowl.
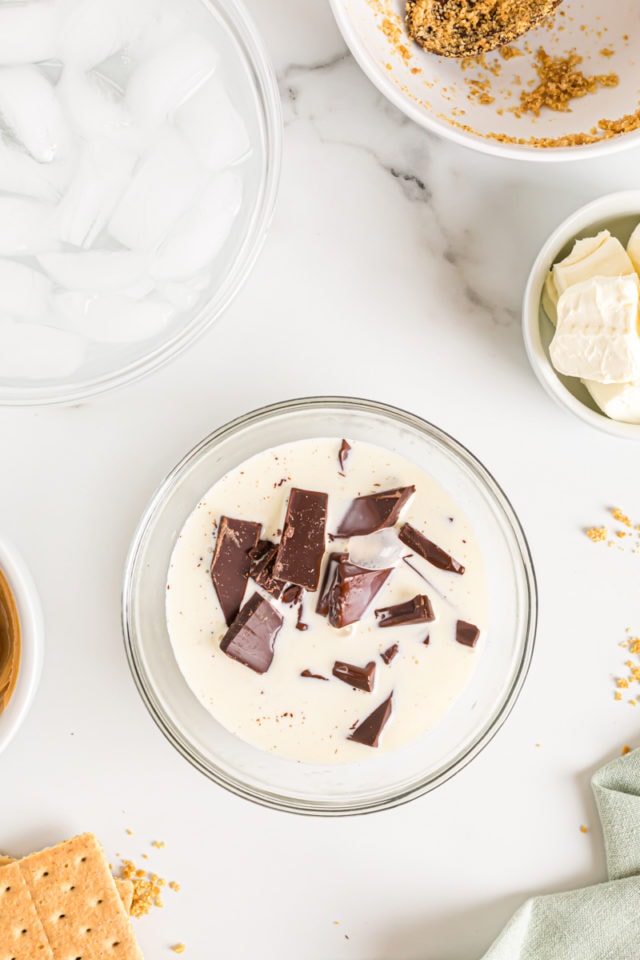
Start the ganache. Place a half cup of the cream in a small saucepan set over medium heat. Once it comes to a boil, immediately pour the cream over the chopped chocolate and let it sit for 5 minutes. Whisk to combine.

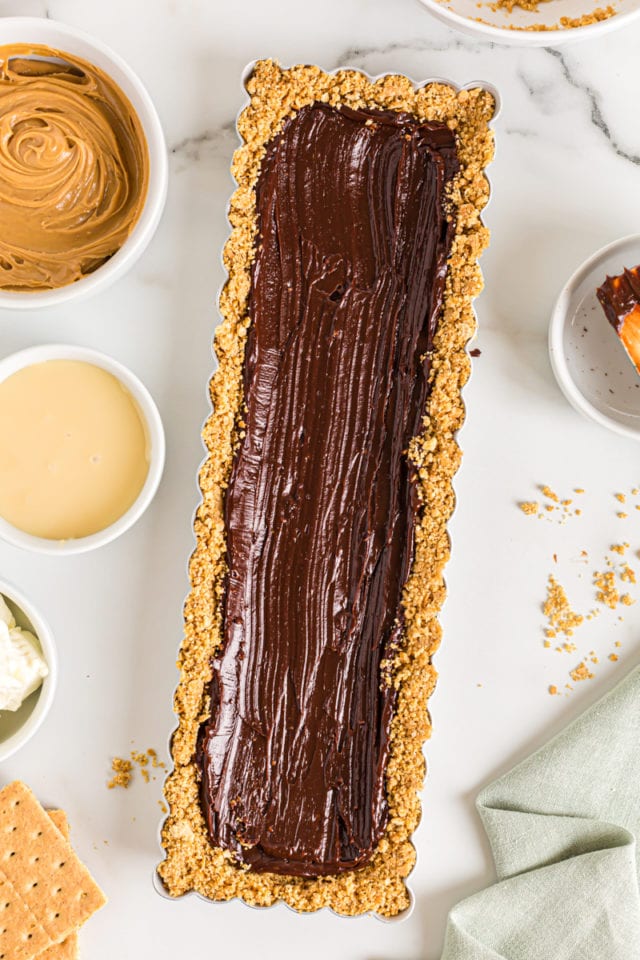
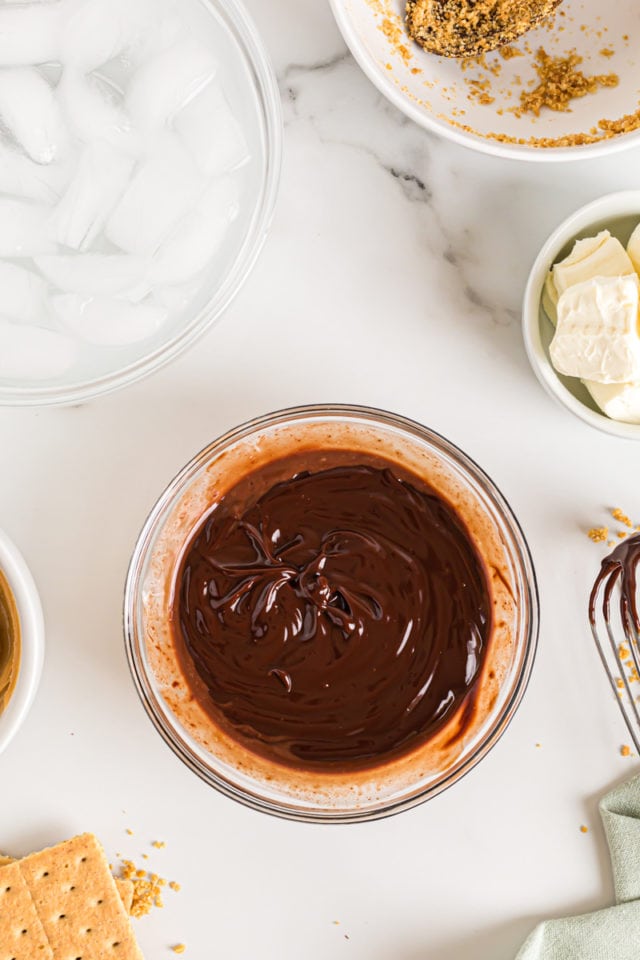
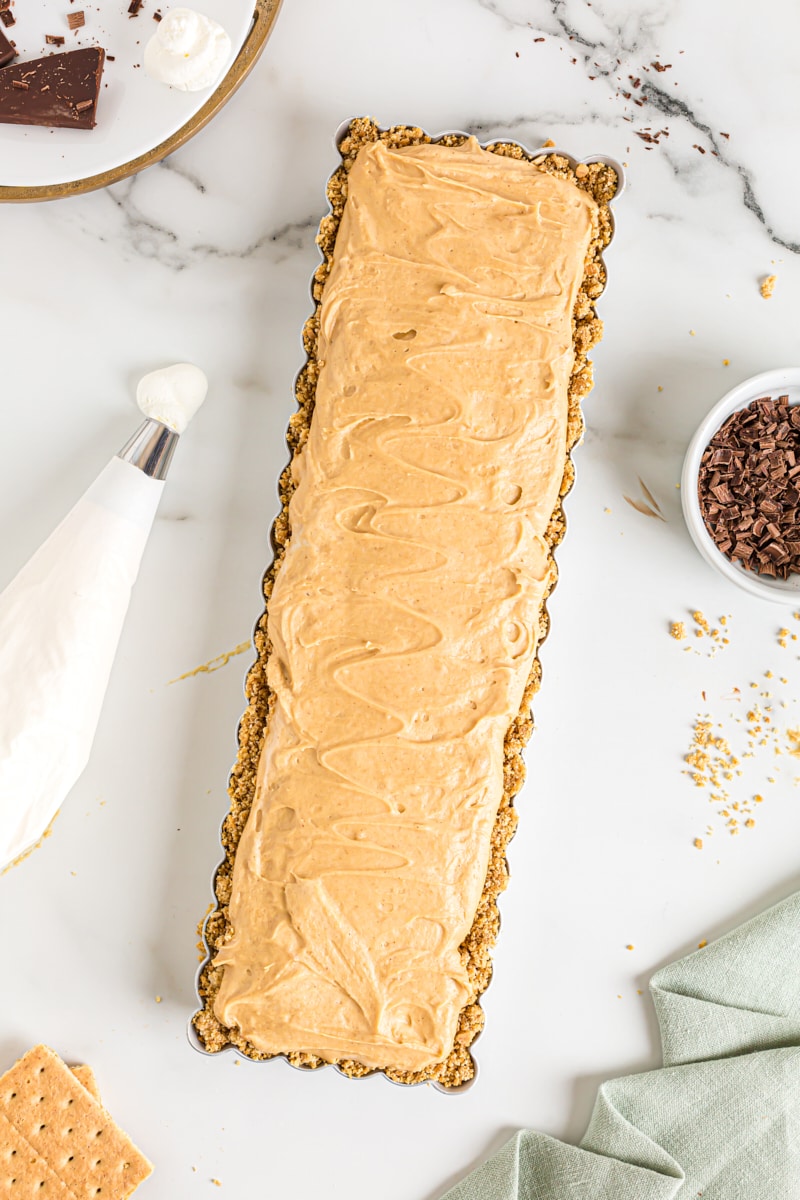
Finish the ganache. Set the bowl with the ganache in the bowl with the ice water and whisk until it cools. Once cooled, remove the bowl from the ice bath and continue to whisk until the ganache thickens. Spread the ganache onto the crust, then return the tart pan to the refrigerator.
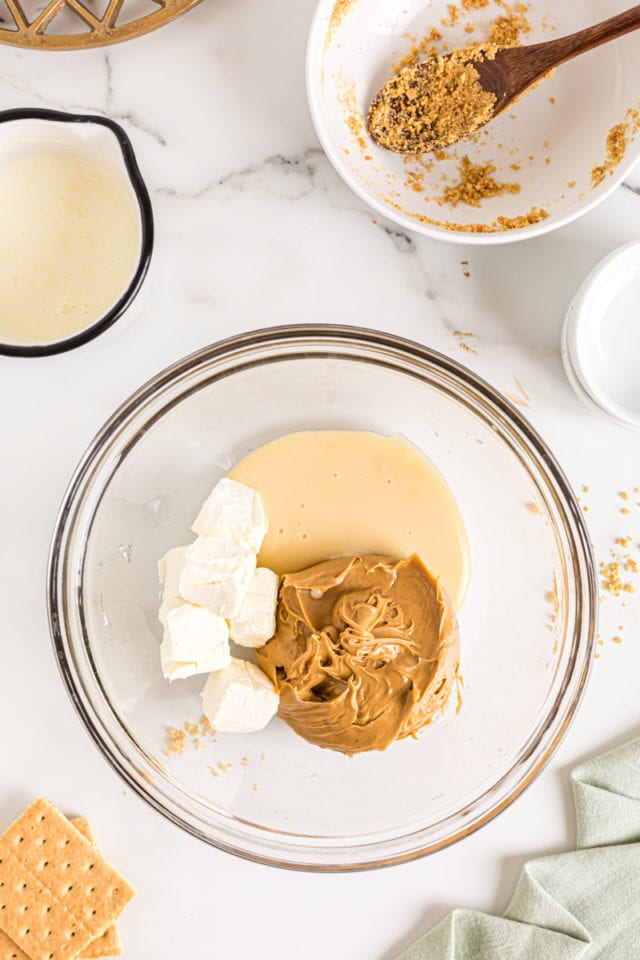
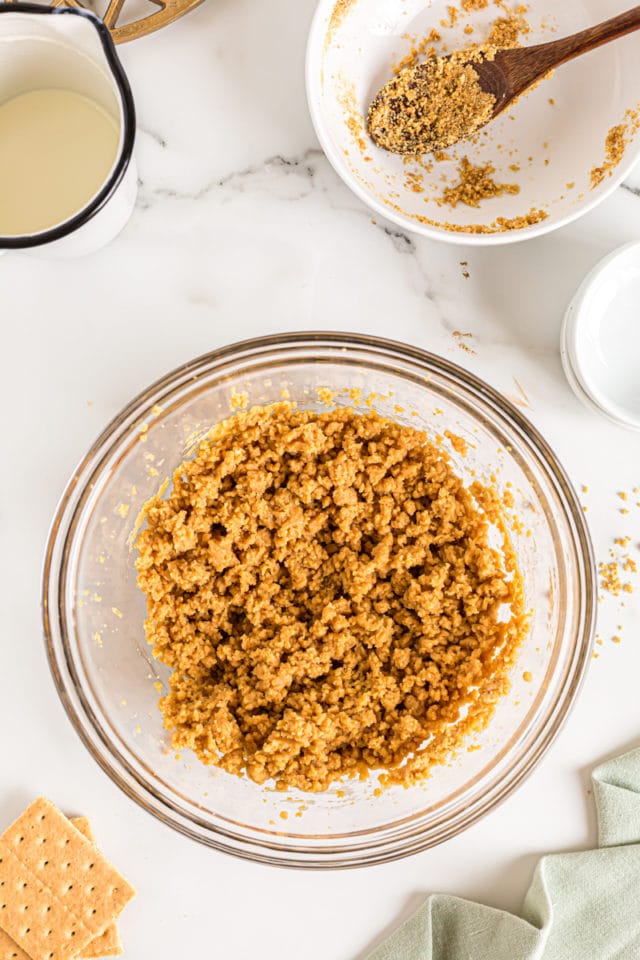
Start the peanut butter filling. Combine the peanut butter, cream cheese, and condensed milk in the bowl of a food processor and process until smooth. Transfer this to a mixing bowl. Alternatively, you can mix these ingredients in a mixing bowl with an electric mixer.
Make the whipped cream. In another mixing bowl, whip 3/4 cup of heavy cream until soft peaks form.
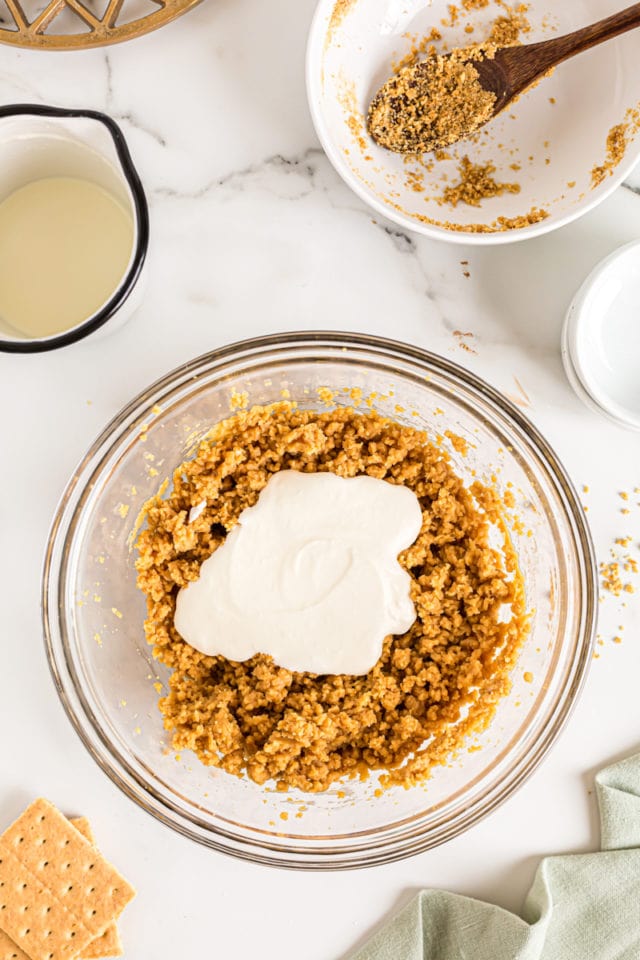
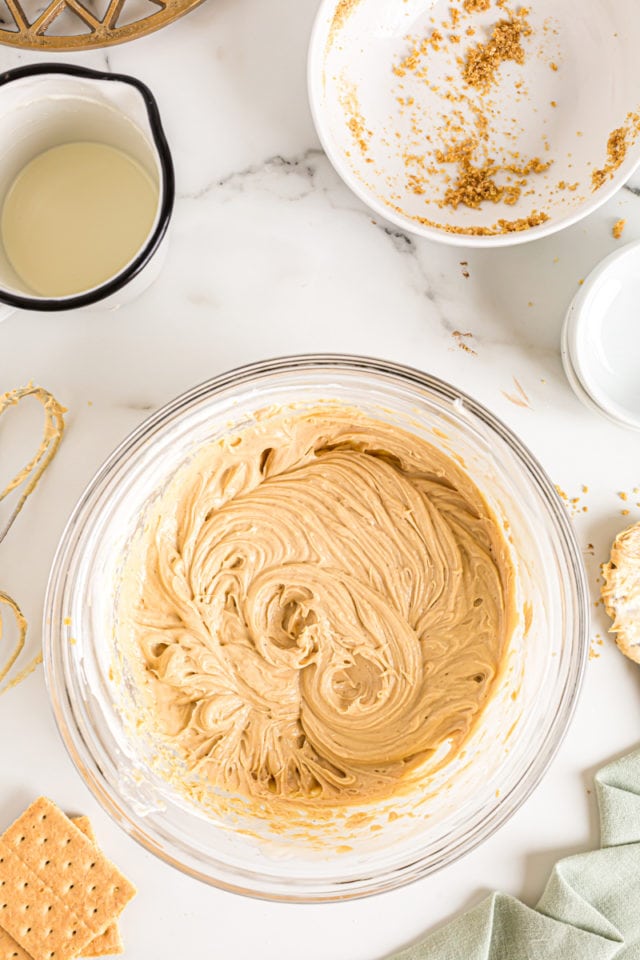

Finish the peanut butter filling. Fold a third of the whipped cream into the peanut butter mixture, followed by another third, and then the final third. Spread this over the ganache in the prepared crust.
Chill. Return the tart to the refrigerator and let it chill for at least 2 hours, or overnight.
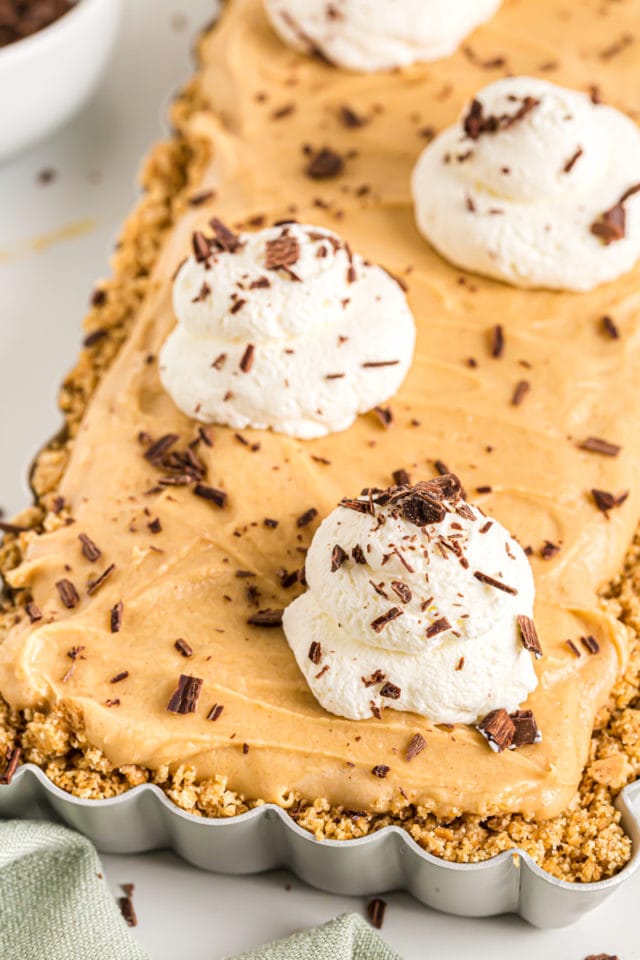
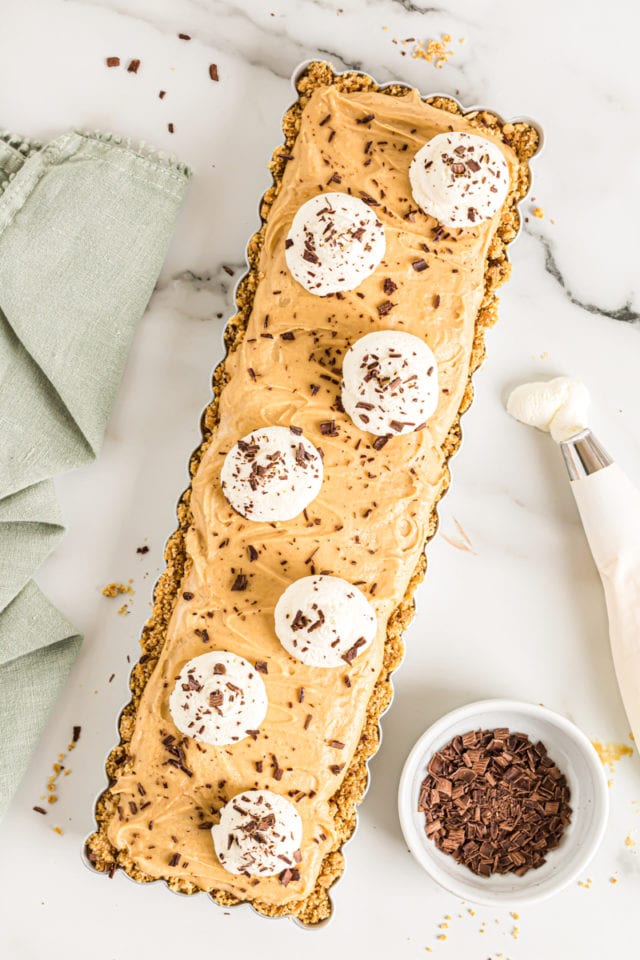
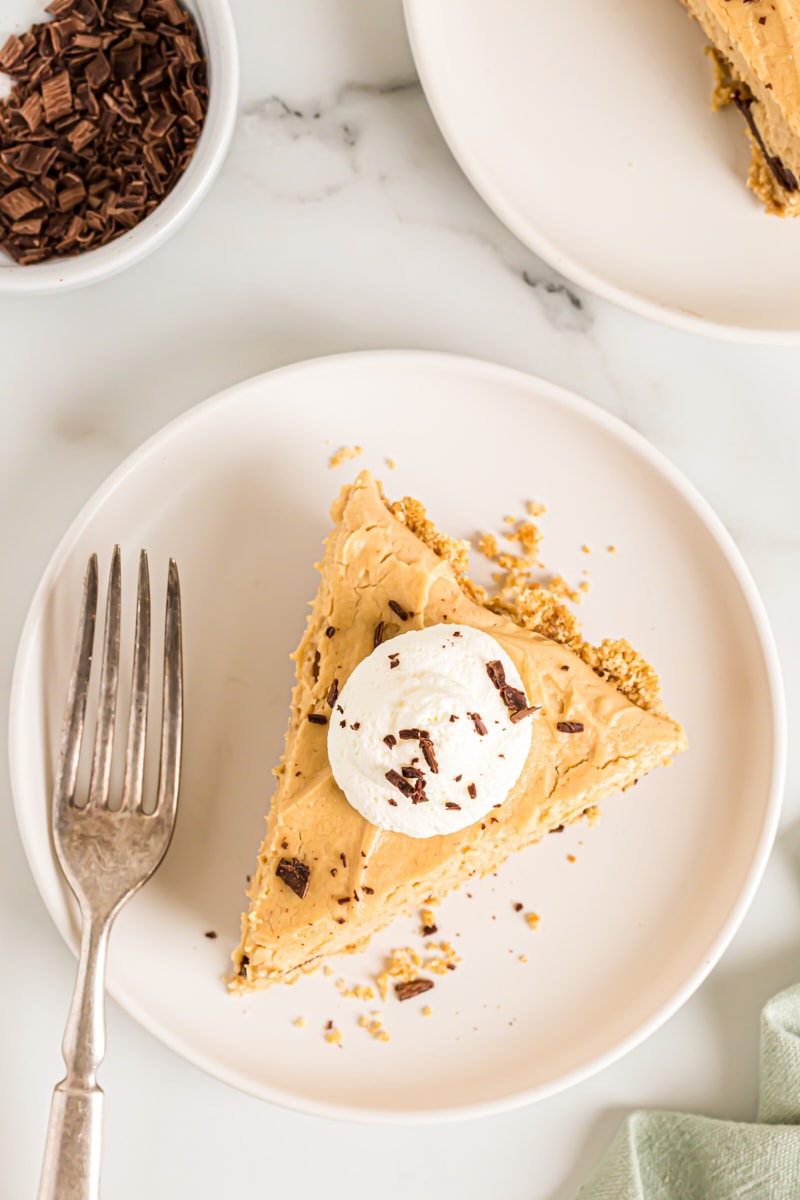
Serve. Let the tart sit at room temperature for 10 minutes before serving. While the tart sits, whip the remaining cream to garnish the tart. Sprinkle with chocolate shavings, if desired.

How to Make Chocolate Curls and Shavings
While you can use chopped chocolate or mini chocolate chips for this Peanut Butter Tart, chocolate curls and shavings will elevate any dessert! Here’s how to make them:
Chocolate curls require your chocolate to be softened first. Place a thick chocolate bar in the microwave and heat it at 50 percent power a few seconds at a time until it’s ever-so-slightly soft. Scrape a vegetable peeler along the sides to form the curls. Once you’re finished, refrigerate the curls so they firm up.
Chocolate shavings are made the same way, without the microwaving! Use a vegetable peeler to scrape along the sides of a room temperature chocolate bar.
Tips for Success
Here are some hints and tips I’ve picked up from making this Peanut Butter Tart recipe!
- Whisk the ganache—a lot! When making the ganache, keep whisking it in the ice bath until it thickens a good bit. Then, take it out and whisk it vigorously to incorporate enough air to stiffen the mixture.
- Don’t add the whipped cream too fast. I know it’s tempting to dump all the whipped cream into the peanut butter mixture at once rather than adding it in portions, but don’t do it! The first addition helps loosen the peanut butter mixture so the remaining whipped cream can be more easily folded into it without deflating too much and losing that fluffy texture.
- Using an electric mixer. If you prefer, you can skip the food processor and use a stand mixer or hand mixer to combine the peanut butter, cream cheese, and condensed milk.
- Don’t have a rectangular tart pan? You can use a 9-inch round tart pan or pie pan. The layers just won’t be quite as thick.
How to Store
This Peanut Butter Tart needs to be stored in the refrigerator. Cover it loosely to keep the peanut butter filling from sticking; it will keep in the fridge for 3 to 4 days.
Can This Recipe Be Frozen?
Yes, you can freeze this Peanut Butter Tart for up to 3 months. I recommend freezing it uncovered on a baking sheet until the filling solidifies, then wrapping it tightly with plastic wrap. This guarantees maximum freshness while also protecting the peanut butter layer from sticking to the wrap.
Peanut Butter Tart
This rich tart is perfect for anyone who loves the classic combination of peanut butter and chocolate!
Ingredients
For the crust:
- 1 & 1/2 cups (150g) graham cracker crumbs (about 10 full graham cracker sheets)
- 6 tablespoons (85g) unsalted butter, melted
For the filling:
- 3 ounces (85g) milk chocolate, plus more for garnish
- 1 & 3/4 cups (414ml) heavy cream, divided
- 3/4 cup (191g) creamy peanut butter
- 4 ounces (113g) cream cheese
- 1/3 cup (78ml) sweetened condensed milk
Instructions
To make the crust:
- Stir together the graham cracker crumbs and the butter until thoroughly moistened.
- Press into the bottom and up the sides of a 13 & 3/4- by-4 & 1/4-inch rectangular tart pan with a removable bottom. Refrigerate while you make the filling.
To make the filling:
- Fill a large bowl with ice and water.
- Chop the chocolate, and place in a medium glass or metal bowl.
- Place 1/2 cup cream in a small saucepan over medium heat, and bring to a boil. Immediately pour over the chopped chocolate. Let set for 5 minutes. Then, whisk to combine.
- Set the chocolate mixture (ganache) in the ice bath and whisk constantly until cool. Then, remove the ganache from the ice bath, and continue whisking until just thickened. Do not over-mix. Spread the ganache in the bottom of the prepared crust. Refrigerate until set.
- Place the peanut butter, cream cheese, and condensed milk in the bowl of a food processor. Process until smooth. Transfer to a mixing bowl and set aside. (Alternatively, mix well with an electric mixer).
- Whip 3/4 cup heavy cream to soft peaks. Fold about 1/3 of the whipped cream gently into the peanut butter mixture. Repeat with another 1/3. Whisk in the remaining 1/3.
- Transfer the filling to the prepared crust. Refrigerate for at least 2 hours or overnight.
- Remove the tart from the refrigerator 10 minutes before serving.
- Whip the remaining 1/2 cup cream and dollop on top of the tart. If you like, make some chocolate curls with a vegetable peeler for garnish.
Notes
Recipe slightly adapted from Martha Stewart.
Recommended Products
Bake or Break is a participant in the Amazon Services LLC Associates Program, an affiliate advertising program designed to provide a means for us to earn fees by linking to Amazon.com and affiliated sites.


25 Comments on “Peanut Butter Tart”
Lordy, I don’t see enough peanut butter- anything here in Manila. This post makes the lack worthwhile.
WOW! This looks yummy!Peanut butter in a tart – exquisite!
I love peanut butter – to the point that I don’t BUY it because I’ll eat it all. So this pie, obviously, would be heaven for me!
This MS recipe was on Tastespotting today—oh it sounds delicious & looks amazing!
I’ve got two questions – do you think I could do this without a food processor? I think the crust would be fine but what about the peanut butter filling? And, if I don’t have special tart pan, what would be an alternative-sized pan? Finally, I made he chocolate wafter ice box cake a few weeks ago, and it was great. Love your site.
Kelly, you certainly don’t need a food processor for the crust. As for the filling, you could most likely make it with a hand mixer. It will just be a bit tedious because it will take a while to get it to the right consistency. You can use any sized pan that has roughly the same area and height. So, the area of my tart pan is about 58 & 1/2 square inches (length x width). The height is about an inch. If you have anything roughly that size, it shouldn’t be a problem. One nice thing about the pan I used is that the bottom is removable so that you can take out the tart with much less chance of breaking it.
Good luck! Let me know how it works for you.
Hi. I made this the other night and did use a mixer (I broke my food processor bowl recently, ugh). I had to add a little extra sweetened condensed milk to mix it easier.
I made this in a 9 inch springform pan and I put a piece of parchment paper on the bottom (before snapping the side part on) and that made it easier to remove. It was a bit thicker than the required pan size, so took a bit longer than 2 hours to chill.
But, once chilled, it was so good.
all i can say is WOW… that looks amazing. I love peanutbutter!
I’m glad you liked it, Jennifer. Good to know that it works well in a springform pan.
Carrie, thanks for the compliment. I, too, love love love peanut butter.
I am SO going to make this one. Thanks for feeding my hunger for peanut butter:)
another fantastic way to have peanut butter. Looks gr8 .
Coming from the Peanut capitol of the world(no really),I’m always looking for great peanut butter desserts. This one certainly looks beautiful and sounds yummy!
Have mercy…my husband would kill for this!
Pingback: Chocolate Charlotte
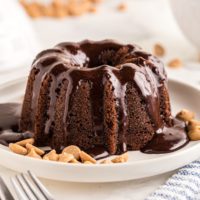
Pingback: Peanut Butter Pound Cake
Pingback: Outrageous Chocolate Cookies
I made this for Easter and it was delicious! I made 1-1/2 times the recipe and put it in a 10.25″ round tart pan. Also, I used my Kitchenaid stand mixer to make the peanut butter filling and it came together perfectly. I mixed the cream cheese and condensed milk on high until there were no lumps in the cream cheese, and then added the peanut butter.
Sarah, I’m glad you liked it! Thanks for the info on adjusting the recipe for a round pan.
Pingback: Peanut Butter Candy Bar Squares
Pingback: now I can die a happy girl « Slow Like Honey
Pingback: Peanut Butter Pie with Cookie Crust | Brighton Jewelry Store
This was amazing! Very easy to make and everyone loved it. I probably could have eaten half of it myself! The peanut butter filling was perfect
Pingback: Best No-Bake Desserts - Bake or Break